
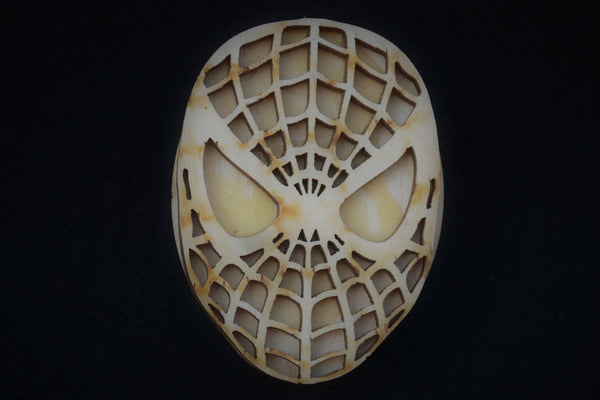

Spiderman Mask
$4.95
- Size: 2.5" x 2.0"
- Features: Wooden stamp is designed for the sole purpose of applying adhesive to create glitter tattoos as directed by instructions provided with purchase. (NOTE: Actual stamp may have some slight variations from picture shown here.)
-
Step 1: Clean the skin area with JEMS Skin Cleaner with a cotton ball.
Step 2: Dry the skin with JEMS Prep Compound by lightly dusting application area and brushing it with a soft bristle brush.
Step 3: Apply adhesive to the beveled edge of sponge brush and dab adhesive onto the desired body stamp. DO NOT brush adhesive onto the stamp, a bubble texture on the stamp is alright.
Step 4: Roll the stamp with adhesive onto prepared skin area. It is very important to use a simple rolling motion from one side to the other, allowing adhesive to dry clear.
Step 5: Once adhesive is clear, apply glitter using puff bottle. Gently move litter around the entire stamped area with the lollipop pad and press the glitter into the stamp pattern. Use soft makeup brush to remove excess glitter. You can save the excess glitter for a future rainbow body art.
Recommendations:
We suggest that body art only be placed on arms and lower legs, not on faces.
Do NOT let adhesive to freeze, it will turn solid.
To remove body art, gently rub with alcohol or baby oil.
To open bottles, press a pin into the top of the bottles. A smaller hole allows you to control the products best during the application process.
View full product details
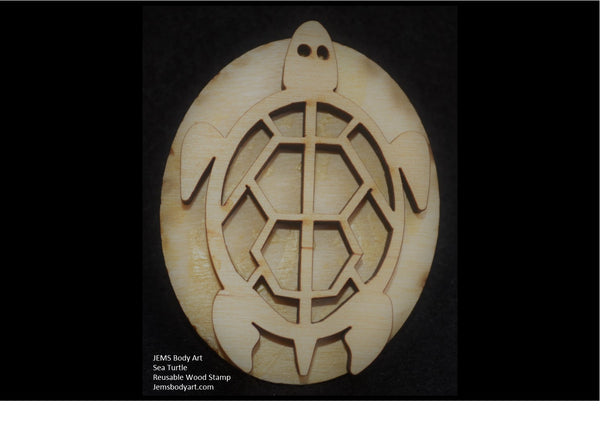

Sea Turtle
$4.95
-
Size: 2.5" x 2.25"
Features: Wooden stamp is designed for the sole purpose of applying adhesive to create glitter tattoos as directed by instructions provided with purchase. (NOTE: Actual stamp may have some slight variations from picture shown here.) -
Step 1: Clean the skin area with JEMS Skin Cleaner with a cotton ball.
Step 2: Dry the skin with JEMS Prep Compound by lightly dusting application area and brushing it with a soft bristle brush.
Step 3: Apply adhesive to the beveled edge of sponge brush and dab adhesive onto the desired body stamp. DO NOT brush adhesive onto the stamp, a bubble texture on the stamp is alright.
Step 4: Roll the stamp with adhesive onto prepared skin area. It is very important to use a simple rolling motion from one side to the other, allowing adhesive to dry clear.
Step 5: Once adhesive is clear, apply glitter using puff bottle. Gently move litter around the entire stamped area with the lollipop pad and press the glitter into the stamp pattern. Use soft makeup brush to remove excess glitter. You can save the excess glitter for a future rainbow body art.
Recommendations:
We suggest that body art only be placed on arms and lower legs, not on faces.
Do NOT let adhesive to freeze, it will turn solid.
To remove body art, gently rub with alcohol or baby oil.
To open bottles, press a pin into the top of the bottles. A smaller hole allows you to control the products best during the application process.
View full product details
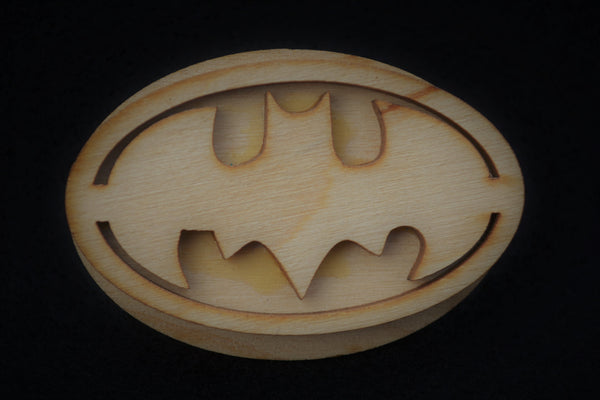
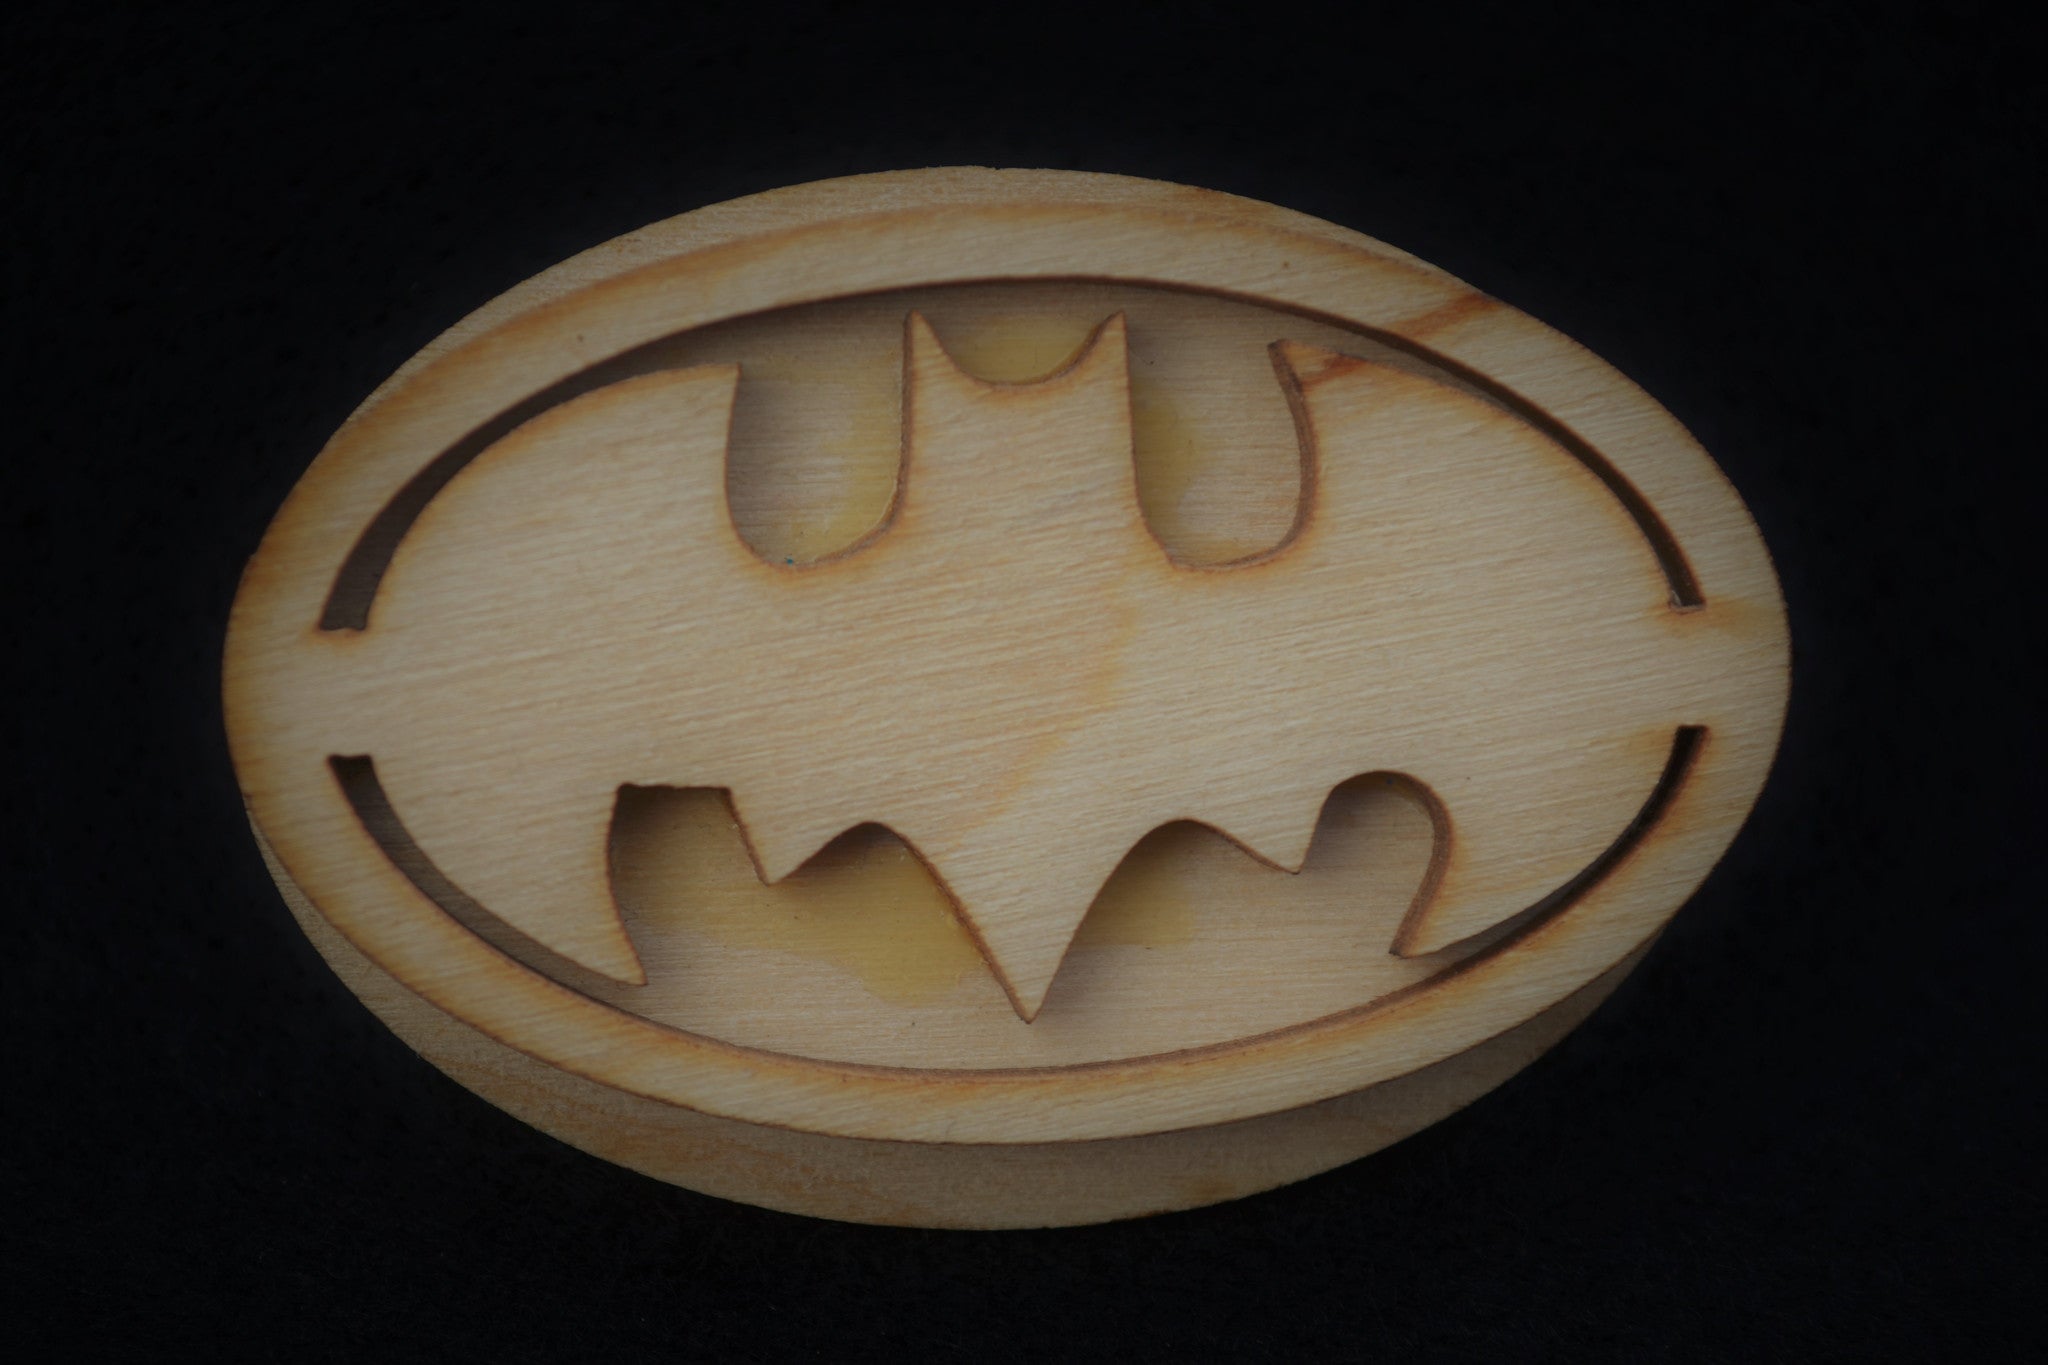
Batman
$4.95
- Size: 2.5" x 1.5"
- Features: Wooden stamp is designed for the sole purpose of applying adhesive to create glitter tattoos as directed by instructions provided with purchase. (NOTE: Actual stamp may have some slight variations from picture shown here.)
-
Step 1: Clean the skin area with JEMS Skin Cleaner with a cotton ball.
Step 2: Dry the skin with JEMS Prep Compound by lightly dusting application area and brushing it with a soft bristle brush.
Step 3: Apply adhesive to the beveled edge of sponge brush and dab adhesive onto the desired body stamp. DO NOT brush adhesive onto the stamp, a bubble texture on the stamp is alright.
Step 4: Roll the stamp with adhesive onto prepared skin area. It is very important to use a simple rolling motion from one side to the other, allowing adhesive to dry clear.
Step 5: Once adhesive is clear, apply glitter using puff bottle. Gently move litter around the entire stamped area with the lollipop pad and press the glitter into the stamp pattern. Use soft makeup brush to remove excess glitter. You can save the excess glitter for a future rainbow body art.
Recommendations:
We suggest that body art only be placed on arms and lower legs, not on faces.
Do NOT let adhesive to freeze, it will turn solid.
To remove body art, gently rub with alcohol or baby oil.
To open bottles, press a pin into the top of the bottles. A smaller hole allows you to control the products best during the application process.
View full product details

Tribal Shark
$4.95
- Size: 2.0" x 3.0"
- Features: Wooden stamp is designed for the sole purpose of applying adhesive to create glitter tattoos as directed by instructions provided with purchase. (NOTE: Actual stamp may have some slight variations from picture shown here.)
-
Step 1: Clean the skin area with JEMS Skin Cleaner with a cotton ball.
Step 2: Dry the skin with JEMS Prep Compound by lightly dusting application area and brushing it with a soft bristle brush.
Step 3: Apply adhesive to the beveled edge of sponge brush and dab adhesive onto the desired body stamp. DO NOT brush adhesive onto the stamp, a bubble texture on the stamp is alright.
Step 4: Roll the stamp with adhesive onto prepared skin area. It is very important to use a simple rolling motion from one side to the other, allowing adhesive to dry clear.
Step 5: Once adhesive is clear, apply glitter using puff bottle. Gently move litter around the entire stamped area with the lollipop pad and press the glitter into the stamp pattern. Use soft makeup brush to remove excess glitter. You can save the excess glitter for a future rainbow body art.
Recommendations:
We suggest that body art only be placed on arms and lower legs, not on faces.
Do NOT let adhesive to freeze, it will turn solid.
To remove body art, gently rub with alcohol or baby oil.
To open bottles, press a pin into the top of the bottles. A smaller hole allows you to control the products best during the application process.
View full product details

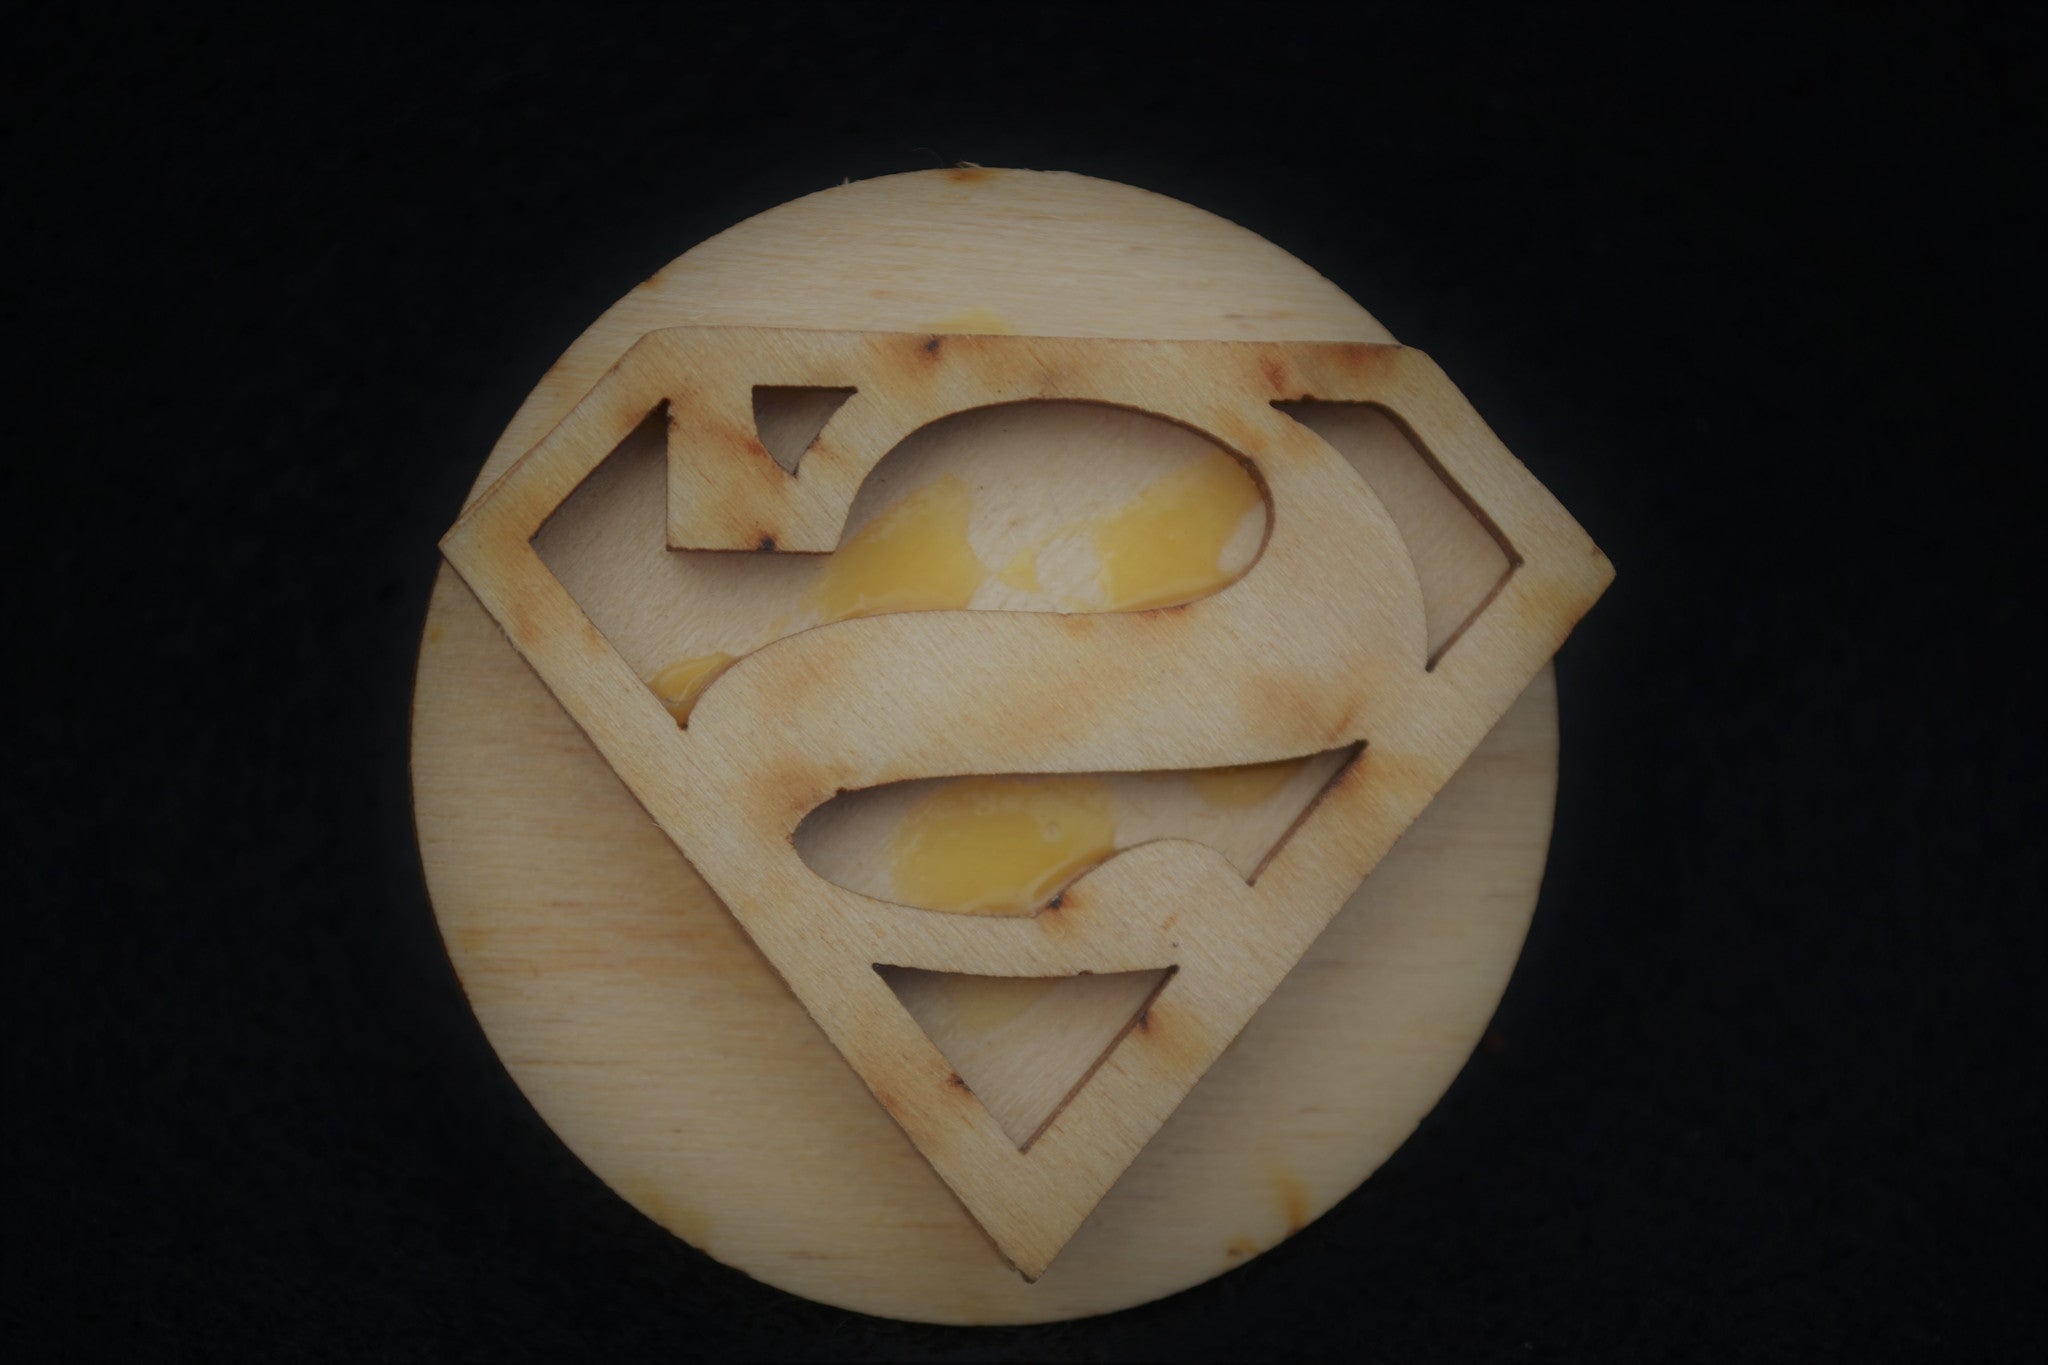
Superman
$4.95
- Size: 2.0" x 1.5"
- Features: Wooden stamp is designed for the sole purpose of applying adhesive to create glitter tattoos as directed by instructions provided with purchase. (NOTE: Actual stamp may have some slight variations from picture shown here.)
-
Step 1: Clean the skin area with JEMS Skin Cleaner with a cotton ball.
Step 2: Dry the skin with JEMS Prep Compound by lightly dusting application area and brushing it with a soft bristle brush.
Step 3: Apply adhesive to the beveled edge of sponge brush and dab adhesive onto the desired body stamp. DO NOT brush adhesive onto the stamp, a bubble texture on the stamp is alright.
Step 4: Roll the stamp with adhesive onto prepared skin area. It is very important to use a simple rolling motion from one side to the other, allowing adhesive to dry clear.
Step 5: Once adhesive is clear, apply glitter using puff bottle. Gently move litter around the entire stamped area with the lollipop pad and press the glitter into the stamp pattern. Use soft makeup brush to remove excess glitter. You can save the excess glitter for a future rainbow body art.
Recommendations:
We suggest that body art only be placed on arms and lower legs, not on faces.
Do NOT let adhesive to freeze, it will turn solid.
To remove body art, gently rub with alcohol or baby oil.
To open bottles, press a pin into the top of the bottles. A smaller hole allows you to control the products best during the application process.
View full product details
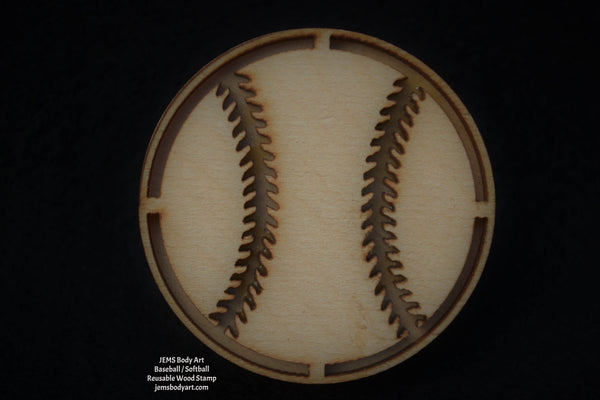
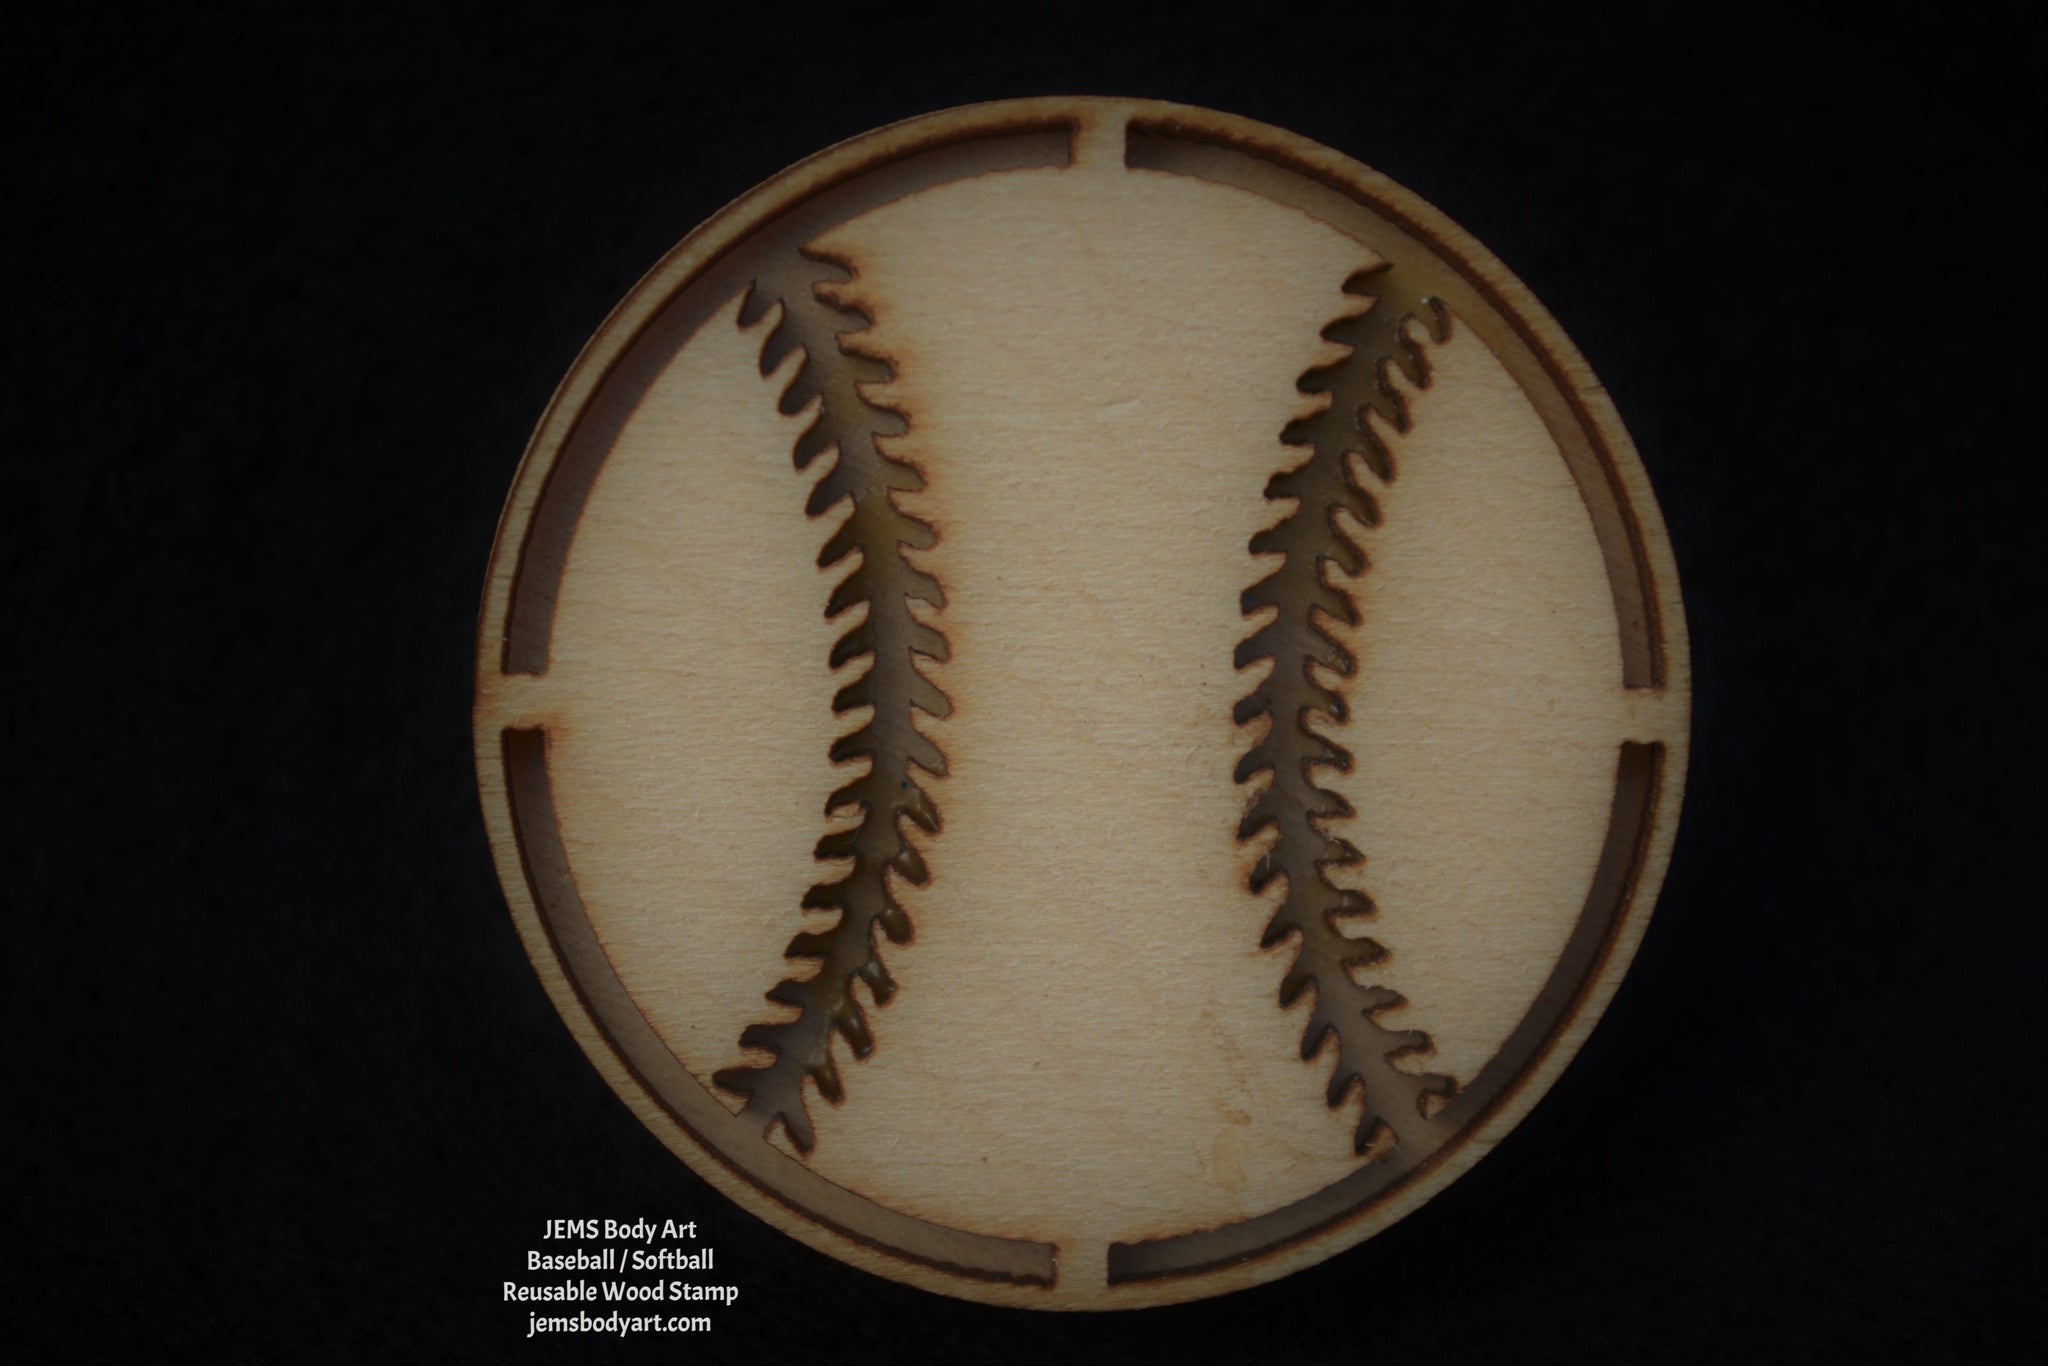
Baseball / Softball
$4.95
-
Size: 2" Round
Features: Wooden stamp is designed for the sole purpose of applying adhesive to create glitter tattoos as directed by instructions provided with purchase. (NOTE: Actual stamp may have some slight variations from picture shown here.) -
Step 1: Clean the skin area with JEMS Skin Cleaner with a cotton ball.
Step 2: Dry the skin with JEMS Prep Compound by lightly dusting application area and brushing it with a soft bristle brush.
Step 3: Apply adhesive to the beveled edge of sponge brush and dab adhesive onto the desired body stamp. DO NOT brush adhesive onto the stamp, a bubble texture on the stamp is alright.
Step 4: Roll the stamp with adhesive onto prepared skin area. It is very important to use a simple rolling motion from one side to the other, allowing adhesive to dry clear.
Step 5: Once adhesive is clear, apply glitter using puff bottle. Gently move litter around the entire stamped area with the lollipop pad and press the glitter into the stamp pattern. Use soft makeup brush to remove excess glitter. You can save the excess glitter for a future rainbow body art.
Recommendations:
We suggest that body art only be placed on arms and lower legs, not on faces.
Do NOT let adhesive to freeze, it will turn solid.
To remove body art, gently rub with alcohol or baby oil.
To open bottles, press a pin into the top of the bottles. A smaller hole allows you to control the products best during the application process.
View full product details

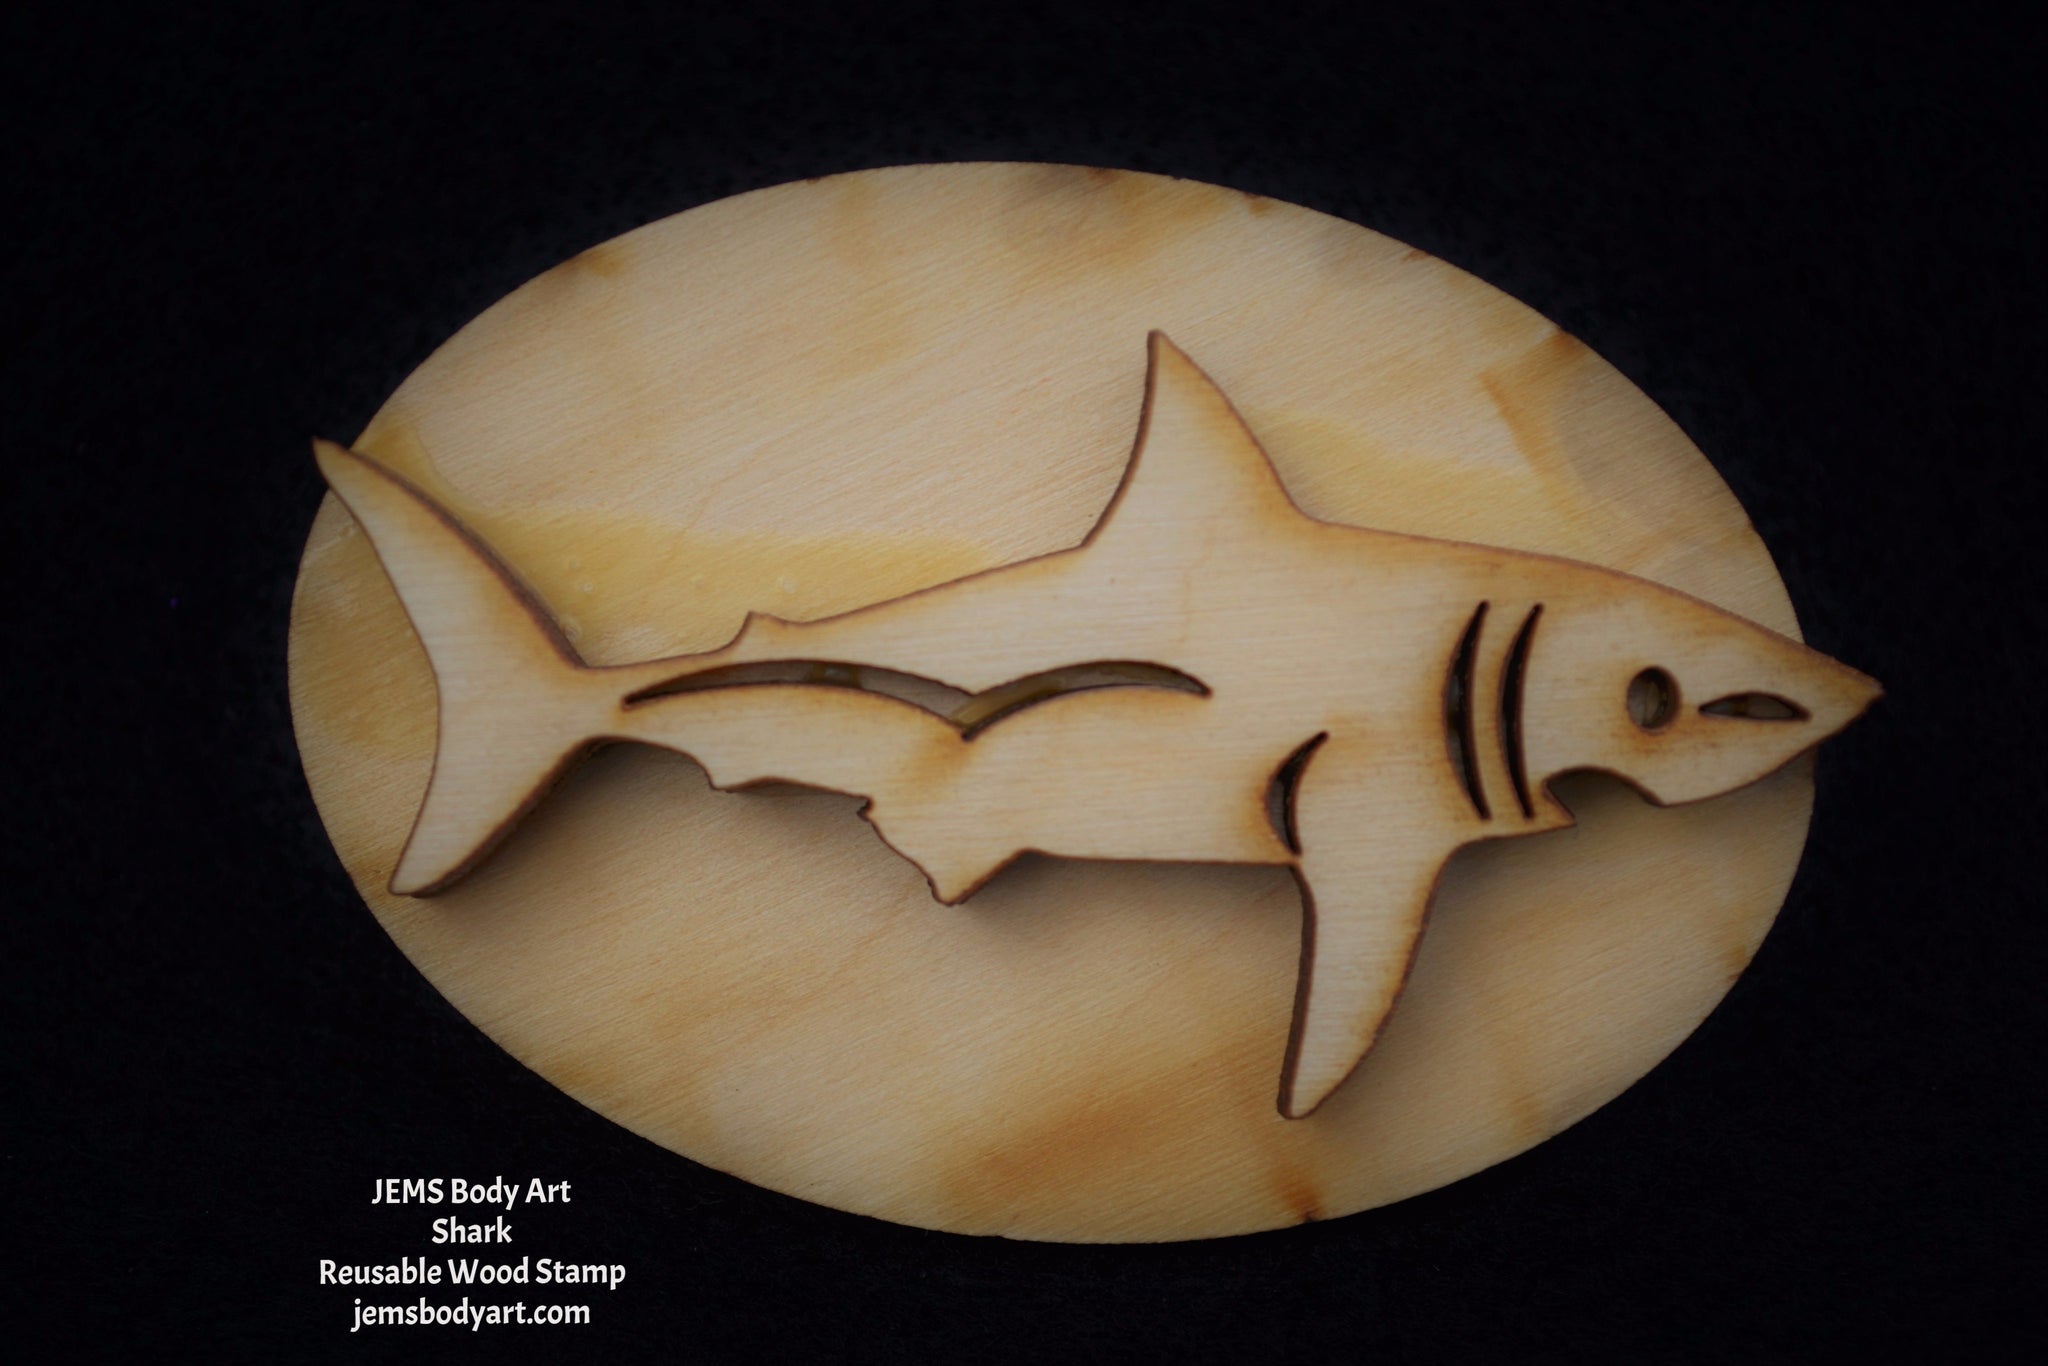
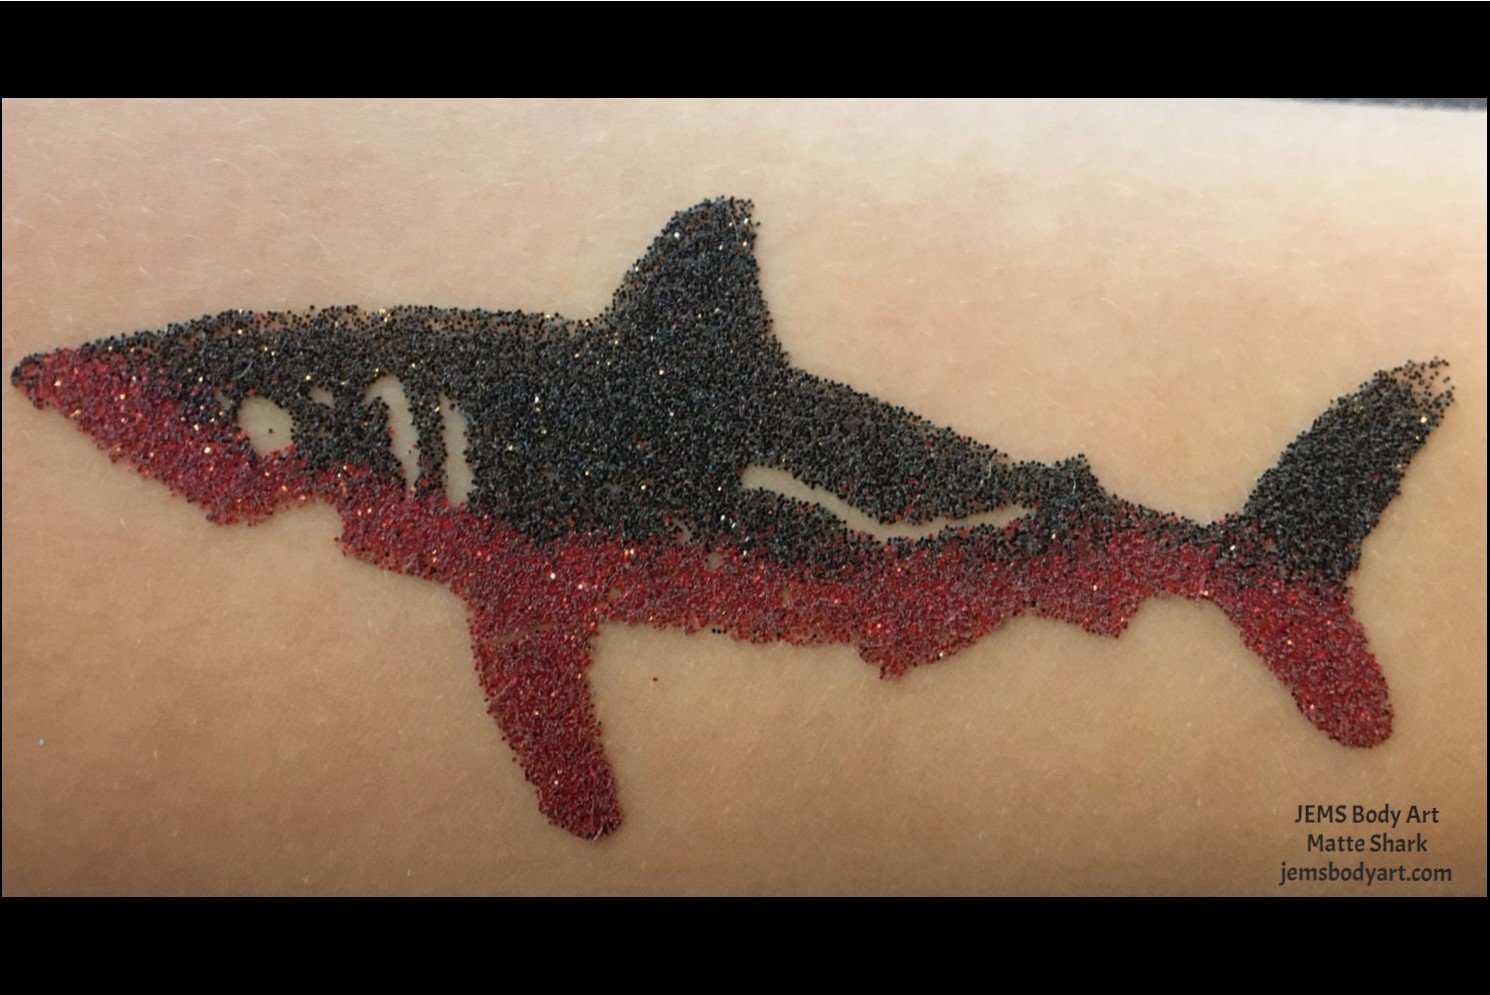
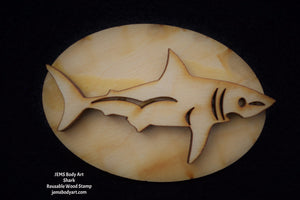
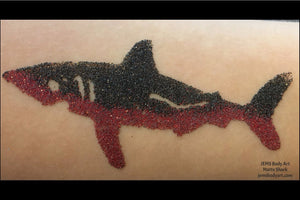
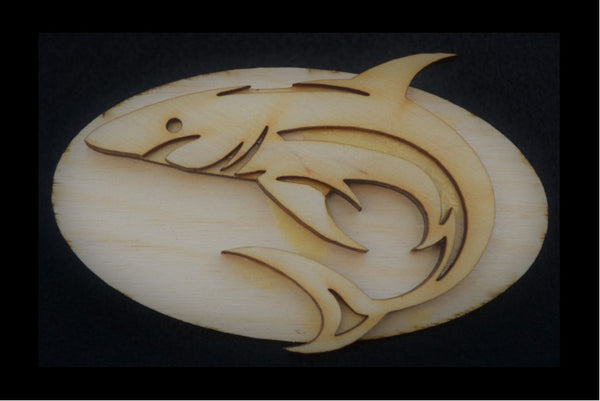
Shark
$4.95
-
Size: 2.75" x 1.5"
Features: Wooden stamp is designed for the sole purpose of applying adhesive to create glitter tattoos as directed by instructions provided with purchase. (NOTE: Actual stamp may have some slight variations from picture shown here.) -
Step 1: Clean the skin area with JEMS Skin Cleaner with a cotton ball.
Step 2: Dry the skin with JEMS Prep Compound by lightly dusting application area and brushing it with a soft bristle brush.
Step 3: Apply adhesive to the beveled edge of sponge brush and dab adhesive onto the desired body stamp. DO NOT brush adhesive onto the stamp, a bubble texture on the stamp is alright.
Step 4: Roll the stamp with adhesive onto prepared skin area. It is very important to use a simple rolling motion from one side to the other, allowing adhesive to dry clear.
Step 5: Once adhesive is clear, apply glitter using puff bottle. Gently move litter around the entire stamped area with the lollipop pad and press the glitter into the stamp pattern. Use soft makeup brush to remove excess glitter. You can save the excess glitter for a future rainbow body art.
Recommendations:
We suggest that body art only be placed on arms and lower legs, not on faces.
Do NOT let adhesive to freeze, it will turn solid.
To remove body art, gently rub with alcohol or baby oil.
To open bottles, press a pin into the top of the bottles. A smaller hole allows you to control the products best during the application process.
View full product details
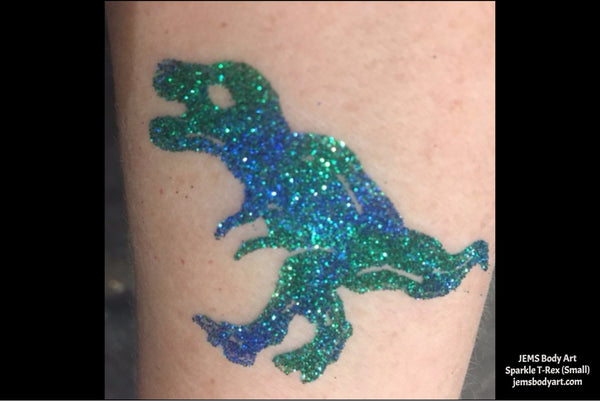
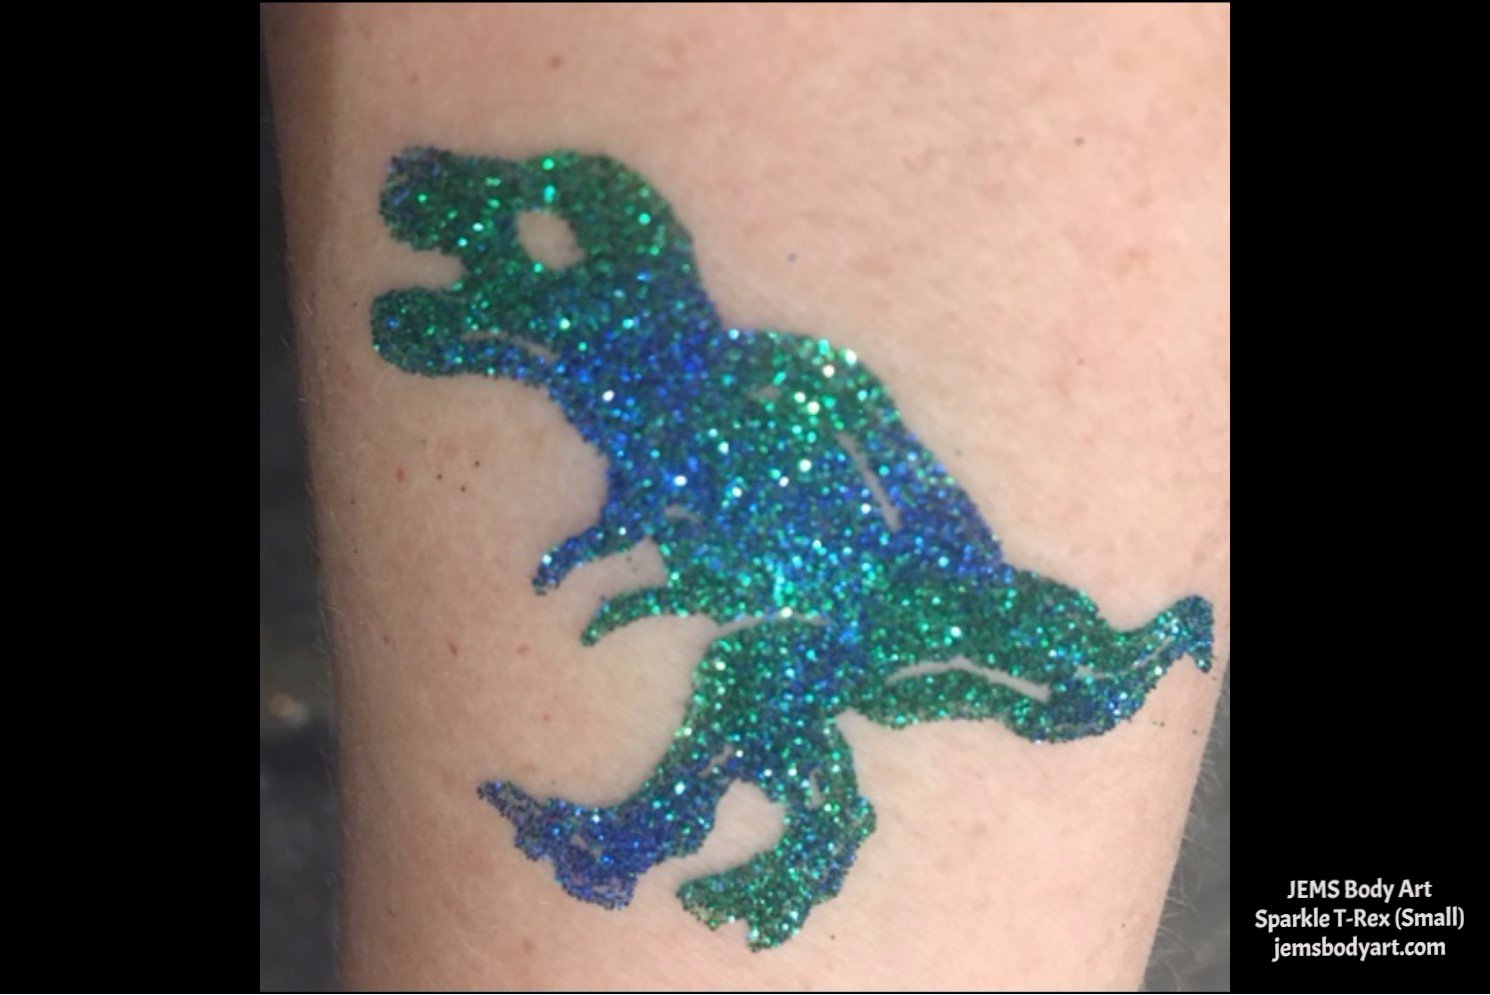
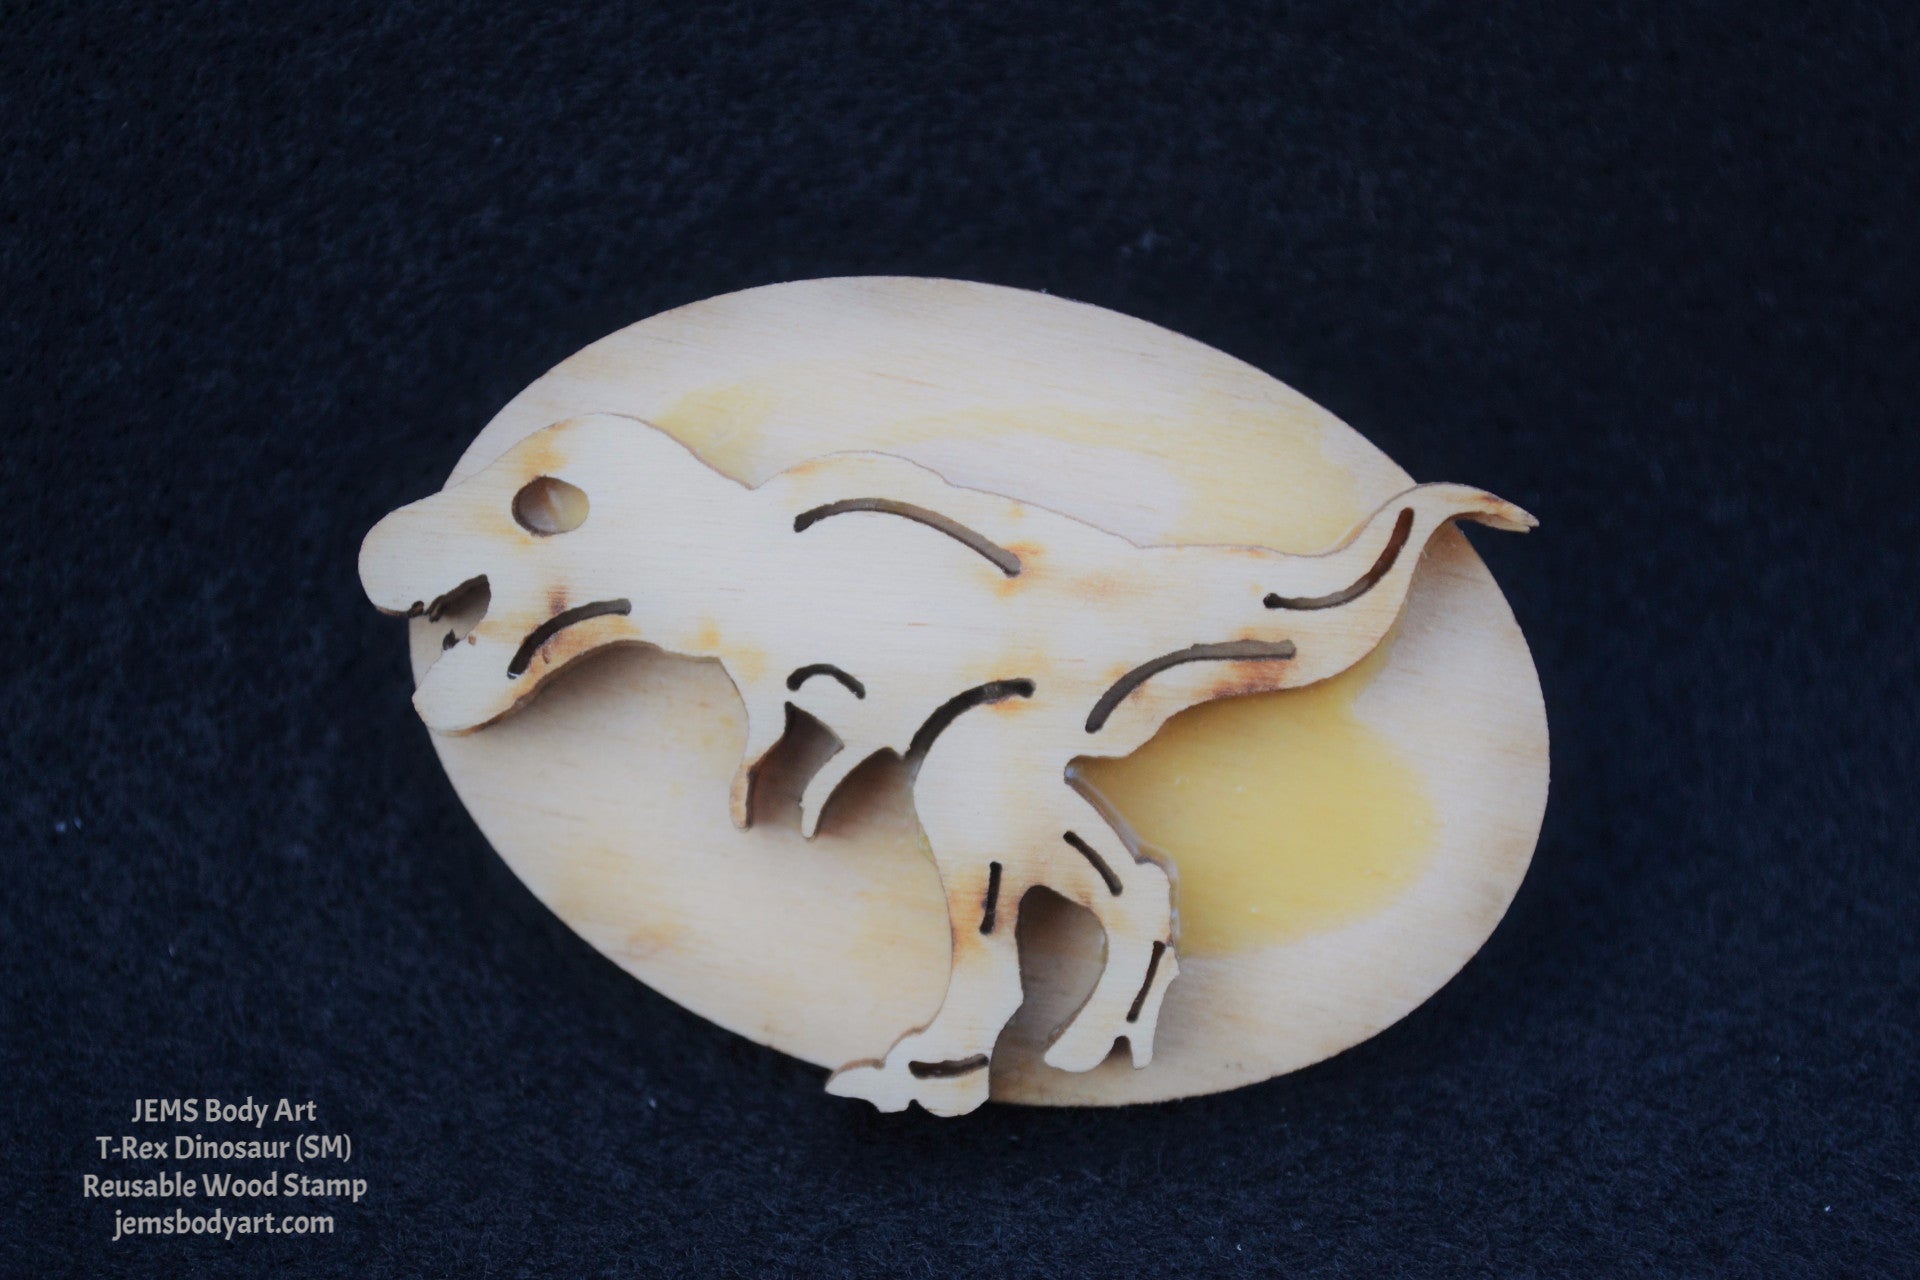


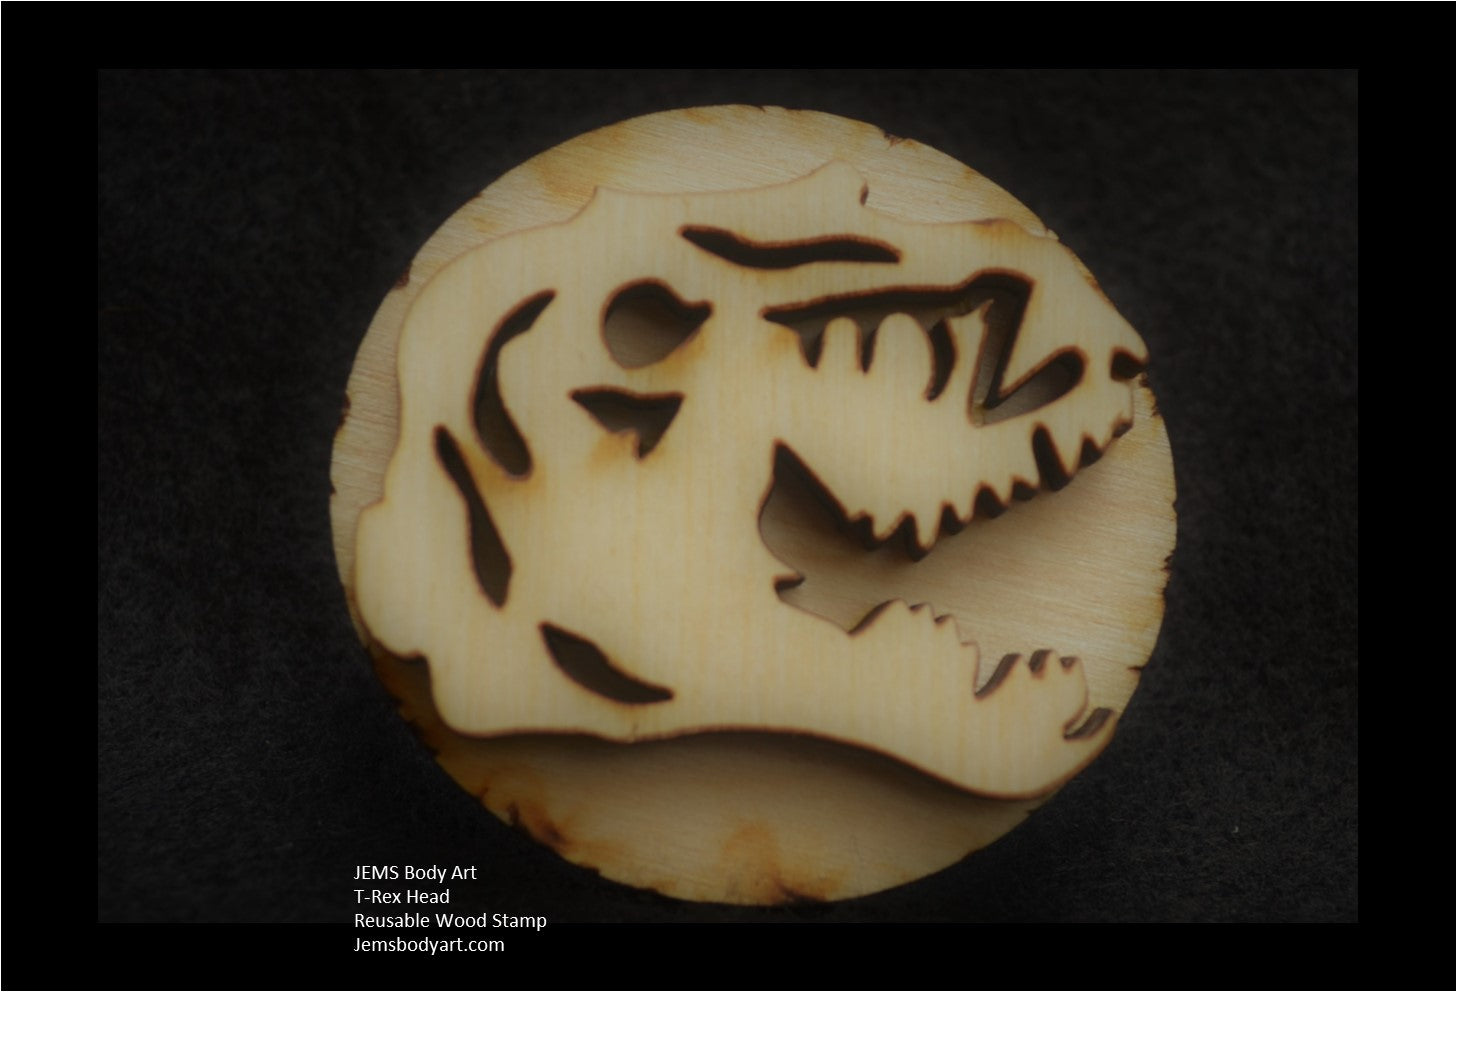
T-Rex Dinosaur
$4.95
-
Size: 2.75" Wide x 1.75" Tall
Features: Wooden stamp is designed for the sole purpose of applying adhesive to create glitter tattoos as directed by instructions provided with purchase. (NOTE: Actual stamp may have some slight variations from picture shown here.) -
Step 1: Clean the skin area with JEMS Skin Cleaner with a cotton ball.
Step 2: Dry the skin with JEMS Prep Compound by lightly dusting application area and brushing it with a soft bristle brush.
Step 3: Apply adhesive to the beveled edge of sponge brush and dab adhesive onto the desired body stamp. DO NOT brush adhesive onto the stamp, a bubble texture on the stamp is alright.
Step 4: Roll the stamp with adhesive onto prepared skin area. It is very important to use a simple rolling motion from one side to the other, allowing adhesive to dry clear.
Step 5: Once adhesive is clear, apply glitter using puff bottle. Gently move litter around the entire stamped area with the lollipop pad and press the glitter into the stamp pattern. Use soft makeup brush to remove excess glitter. You can save the excess glitter for a future rainbow body art.
Recommendations:
We suggest that body art only be placed on arms and lower legs, not on faces.
Do NOT let adhesive to freeze, it will turn solid.
To remove body art, gently rub with alcohol or baby oil.
To open bottles, press a pin into the top of the bottles. A smaller hole allows you to control the products best during the application process.
View full product details

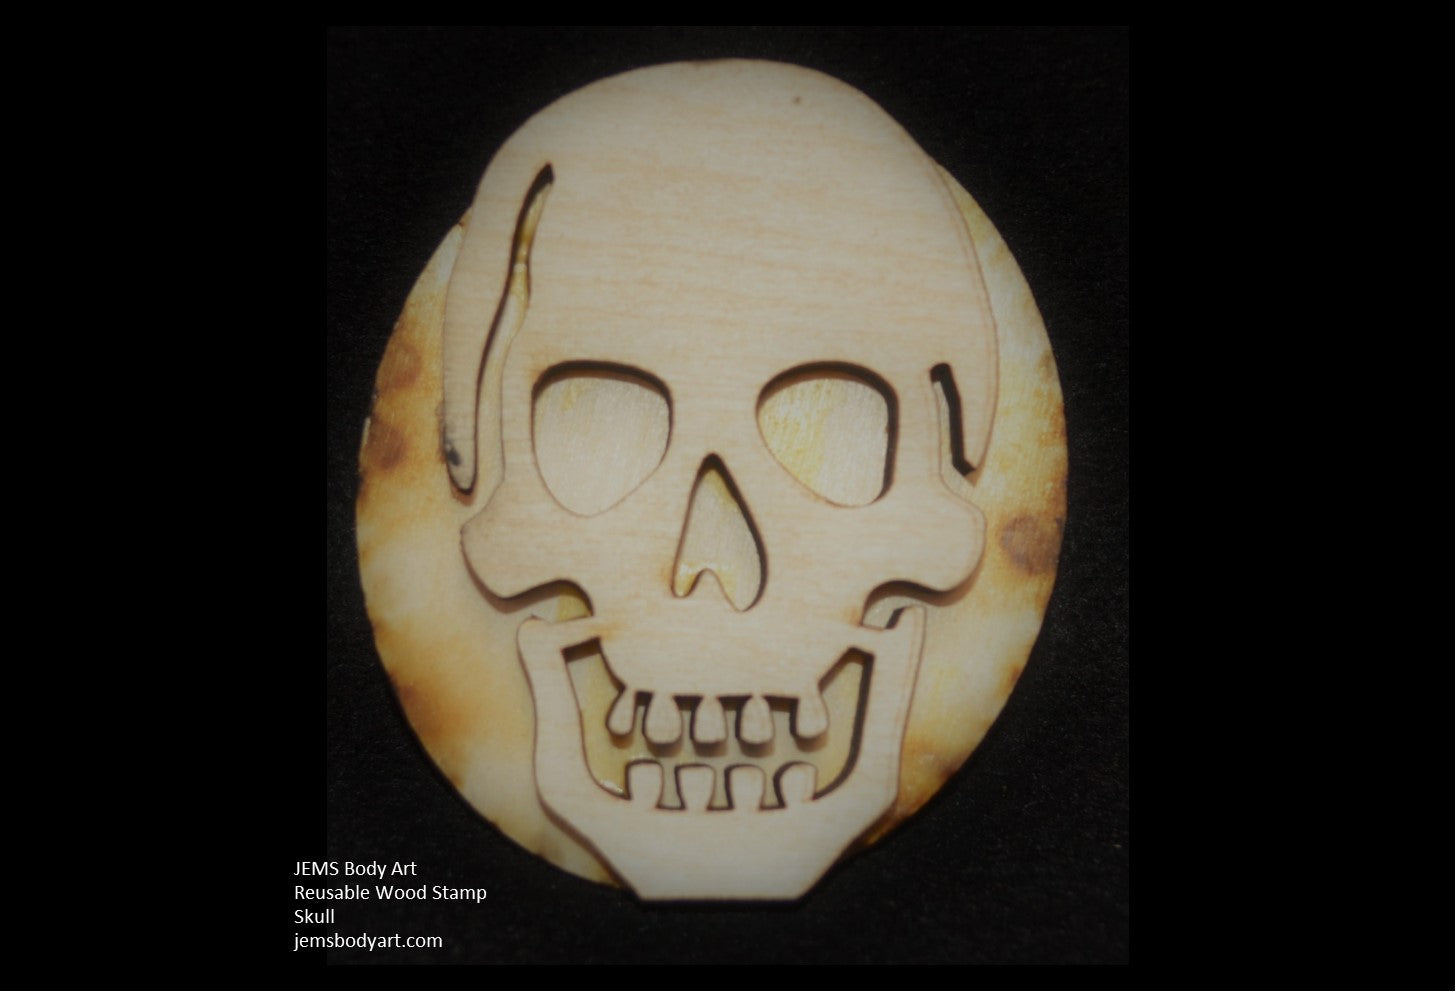
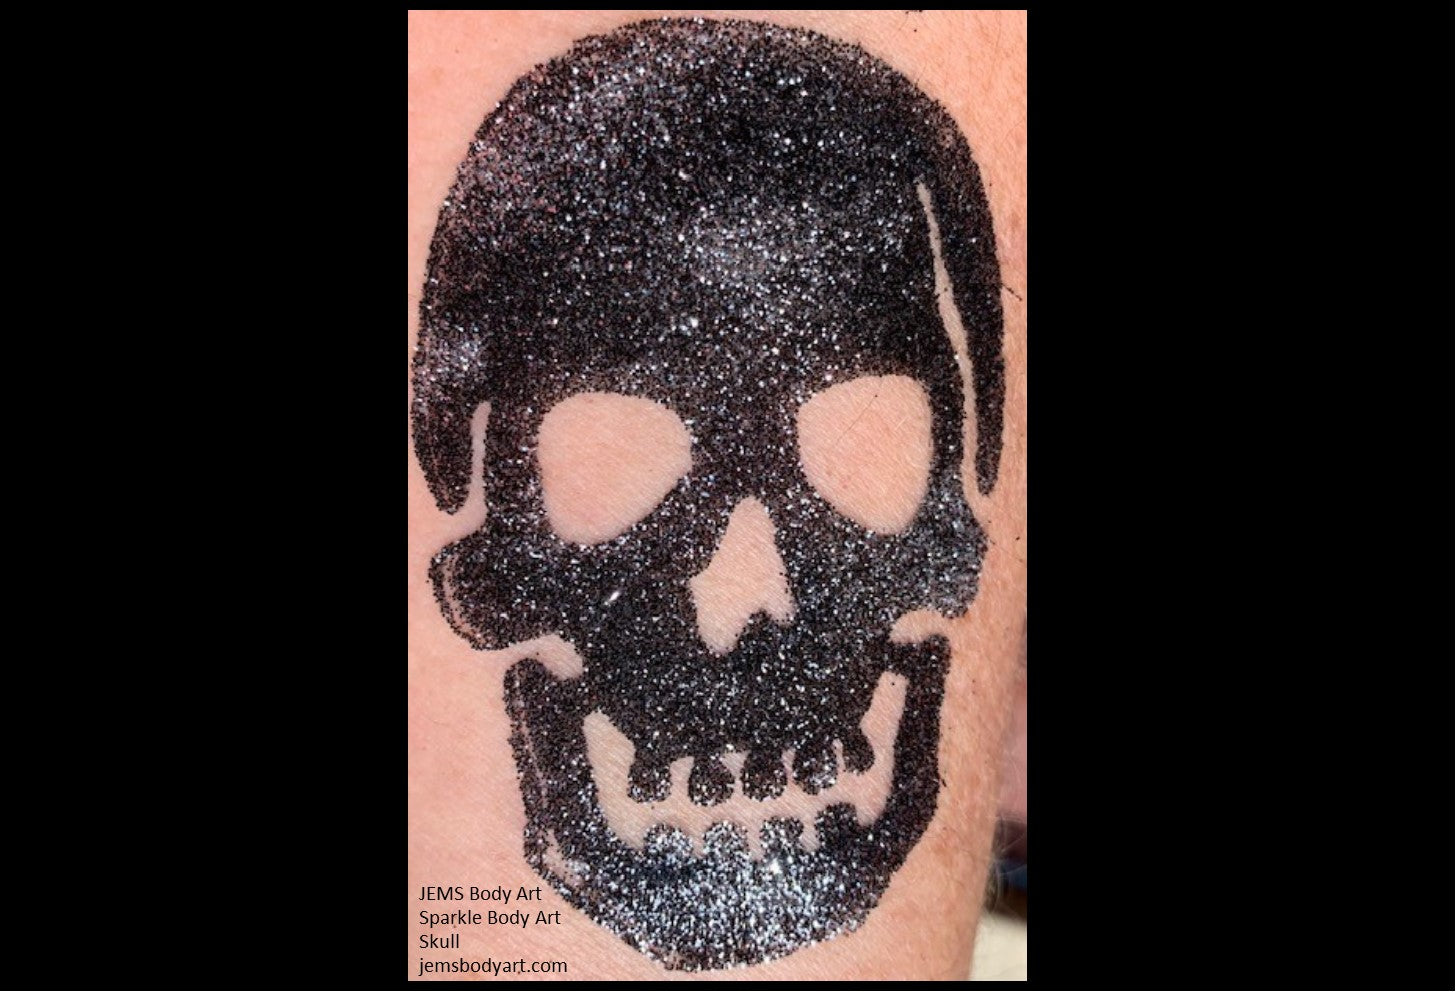


Skull
$4.95
- Size: 3" x 2"
- Features: Wooden stamp is designed for the sole purpose of applying adhesive to create glitter tattoos as directed by instructions provided with purchase. (NOTE: Actual stamp may have some slight variations from picture shown here.)
-
Step 1: Clean the skin area with JEMS Skin Cleaner with a cotton ball.
Step 2: Dry the skin with JEMS Prep Compound by lightly dusting application area and brushing it with a soft bristle brush.
Step 3: Apply adhesive to the beveled edge of sponge brush and dab adhesive onto the desired body stamp. DO NOT brush adhesive onto the stamp, a bubble texture on the stamp is alright.
Step 4: Roll the stamp with adhesive onto prepared skin area. It is very important to use a simple rolling motion from one side to the other, allowing adhesive to dry clear.
Step 5: Once adhesive is clear, apply glitter using puff bottle. Gently move litter around the entire stamped area with the lollipop pad and press the glitter into the stamp pattern. Use soft makeup brush to remove excess glitter. You can save the excess glitter for a future rainbow body art.
Recommendations:
We suggest that body art only be placed on arms and lower legs, not on faces.
Do NOT let adhesive to freeze, it will turn solid.
To remove body art, gently rub with alcohol or baby oil.
To open bottles, press a pin into the top of the bottles. A smaller hole allows you to control the products best during the application process.
View full product details
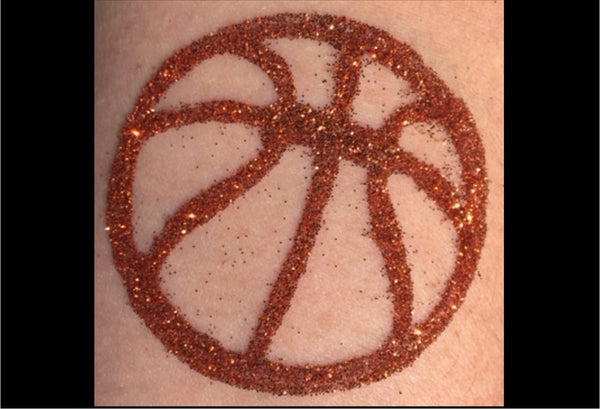
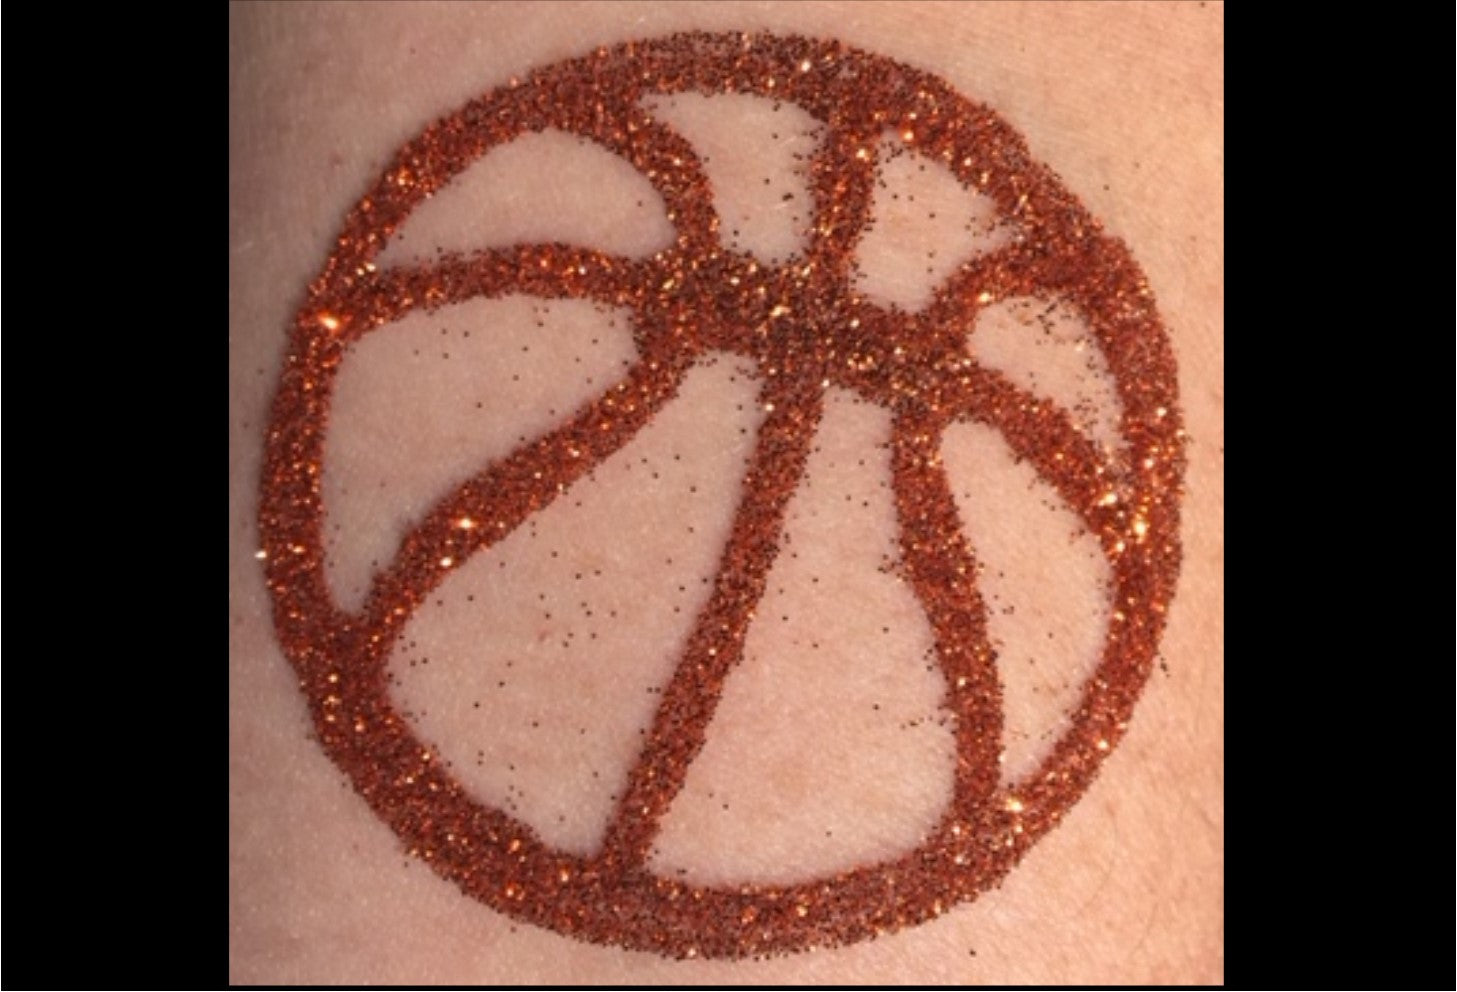
Basketball
$4.95
-
Size: 2"" Round
Features: Wooden stamp is designed for the sole purpose of applying adhesive to create glitter tattoos as directed by instructions provided with purchase. (NOTE: Actual stamp may have some slight variations from picture shown here.) -
Step 1: Clean the skin area with JEMS Skin Cleaner with a cotton ball.
Step 2: Dry the skin with JEMS Prep Compound by lightly dusting application area and brushing it with a soft bristle brush.
Step 3: Apply adhesive to the beveled edge of sponge brush and dab adhesive onto the desired body stamp. DO NOT brush adhesive onto the stamp, a bubble texture on the stamp is alright.
Step 4: Roll the stamp with adhesive onto prepared skin area. It is very important to use a simple rolling motion from one side to the other, allowing adhesive to dry clear.
Step 5: Once adhesive is clear, apply glitter using puff bottle. Gently move litter around the entire stamped area with the lollipop pad and press the glitter into the stamp pattern. Use soft makeup brush to remove excess glitter. You can save the excess glitter for a future rainbow body art.
Recommendations:
We suggest that body art only be placed on arms and lower legs, not on faces.
Do NOT let adhesive to freeze, it will turn solid.
To remove body art, gently rub with alcohol or baby oil.
To open bottles, press a pin into the top of the bottles. A smaller hole allows you to control the products best during the application process.
View full product details


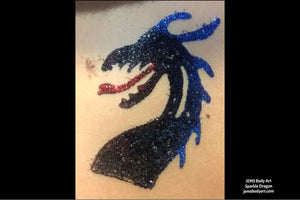
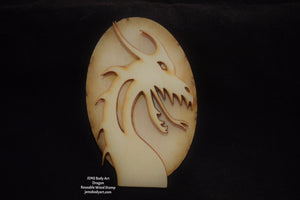
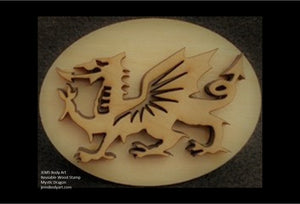
Dragon
$4.95
-
Size: 3" tall 2.5"
Features: Wooden stamp is designed for the sole purpose of applying adhesive to create glitter tattoos as directed by instructions provided with purchase. (NOTE: Actual stamp may have some slight variations from picture shown here.) -
Step 1: Clean the skin area with JEMS Skin Cleaner with a cotton ball.
Step 2: Dry the skin with JEMS Prep Compound by lightly dusting application area and brushing it with a soft bristle brush.
Step 3: Apply adhesive to the beveled edge of sponge brush and dab adhesive onto the desired body stamp. DO NOT brush adhesive onto the stamp, a bubble texture on the stamp is alright.
Step 4: Roll the stamp with adhesive onto prepared skin area. It is very important to use a simple rolling motion from one side to the other, allowing adhesive to dry clear.
Step 5: Once adhesive is clear, apply glitter using puff bottle. Gently move litter around the entire stamped area with the lollipop pad and press the glitter into the stamp pattern. Use soft makeup brush to remove excess glitter. You can save the excess glitter for a future rainbow body art.
Recommendations:
We suggest that body art only be placed on arms and lower legs, not on faces.
Do NOT let adhesive to freeze, it will turn solid.
To remove body art, gently rub with alcohol or baby oil.
To open bottles, press a pin into the top of the bottles. A smaller hole allows you to control the products best during the application process.
View full product details

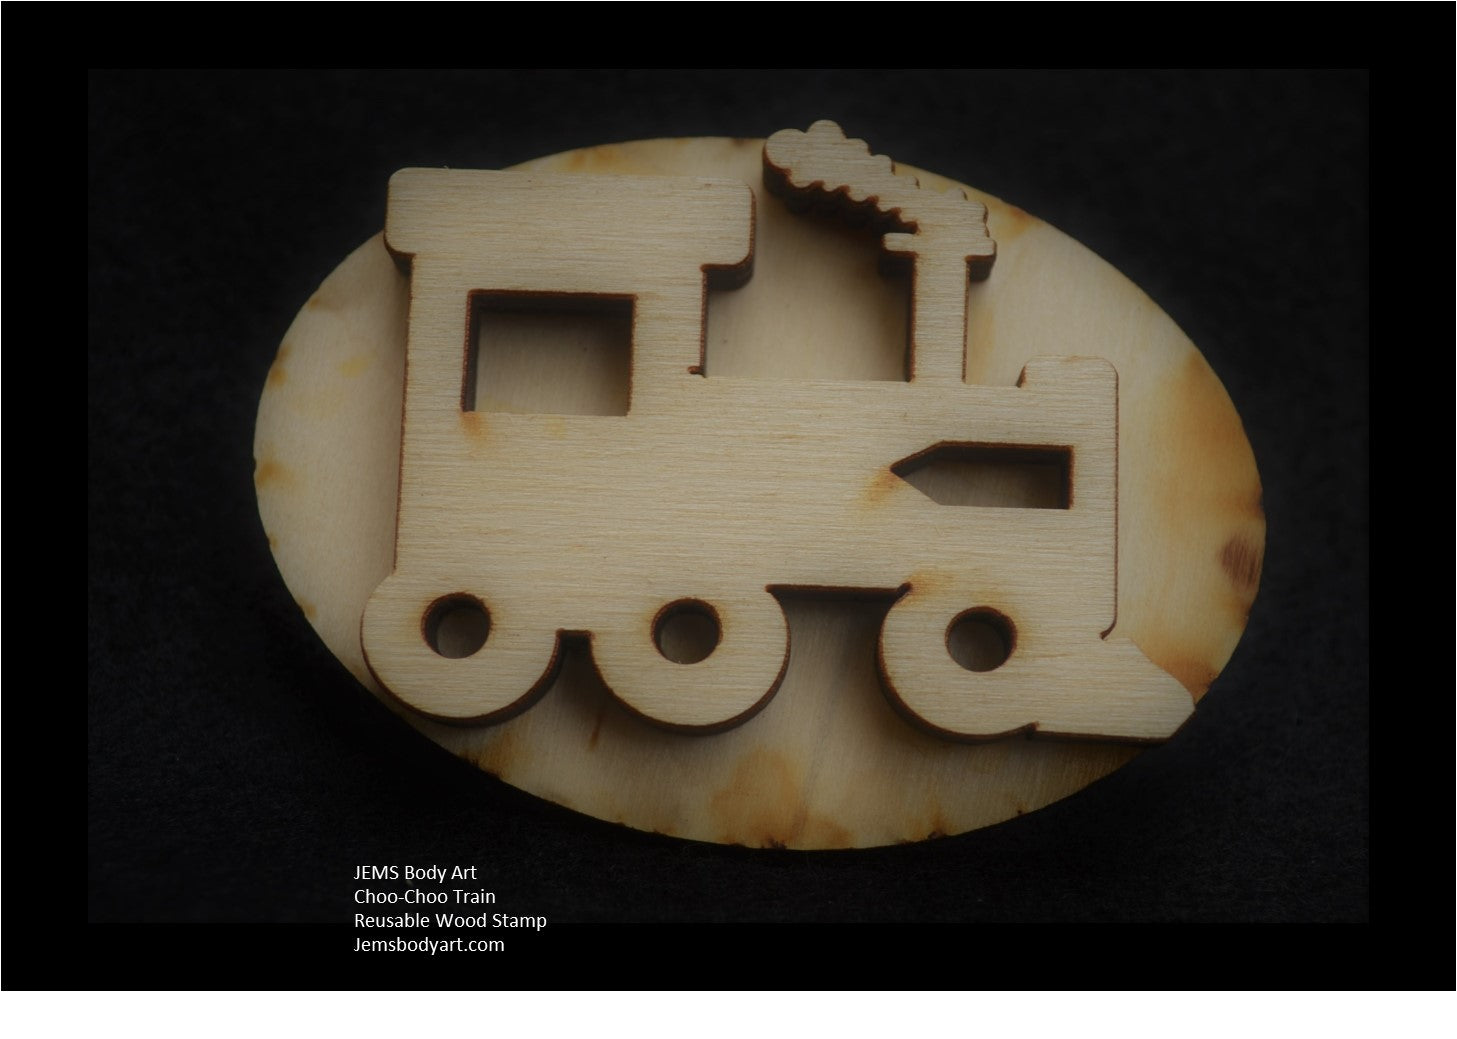
Choo-Choo Train
$4.95
- Size: 2.5" x 1.75"
- Features: Wooden stamp is designed for the sole purpose of applying adhesive to create glitter tattoos as directed by instructions provided with purchase. (NOTE: Actual stamp may have some slight variations from picture shown here.)
-
Step 1: Clean the skin area with JEMS Skin Cleaner with a cotton ball.
Step 2: Dry the skin with JEMS Prep Compound by lightly dusting application area and brushing it with a soft bristle brush.
Step 3: Apply adhesive to the beveled edge of sponge brush and dab adhesive onto the desired body stamp. DO NOT brush adhesive onto the stamp, a bubble texture on the stamp is alright.
Step 4: Roll the stamp with adhesive onto prepared skin area. It is very important to use a simple rolling motion from one side to the other, allowing adhesive to dry clear.
Step 5: Once adhesive is clear, apply glitter using puff bottle. Gently move litter around the entire stamped area with the lollipop pad and press the glitter into the stamp pattern. Use soft makeup brush to remove excess glitter. You can save the excess glitter for a future rainbow body art.
Recommendations:
We suggest that body art only be placed on arms and lower legs, not on faces.
Do NOT let adhesive to freeze, it will turn solid.
To remove body art, gently rub with alcohol or baby oil.
To open bottles, press a pin into the top of the bottles. A smaller hole allows you to control the products best during the application process.
View full product details

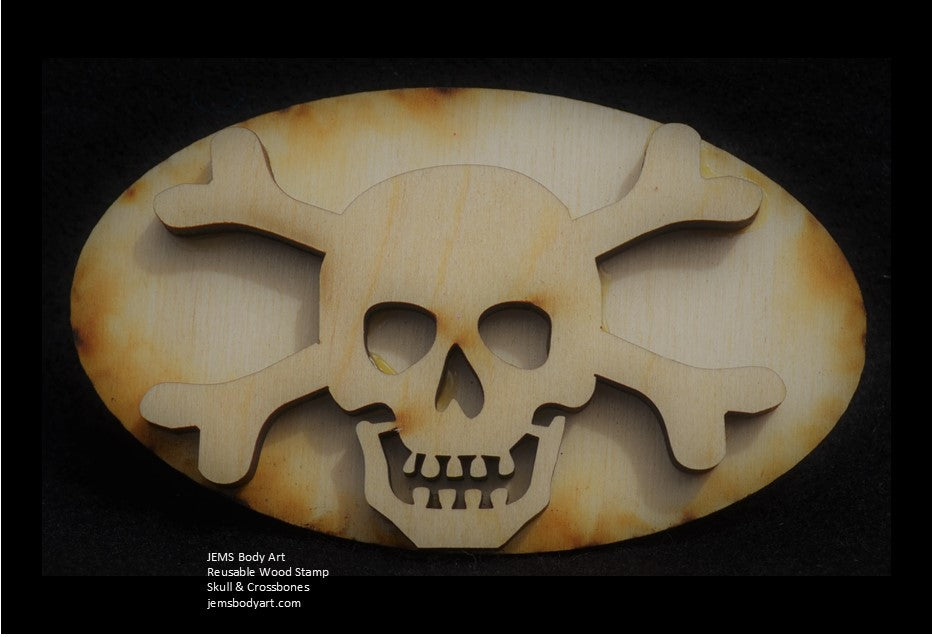
Skull and Cross Bones
$4.95
-
Size: 2.5" x 1.5"
Features: Wooden stamp is designed for the sole purpose of applying adhesive to create glitter tattoos as directed by instructions provided with purchase. (NOTE: Actual stamp may have some slight variations from picture shown here.) -
Step 1: Clean the skin area with JEMS Skin Cleaner with a cotton ball.
Step 2: Dry the skin with JEMS Prep Compound by lightly dusting application area and brushing it with a soft bristle brush.
Step 3: Apply adhesive to the beveled edge of sponge brush and dab adhesive onto the desired body stamp. DO NOT brush adhesive onto the stamp, a bubble texture on the stamp is alright.
Step 4: Roll the stamp with adhesive onto prepared skin area. It is very important to use a simple rolling motion from one side to the other, allowing adhesive to dry clear.
Step 5: Once adhesive is clear, apply glitter using puff bottle. Gently move litter around the entire stamped area with the lollipop pad and press the glitter into the stamp pattern. Use soft makeup brush to remove excess glitter. You can save the excess glitter for a future rainbow body art.
Recommendations:
We suggest that body art only be placed on arms and lower legs, not on faces.
Do NOT let adhesive to freeze, it will turn solid.
To remove body art, gently rub with alcohol or baby oil.
To open bottles, press a pin into the top of the bottles. A smaller hole allows you to control the products best during the application process.
View full product details
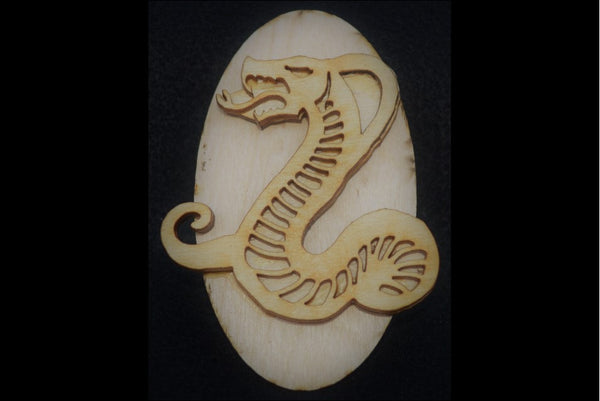

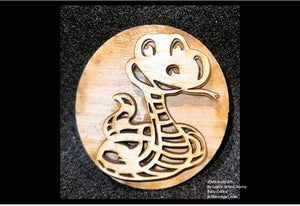
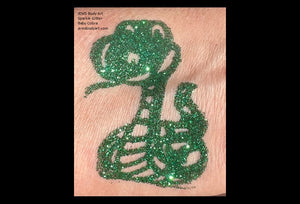
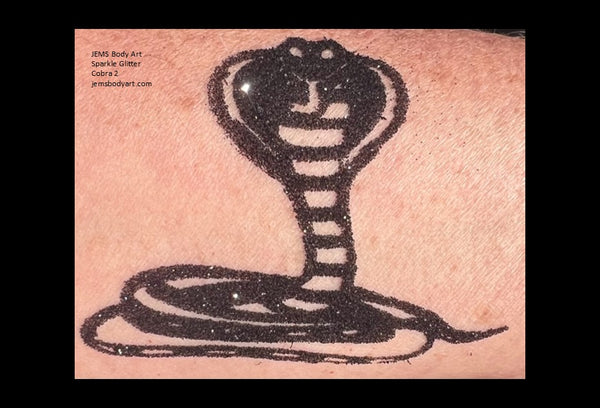
Cobra
$4.95
- Size: 2.75" x 2.5"
- Features: Wooden stamp is designed for the sole purpose of applying adhesive to create glitter tattoos as directed by instructions provided with purchase. (NOTE: Actual stamp may have some slight variations from picture shown here.)
-
Step 1: Clean the skin area with JEMS Skin Cleaner with a cotton ball.
Step 2: Dry the skin with JEMS Prep Compound by lightly dusting application area and brushing it with a soft bristle brush.
Step 3: Apply adhesive to the beveled edge of sponge brush and dab adhesive onto the desired body stamp. DO NOT brush adhesive onto the stamp, a bubble texture on the stamp is alright.
Step 4: Roll the stamp with adhesive onto prepared skin area. It is very important to use a simple rolling motion from one side to the other, allowing adhesive to dry clear.
Step 5: Once adhesive is clear, apply glitter using puff bottle. Gently move litter around the entire stamped area with the lollipop pad and press the glitter into the stamp pattern. Use soft makeup brush to remove excess glitter. You can save the excess glitter for a future rainbow body art.
Recommendations:
We suggest that body art only be placed on arms and lower legs, not on faces.
Do NOT let adhesive to freeze, it will turn solid.
To remove body art, gently rub with alcohol or baby oil.
To open bottles, press a pin into the top of the bottles. A smaller hole allows you to control the products best during the application process.
View full product details
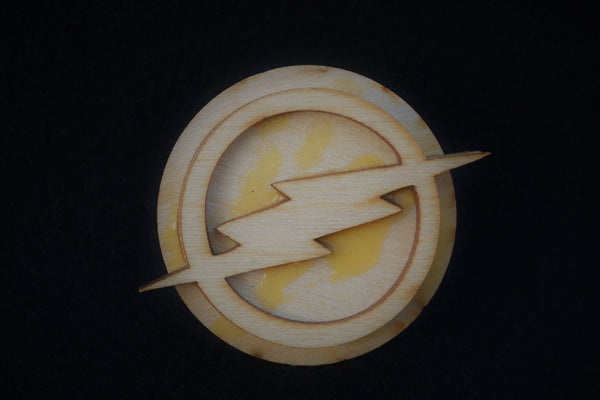

Flash
$4.95
-
Size: 2.0" round
Features: Wooden stamp is designed for the sole purpose of applying adhesive to create glitter tattoos as directed by instructions provided with purchase. (NOTE: Actual stamp may have some slight variations from picture shown here.) -
Step 1: Clean the skin area with JEMS Skin Cleaner with a cotton ball.
Step 2: Dry the skin with JEMS Prep Compound by lightly dusting application area and brushing it with a soft bristle brush.
Step 3: Apply adhesive to the beveled edge of sponge brush and dab adhesive onto the desired body stamp. DO NOT brush adhesive onto the stamp, a bubble texture on the stamp is alright.
Step 4: Roll the stamp with adhesive onto prepared skin area. It is very important to use a simple rolling motion from one side to the other, allowing adhesive to dry clear.
Step 5: Once adhesive is clear, apply glitter using puff bottle. Gently move litter around the entire stamped area with the lollipop pad and press the glitter into the stamp pattern. Use soft makeup brush to remove excess glitter. You can save the excess glitter for a future rainbow body art.
Recommendations:
We suggest that body art only be placed on arms and lower legs, not on faces.
Do NOT let adhesive to freeze, it will turn solid.
To remove body art, gently rub with alcohol or baby oil.
To open bottles, press a pin into the top of the bottles. A smaller hole allows you to control the products best during the application process.
View full product details
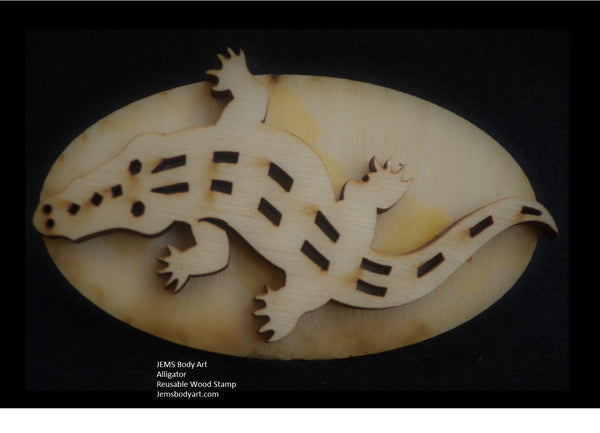
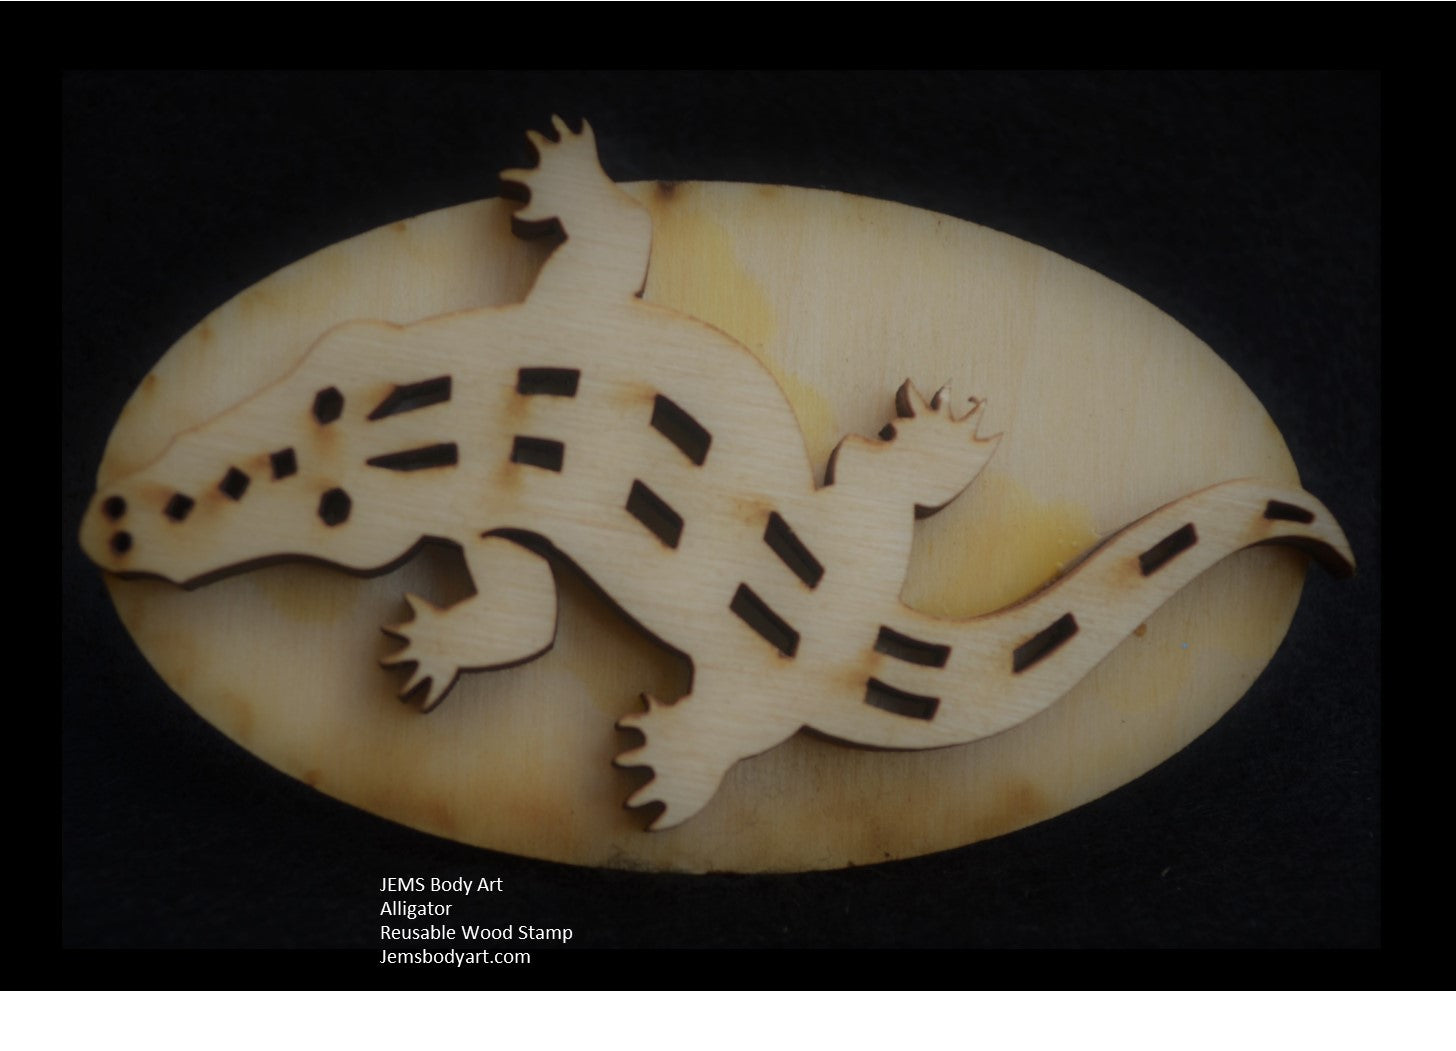
Alligator
$4.95
-
Size: 2.5" x 2.25"
Features: Wooden stamp is designed for the sole purpose of applying adhesive to create glitter tattoos as directed by instructions provided with purchase. (NOTE: Actual stamp may have some slight variations from picture shown here.) -
Step 1: Clean the skin area with JEMS Skin Cleaner with a cotton ball.
Step 2: Dry the skin with JEMS Prep Compound by lightly dusting application area and brushing it with a soft bristle brush.
Step 3: Apply adhesive to the beveled edge of sponge brush and dab adhesive onto the desired body stamp. DO NOT brush adhesive onto the stamp, a bubble texture on the stamp is alright.
Step 4: Roll the stamp with adhesive onto prepared skin area. It is very important to use a simple rolling motion from one side to the other, allowing adhesive to dry clear.
Step 5: Once adhesive is clear, apply glitter using puff bottle. Gently move litter around the entire stamped area with the lollipop pad and press the glitter into the stamp pattern. Use soft makeup brush to remove excess glitter. You can save the excess glitter for a future rainbow body art.
Recommendations:
We suggest that body art only be placed on arms and lower legs, not on faces.
Do NOT let adhesive to freeze, it will turn solid.
To remove body art, gently rub with alcohol or baby oil.
To open bottles, press a pin into the top of the bottles. A smaller hole allows you to control the products best during the application process.
View full product details


Rocket with Flames
$4.95
-
Size: 2.0 x 1.0"
Features: Wooden stamp is designed for the sole purpose of applying adhesive to create glitter tattoos as directed by instructions provided with purchase. (NOTE: Actual stamp may have some slight variations from picture shown here.) -
Step 1: Clean the skin area with JEMS Skin Cleaner with a cotton ball.
Step 2: Dry the skin with JEMS Prep Compound by lightly dusting application area and brushing it with a soft bristle brush.
Step 3: Apply adhesive to the beveled edge of sponge brush and dab adhesive onto the desired body stamp. DO NOT brush adhesive onto the stamp, a bubble texture on the stamp is alright.
Step 4: Roll the stamp with adhesive onto prepared skin area. It is very important to use a simple rolling motion from one side to the other, allowing adhesive to dry clear.
Step 5: Once adhesive is clear, apply glitter using puff bottle. Gently move litter around the entire stamped area with the lollipop pad and press the glitter into the stamp pattern. Use soft makeup brush to remove excess glitter. You can save the excess glitter for a future rainbow body art.
Recommendations:
We suggest that body art only be placed on arms and lower legs, not on faces.
Do NOT let adhesive to freeze, it will turn solid.
To remove body art, gently rub with alcohol or baby oil.
To open bottles, press a pin into the top of the bottles. A smaller hole allows you to control the products best during the application process.
View full product details
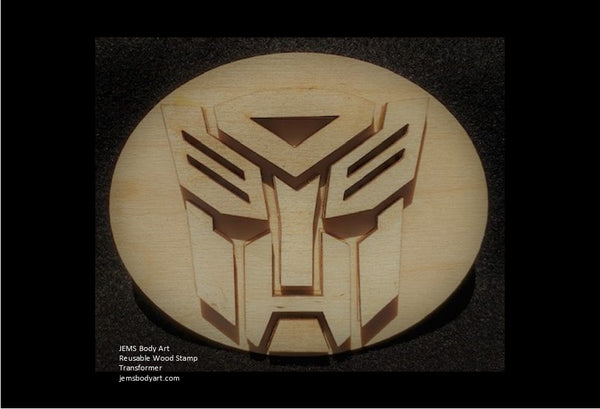
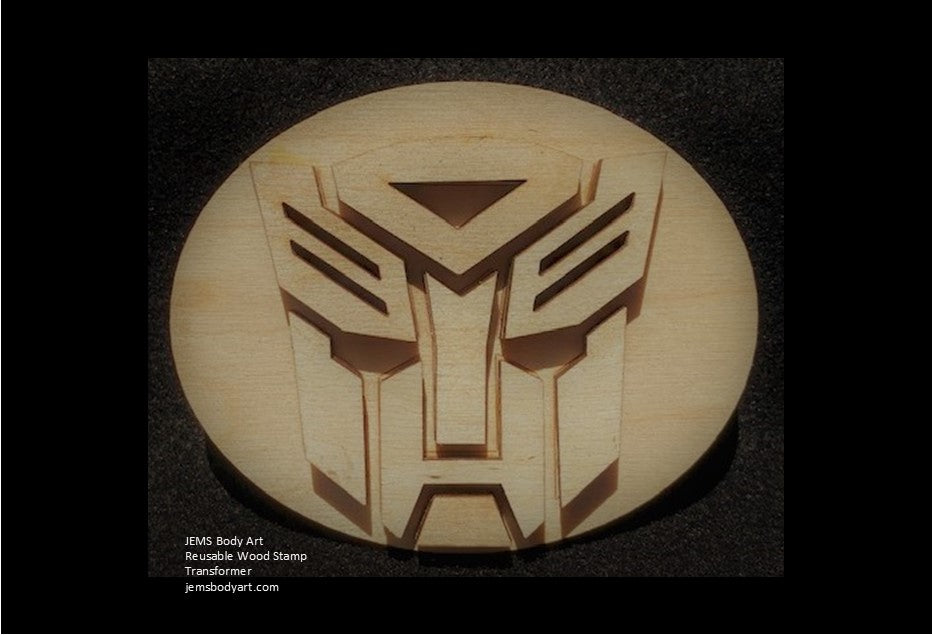
Autobot
$4.95
- Size: 1.5" tall x 2.0" wide
- Features: Wooden stamp is designed for the sole purpose of applying adhesive to create glitter tattoos as directed by instructions provided with purchase. (NOTE: Actual stamp may have some slight variations from picture shown here.)
-
Step 1: Clean the skin area with JEMS Skin Cleaner with a cotton ball.
Step 2: Dry the skin with JEMS Prep Compound by lightly dusting application area and brushing it with a soft bristle brush.
Step 3: Apply adhesive to the beveled edge of sponge brush and dab adhesive onto the desired body stamp. DO NOT brush adhesive onto the stamp, a bubble texture on the stamp is alright.
Step 4: Roll the stamp with adhesive onto prepared skin area. It is very important to use a simple rolling motion from one side to the other, allowing adhesive to dry clear.
Step 5: Once adhesive is clear, apply glitter using puff bottle. Gently move litter around the entire stamped area with the lollipop pad and press the glitter into the stamp pattern. Use soft makeup brush to remove excess glitter. You can save the excess glitter for a future rainbow body art.
Recommendations:
We suggest that body art only be placed on arms and lower legs, not on faces.
Do NOT let adhesive to freeze, it will turn solid.
To remove body art, gently rub with alcohol or baby oil.
To open bottles, press a pin into the top of the bottles. A smaller hole allows you to control the products best during the application process.
View full product details
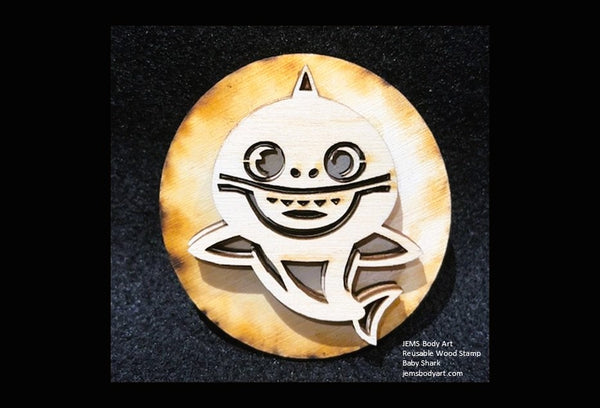

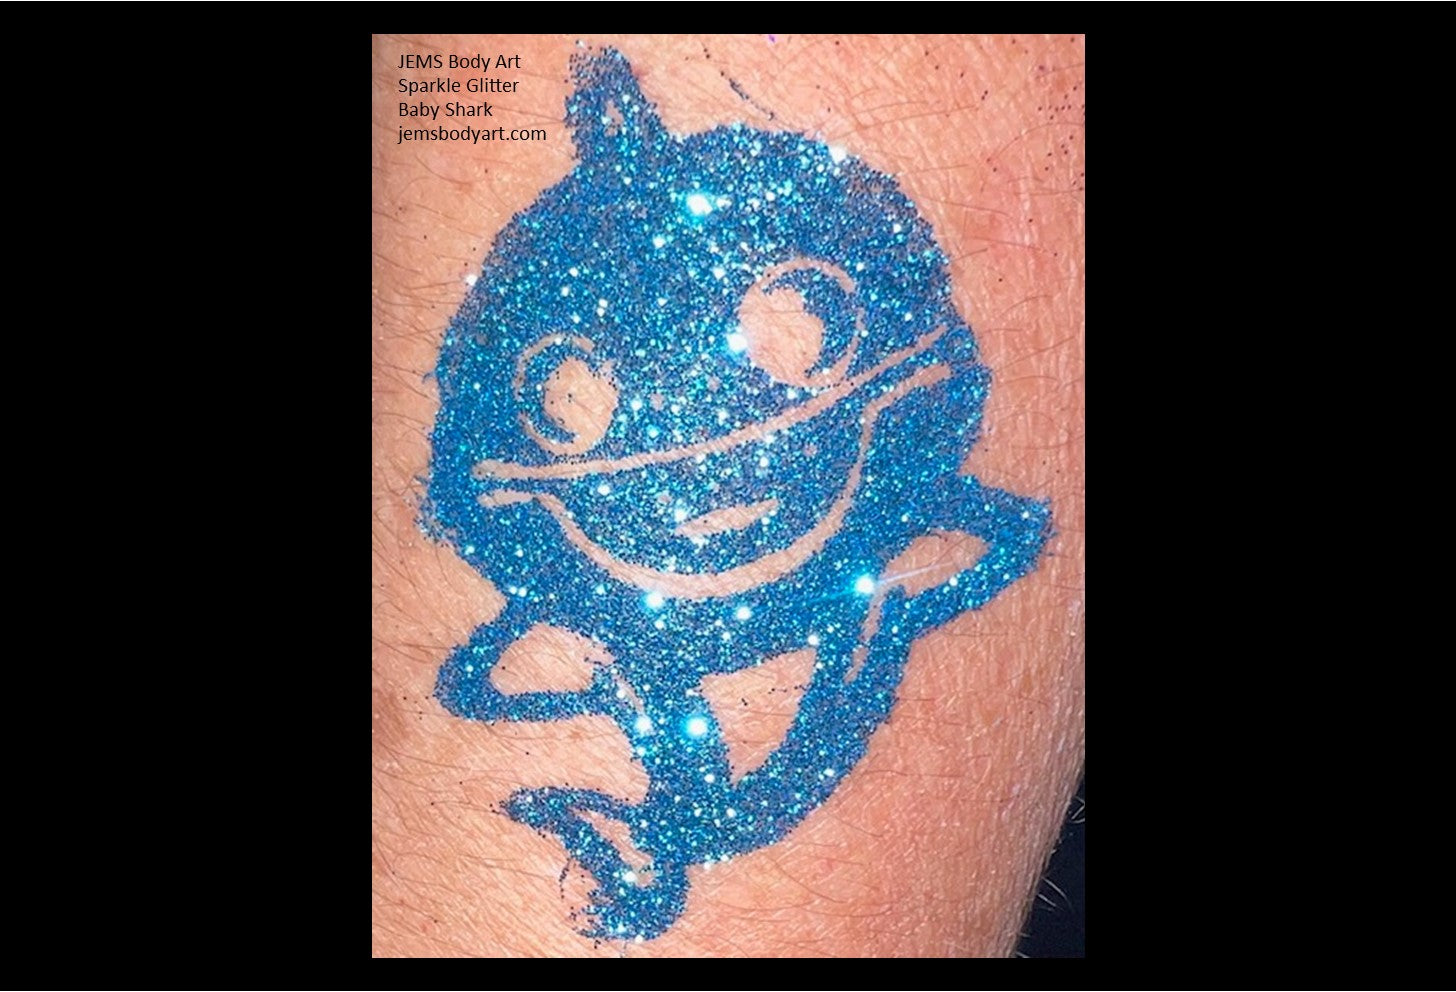
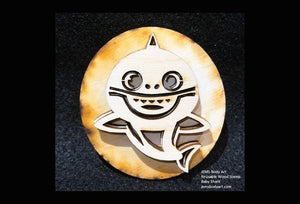

Baby Shark
$4.95
- Size: 2.25"Tall x 2"Wide
- Features: Wooden stamp is designed for the sole purpose of applying adhesive to create glitter tattoos as directed by instructions provided with purchase. (NOTE: Actual stamp may have some slight variations from picture shown here.)
-
Step 1: Clean the skin area with JEMS Skin Cleaner with a cotton ball.
Step 2: Dry the skin with JEMS Prep Compound by lightly dusting application area and brushing it with a soft bristle brush.
Step 3: Apply adhesive to the beveled edge of sponge brush and dab adhesive onto the desired body stamp. DO NOT brush adhesive onto the stamp, a bubble texture on the stamp is alright.
Step 4: Roll the stamp with adhesive onto prepared skin area. It is very important to use a simple rolling motion from one side to the other, allowing adhesive to dry clear.
Step 5: Once adhesive is clear, apply glitter using puff bottle. Gently move litter around the entire stamped area with the lollipop pad and press the glitter into the stamp pattern. Use soft makeup brush to remove excess glitter. You can save the excess glitter for a future rainbow body art.
Recommendations:
We suggest that body art only be placed on arms and lower legs, not on faces.
Do NOT let adhesive to freeze, it will turn solid.
To remove body art, gently rub with alcohol or baby oil.
To open bottles, press a pin into the top of the bottles. A smaller hole allows you to control the products best during the application process.
View full product details


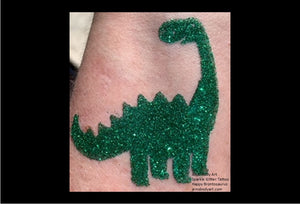
Brontosaurus
$4.95
-
Size: 2.5" tall x 1.75"
Features: Wooden stamp is designed for the sole purpose of applying adhesive to create glitter tattoos as directed by instructions provided with purchase. (NOTE: Actual stamp may have some slight variations from picture shown here.) -
Step 1: Clean the skin area with JEMS Skin Cleaner with a cotton ball.
Step 2: Dry the skin with JEMS Prep Compound by lightly dusting application area and brushing it with a soft bristle brush.
Step 3: Apply adhesive to the beveled edge of sponge brush and dab adhesive onto the desired body stamp. DO NOT brush adhesive onto the stamp, a bubble texture on the stamp is alright.
Step 4: Roll the stamp with adhesive onto prepared skin area. It is very important to use a simple rolling motion from one side to the other, allowing adhesive to dry clear.
Step 5: Once adhesive is clear, apply glitter using puff bottle. Gently move litter around the entire stamped area with the lollipop pad and press the glitter into the stamp pattern. Use soft makeup brush to remove excess glitter. You can save the excess glitter for a future rainbow body art.
Recommendations:
We suggest that body art only be placed on arms and lower legs, not on faces.
Do NOT let adhesive to freeze, it will turn solid.
To remove body art, gently rub with alcohol or baby oil.
To open bottles, press a pin into the top of the bottles. A smaller hole allows you to control the products best during the application process.
View full product details

Captain America
$4.95
- Size: 2.0" x 2"
- Features: Wooden stamp is designed for the sole purpose of applying adhesive to create glitter tattoos as directed by instructions provided with purchase. (NOTE: Actual stamp may have some slight variations from picture shown here.)
-
Step 1: Clean the skin area with JEMS Skin Cleaner with a cotton ball.
Step 2: Dry the skin with JEMS Prep Compound by lightly dusting application area and brushing it with a soft bristle brush.
Step 3: Apply adhesive to the beveled edge of sponge brush and dab adhesive onto the desired body stamp. DO NOT brush adhesive onto the stamp, a bubble texture on the stamp is alright.
Step 4: Roll the stamp with adhesive onto prepared skin area. It is very important to use a simple rolling motion from one side to the other, allowing adhesive to dry clear.
Step 5: Once adhesive is clear, apply glitter using puff bottle. Gently move litter around the entire stamped area with the lollipop pad and press the glitter into the stamp pattern. Use soft makeup brush to remove excess glitter. You can save the excess glitter for a future rainbow body art.
Recommendations:
We suggest that body art only be placed on arms and lower legs, not on faces.
Do NOT let adhesive to freeze, it will turn solid.
To remove body art, gently rub with alcohol or baby oil.
To open bottles, press a pin into the top of the bottles. A smaller hole allows you to control the products best during the application process.
View full product details


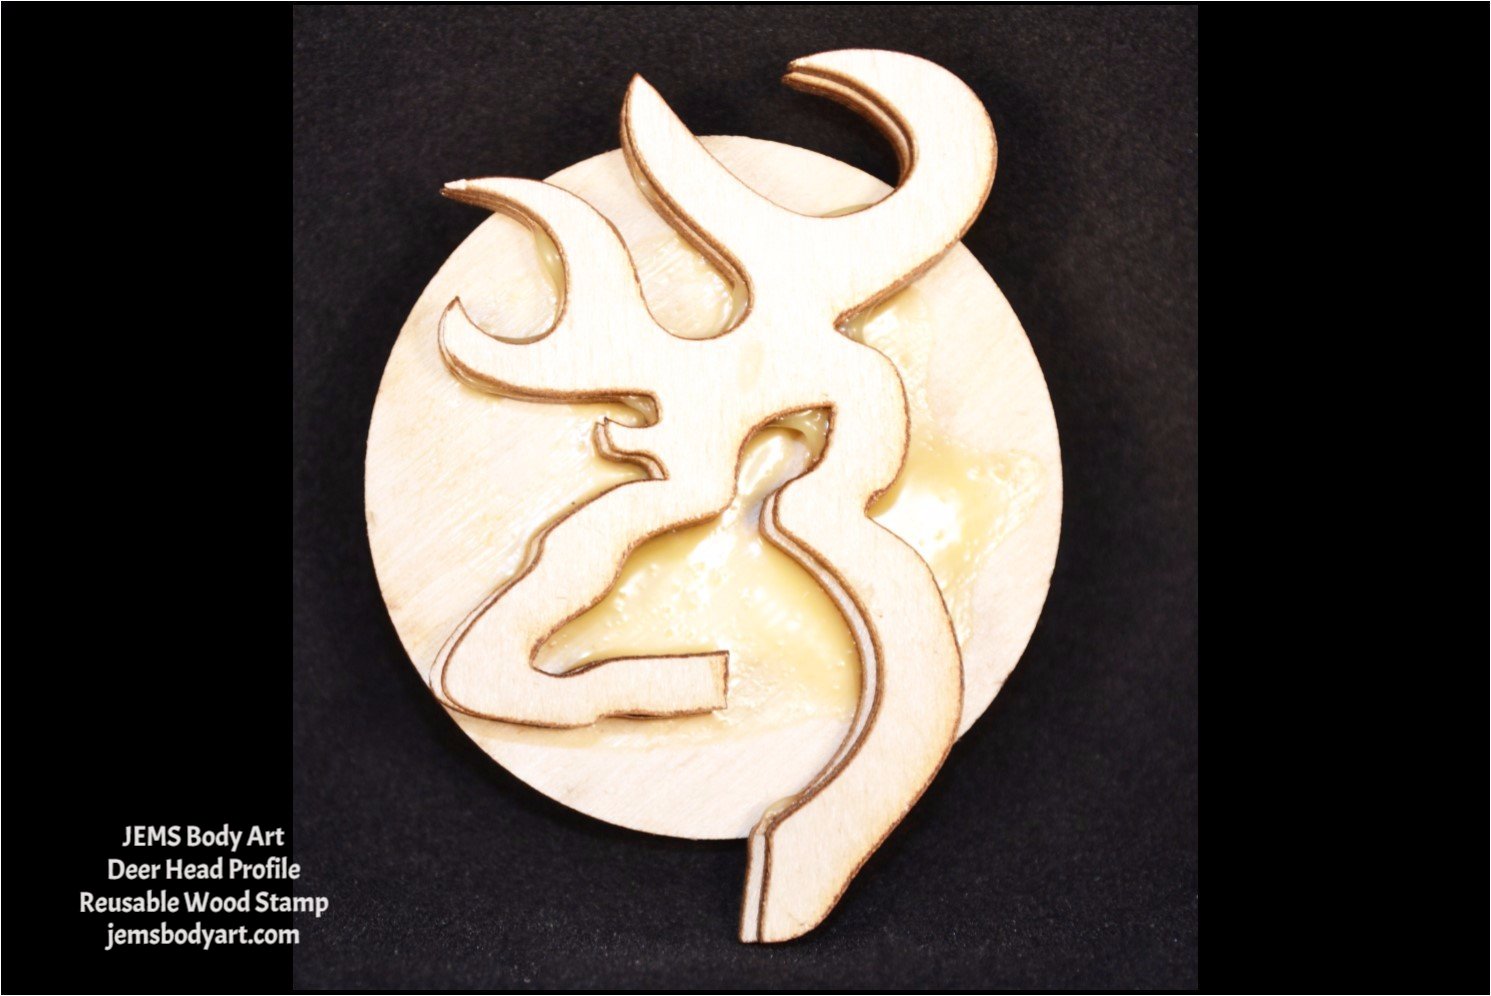
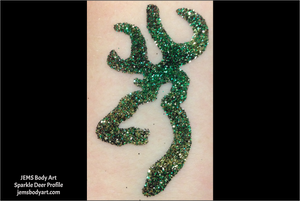
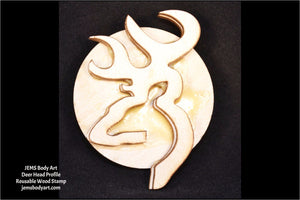
Deer Head Profile
$4.95
- Size: 2" x 1.5"
-
Features: Wooden stamp is designed for the sole purpose of applying adhesive to create glitter tattoos as directed by instructions provided with purchase. (NOTE: Actual stamp may have some slight variations from picture shown here.) -
Step 1: Clean the skin area with JEMS Skin Cleaner with a cotton ball.
Step 2: Dry the skin with JEMS Prep Compound by lightly dusting application area and brushing it with a soft bristle brush.
Step 3: Apply adhesive to the beveled edge of sponge brush and dab adhesive onto the desired body stamp. DO NOT brush adhesive onto the stamp, a bubble texture on the stamp is alright.
Step 4: Roll the stamp with adhesive onto prepared skin area. It is very important to use a simple rolling motion from one side to the other, allowing adhesive to dry clear.
Step 5: Once adhesive is clear, apply glitter using puff bottle. Gently move litter around the entire stamped area with the lollipop pad and press the glitter into the stamp pattern. Use soft makeup brush to remove excess glitter. You can save the excess glitter for a future rainbow body art.
Recommendations:
We suggest that body art only be placed on arms and lower legs, not on faces.
Do NOT let adhesive to freeze, it will turn solid.
To remove body art, gently rub with alcohol or baby oil.
To open bottles, press a pin into the top of the bottles. A smaller hole allows you to control the products best during the application process.
View full product details

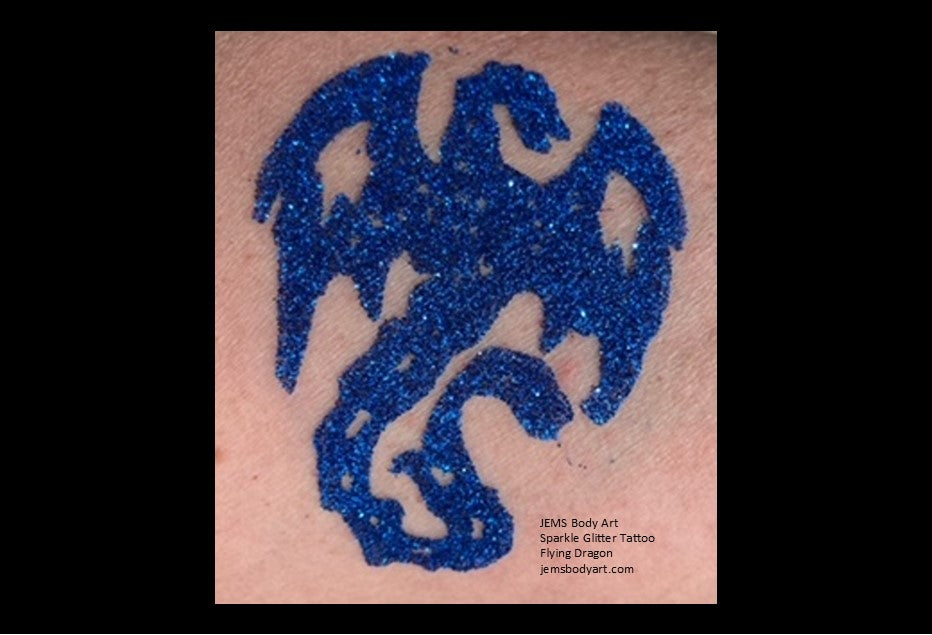
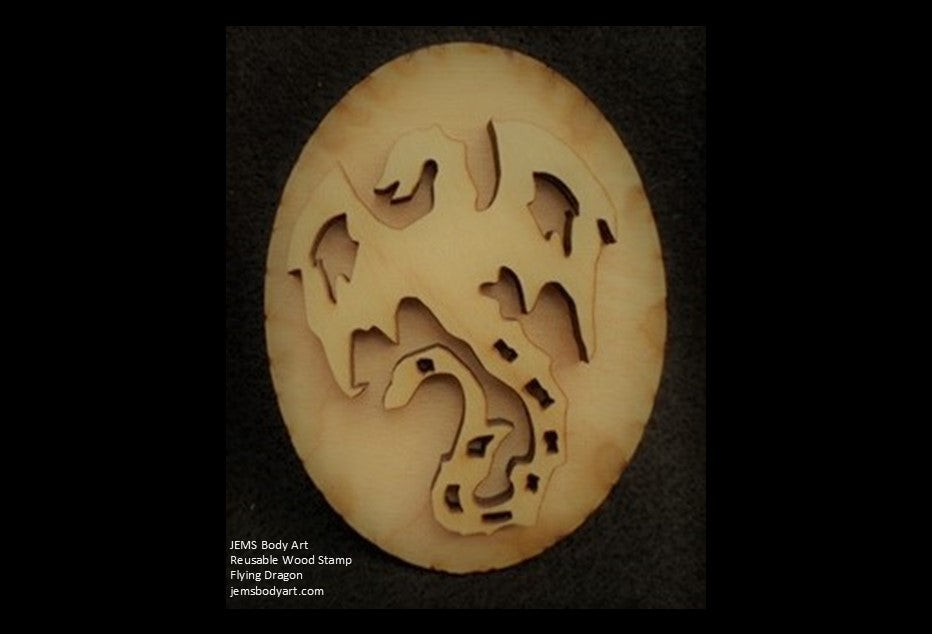

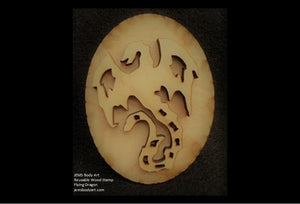
Flying Dragon
$4.95
- Size: 2.5" tall x 2.0" wide
- Features: Wooden stamp is designed for the sole purpose of applying adhesive to create glitter tattoos as directed by instructions provided with purchase. (NOTE: Actual stamp may have some slight variations from picture shown here.)
-
Step 1: Clean the skin area with JEMS Skin Cleaner with a cotton ball.
Step 2: Dry the skin with JEMS Prep Compound by lightly dusting application area and brushing it with a soft bristle brush.
Step 3: Apply adhesive to the beveled edge of sponge brush and dab adhesive onto the desired body stamp. DO NOT brush adhesive onto the stamp, a bubble texture on the stamp is alright.
Step 4: Roll the stamp with adhesive onto prepared skin area. It is very important to use a simple rolling motion from one side to the other, allowing adhesive to dry clear.
Step 5: Once adhesive is clear, apply glitter using puff bottle. Gently move litter around the entire stamped area with the lollipop pad and press the glitter into the stamp pattern. Use soft makeup brush to remove excess glitter. You can save the excess glitter for a future rainbow body art.
Recommendations:
We suggest that body art only be placed on arms and lower legs, not on faces.
Do NOT let adhesive to freeze, it will turn solid.
To remove body art, gently rub with alcohol or baby oil.
To open bottles, press a pin into the top of the bottles. A smaller hole allows you to control the products best during the application process.
View full product details


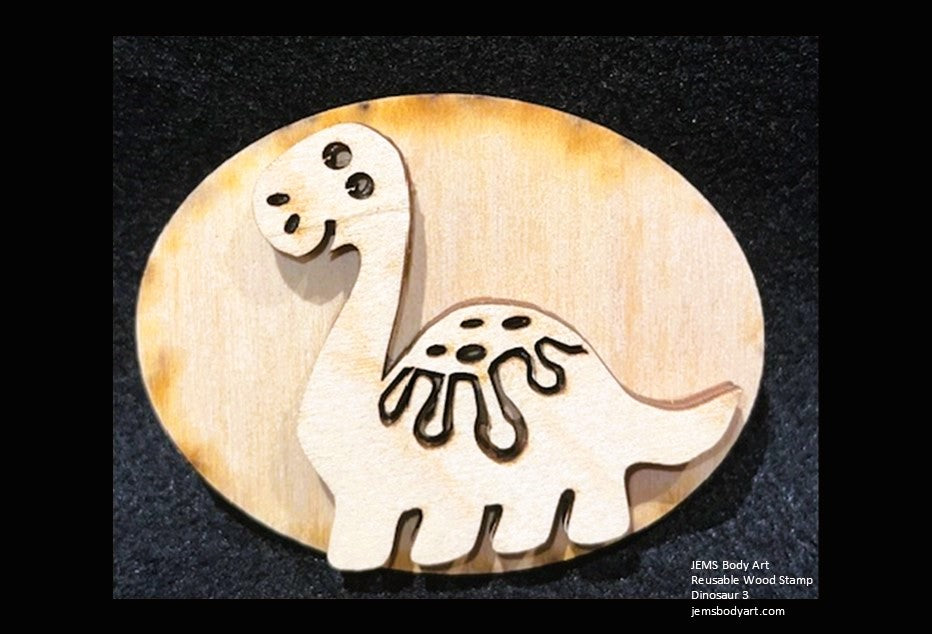
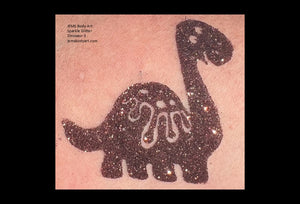

Dinosaur 3
$4.95
- Size: 2"Tall x 2"Wide
- Features: Wooden stamp is designed for the sole purpose of applying adhesive to create glitter tattoos as directed by instructions provided with purchase. (NOTE: Actual stamp may have some slight variations from picture shown here.)
-
Step 1: Clean the skin area with JEMS Skin Cleaner with a cotton ball.
Step 2: Dry the skin with JEMS Prep Compound by lightly dusting application area and brushing it with a soft bristle brush.
Step 3: Apply adhesive to the beveled edge of sponge brush and dab adhesive onto the desired body stamp. DO NOT brush adhesive onto the stamp, a bubble texture on the stamp is alright.
Step 4: Roll the stamp with adhesive onto prepared skin area. It is very important to use a simple rolling motion from one side to the other, allowing adhesive to dry clear.
Step 5: Once adhesive is clear, apply glitter using puff bottle. Gently move litter around the entire stamped area with the lollipop pad and press the glitter into the stamp pattern. Use soft makeup brush to remove excess glitter. You can save the excess glitter for a future rainbow body art.
Recommendations:
We suggest that body art only be placed on arms and lower legs, not on faces.
Do NOT let adhesive to freeze, it will turn solid.
To remove body art, gently rub with alcohol or baby oil.
To open bottles, press a pin into the top of the bottles. A smaller hole allows you to control the products best during the application process.
View full product details
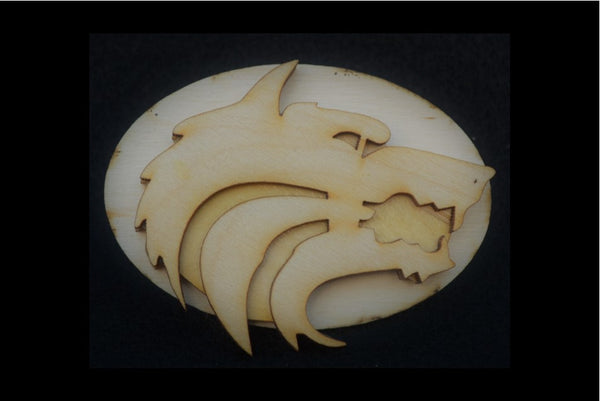

Wolf Head
$4.95
- Size: 2.25" x 3.0"
- Features: Wooden stamp is designed for the sole purpose of applying adhesive to create glitter tattoos as directed by instructions provided with purchase. (NOTE: Actual stamp may have some slight variations from picture shown here.)
-
Step 1: Clean the skin area with JEMS Skin Cleaner with a cotton ball.
Step 2: Dry the skin with JEMS Prep Compound by lightly dusting application area and brushing it with a soft bristle brush.
Step 3: Apply adhesive to the beveled edge of sponge brush and dab adhesive onto the desired body stamp. DO NOT brush adhesive onto the stamp, a bubble texture on the stamp is alright.
Step 4: Roll the stamp with adhesive onto prepared skin area. It is very important to use a simple rolling motion from one side to the other, allowing adhesive to dry clear.
Step 5: Once adhesive is clear, apply glitter using puff bottle. Gently move litter around the entire stamped area with the lollipop pad and press the glitter into the stamp pattern. Use soft makeup brush to remove excess glitter. You can save the excess glitter for a future rainbow body art.
Recommendations:
We suggest that body art only be placed on arms and lower legs, not on faces.
Do NOT let adhesive to freeze, it will turn solid.
To remove body art, gently rub with alcohol or baby oil.
To open bottles, press a pin into the top of the bottles. A smaller hole allows you to control the products best during the application process.
View full product details


Buck Head
$4.95
- Size: 2.5" tall x 2.2" wide
- Features: Wooden stamp is designed for the sole purpose of applying adhesive to create glitter tattoos as directed by instructions provided with purchase. (NOTE: Actual stamp may have some slight variations from picture shown here.)
-
Step 1: Clean the skin area with JEMS Skin Cleaner with a cotton ball.
Step 2: Dry the skin with JEMS Prep Compound by lightly dusting application area and brushing it with a soft bristle brush.
Step 3: Apply adhesive to the beveled edge of sponge brush and dab adhesive onto the desired body stamp. DO NOT brush adhesive onto the stamp, a bubble texture on the stamp is alright.
Step 4: Roll the stamp with adhesive onto prepared skin area. It is very important to use a simple rolling motion from one side to the other, allowing adhesive to dry clear.
Step 5: Once adhesive is clear, apply glitter using puff bottle. Gently move litter around the entire stamped area with the lollipop pad and press the glitter into the stamp pattern. Use soft makeup brush to remove excess glitter. You can save the excess glitter for a future rainbow body art.
Recommendations:
We suggest that body art only be placed on arms and lower legs, not on faces.
Do NOT let adhesive to freeze, it will turn solid.
To remove body art, gently rub with alcohol or baby oil.
To open bottles, press a pin into the top of the bottles. A smaller hole allows you to control the products best during the application process.
View full product details


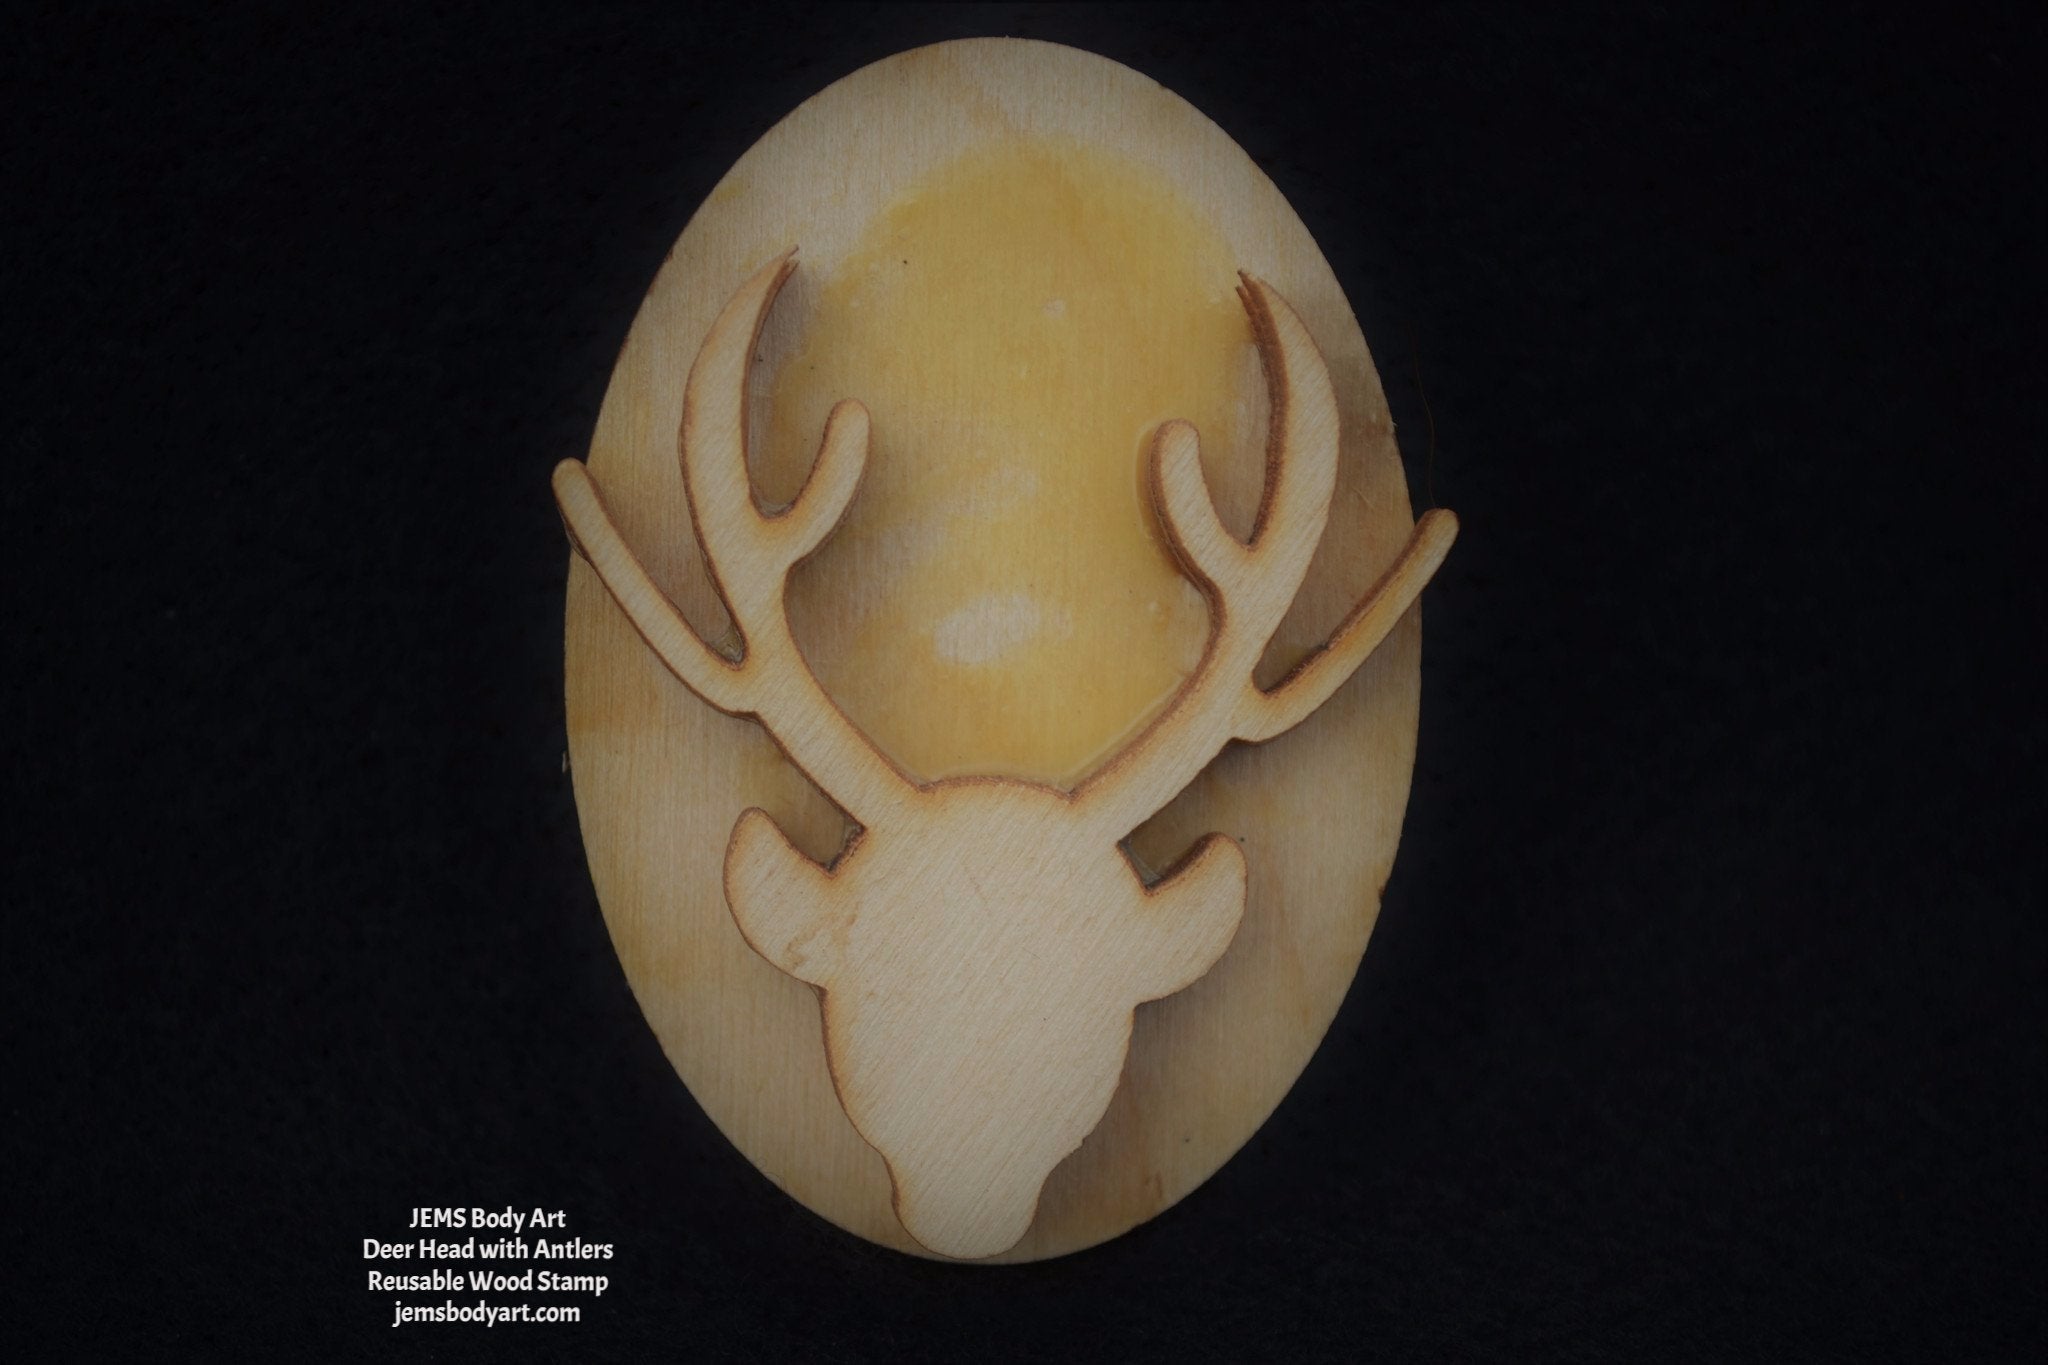
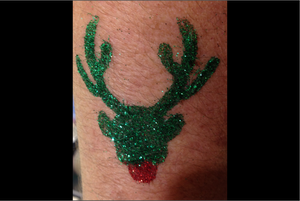
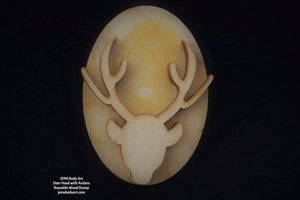
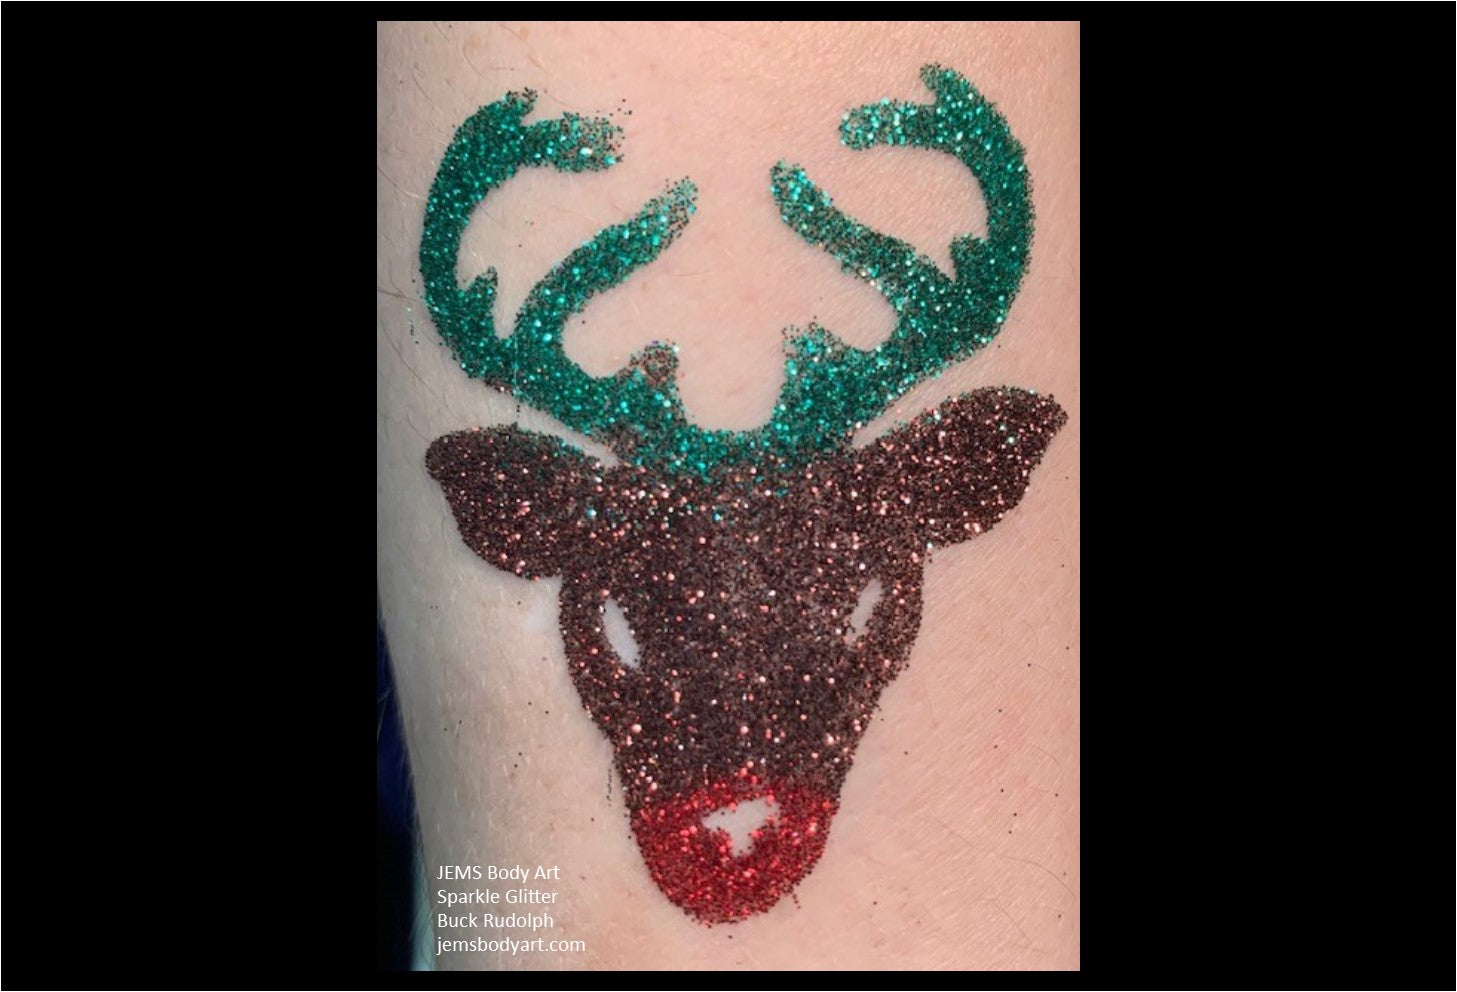
Deer Head with Antlers
$4.95
-
Size: 2" W x 1.75" L
Features: Wooden stamp is designed for the sole purpose of applying adhesive to create glitter tattoos as directed by instructions provided with purchase. (NOTE: Actual stamp may have some slight variations from picture shown here.) -
Step 1: Clean the skin area with JEMS Skin Cleaner with a cotton ball.
Step 2: Dry the skin with JEMS Prep Compound by lightly dusting application area and brushing it with a soft bristle brush.
Step 3: Apply adhesive to the beveled edge of sponge brush and dab adhesive onto the desired body stamp. DO NOT brush adhesive onto the stamp, a bubble texture on the stamp is alright.
Step 4: Roll the stamp with adhesive onto prepared skin area. It is very important to use a simple rolling motion from one side to the other, allowing adhesive to dry clear.
Step 5: Once adhesive is clear, apply glitter using puff bottle. Gently move litter around the entire stamped area with the lollipop pad and press the glitter into the stamp pattern. Use soft makeup brush to remove excess glitter. You can save the excess glitter for a future rainbow body art.
Recommendations:
We suggest that body art only be placed on arms and lower legs, not on faces.
Do NOT let adhesive to freeze, it will turn solid.
To remove body art, gently rub with alcohol or baby oil.
To open bottles, press a pin into the top of the bottles. A smaller hole allows you to control the products best during the application process.
View full product details
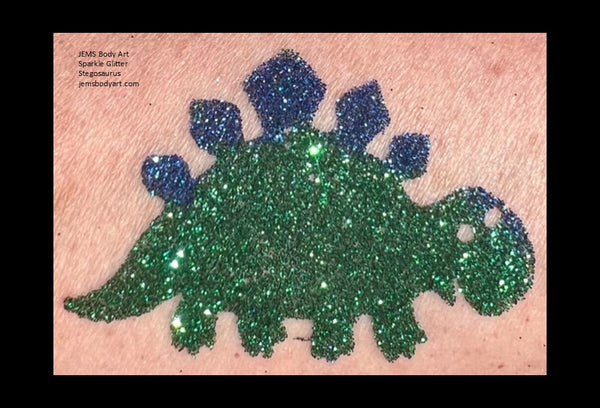


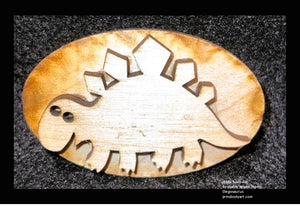
Stegosaurus
$4.95
- Size: 1.5"Tall x 2.25"Wide
- Features: Wooden stamp is designed for the sole purpose of applying adhesive to create glitter tattoos as directed by instructions provided with purchase. (NOTE: Actual stamp may have some slight variations from picture shown here.)
-
Step 1: Clean the skin area with JEMS Skin Cleaner with a cotton ball.
Step 2: Dry the skin with JEMS Prep Compound by lightly dusting application area and brushing it with a soft bristle brush.
Step 3: Apply adhesive to the beveled edge of sponge brush and dab adhesive onto the desired body stamp. DO NOT brush adhesive onto the stamp, a bubble texture on the stamp is alright.
Step 4: Roll the stamp with adhesive onto prepared skin area. It is very important to use a simple rolling motion from one side to the other, allowing adhesive to dry clear.
Step 5: Once adhesive is clear, apply glitter using puff bottle. Gently move litter around the entire stamped area with the lollipop pad and press the glitter into the stamp pattern. Use soft makeup brush to remove excess glitter. You can save the excess glitter for a future rainbow body art.
Recommendations:
We suggest that body art only be placed on arms and lower legs, not on faces.
Do NOT let adhesive to freeze, it will turn solid.
To remove body art, gently rub with alcohol or baby oil.
To open bottles, press a pin into the top of the bottles. A smaller hole allows you to control the products best during the application process.
View full product details


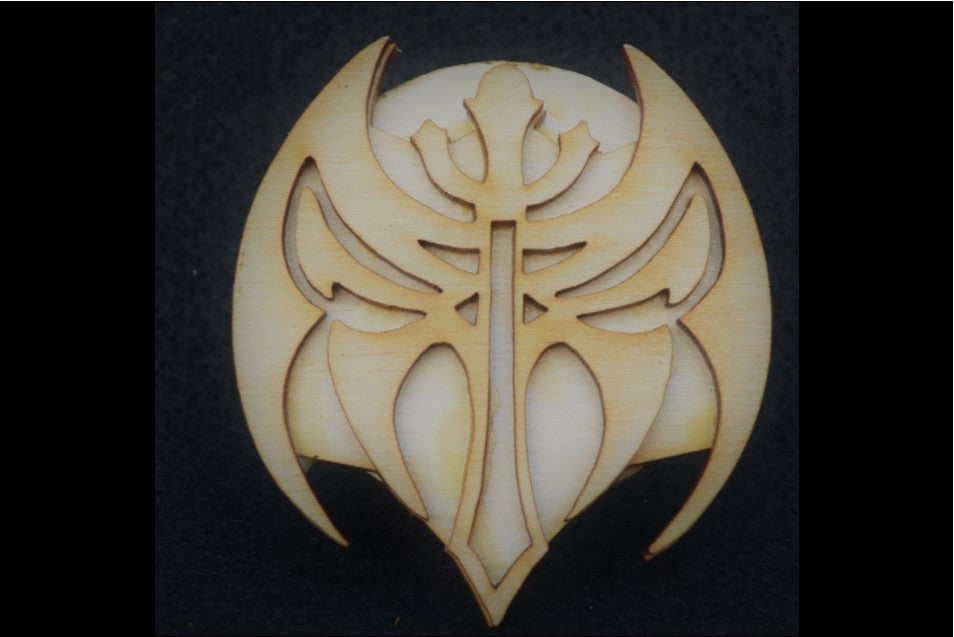
Bat Symbol
$4.95
- Size: 1.0" Tall x 2.0" Wide
- Features: Wooden stamp is designed for the sole purpose of applying adhesive to create glitter tattoos as directed by instructions provided with purchase. (NOTE: Actual stamp may have some slight variations from picture shown here.)
-
Step 1: Clean the skin area with JEMS Skin Cleaner with a cotton ball.
Step 2: Dry the skin with JEMS Prep Compound by lightly dusting application area and brushing it with a soft bristle brush.
Step 3: Apply adhesive to the beveled edge of sponge brush and dab adhesive onto the desired body stamp. DO NOT brush adhesive onto the stamp, a bubble texture on the stamp is alright.
Step 4: Roll the stamp with adhesive onto prepared skin area. It is very important to use a simple rolling motion from one side to the other, allowing adhesive to dry clear.
Step 5: Once adhesive is clear, apply glitter using puff bottle. Gently move litter around the entire stamped area with the lollipop pad and press the glitter into the stamp pattern. Use soft makeup brush to remove excess glitter. You can save the excess glitter for a future rainbow body art.
Recommendations:
We suggest that body art only be placed on arms and lower legs, not on faces.
Do NOT let adhesive to freeze, it will turn solid.
To remove body art, gently rub with alcohol or baby oil.
To open bottles, press a pin into the top of the bottles. A smaller hole allows you to control the products best during the application process.
View full product details


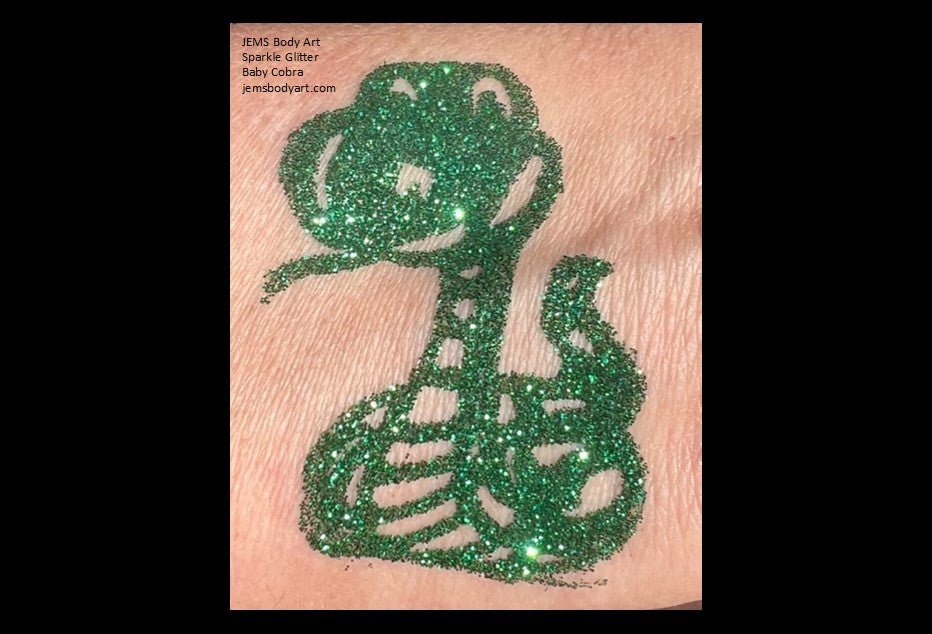
Baby Cobra
$4.95
- Size: 2"Tall x 1.75"Wide
- Features: Wooden stamp is designed for the sole purpose of applying adhesive to create glitter tattoos as directed by instructions provided with purchase. (NOTE: Actual stamp may have some slight variations from picture shown here.)
-
Step 1: Clean the skin area with JEMS Skin Cleaner with a cotton ball.
Step 2: Dry the skin with JEMS Prep Compound by lightly dusting application area and brushing it with a soft bristle brush.
Step 3: Apply adhesive to the beveled edge of sponge brush and dab adhesive onto the desired body stamp. DO NOT brush adhesive onto the stamp, a bubble texture on the stamp is alright.
Step 4: Roll the stamp with adhesive onto prepared skin area. It is very important to use a simple rolling motion from one side to the other, allowing adhesive to dry clear.
Step 5: Once adhesive is clear, apply glitter using puff bottle. Gently move litter around the entire stamped area with the lollipop pad and press the glitter into the stamp pattern. Use soft makeup brush to remove excess glitter. You can save the excess glitter for a future rainbow body art.
Recommendations:
We suggest that body art only be placed on arms and lower legs, not on faces.
Do NOT let adhesive to freeze, it will turn solid.
To remove body art, gently rub with alcohol or baby oil.
To open bottles, press a pin into the top of the bottles. A smaller hole allows you to control the products best during the application process.
View full product details
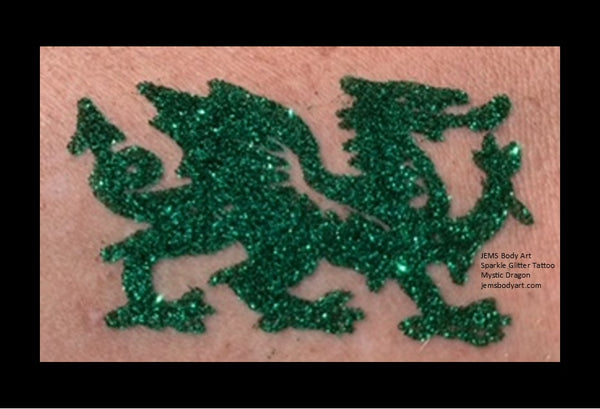


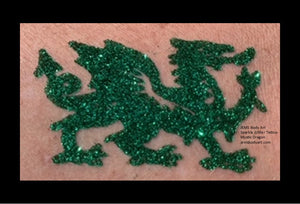
Mystic Dragon
$4.95
- Size: 1.25" tall x 2.50" wide
- Features: Wooden stamp is designed for the sole purpose of applying adhesive to create glitter tattoos as directed by instructions provided with purchase. (NOTE: Actual stamp may have some slight variations from picture shown here.)
-
Step 1: Clean the skin area with JEMS Skin Cleaner with a cotton ball.
Step 2: Dry the skin with JEMS Prep Compound by lightly dusting application area and brushing it with a soft bristle brush.
Step 3: Apply adhesive to the beveled edge of sponge brush and dab adhesive onto the desired body stamp. DO NOT brush adhesive onto the stamp, a bubble texture on the stamp is alright.
Step 4: Roll the stamp with adhesive onto prepared skin area. It is very important to use a simple rolling motion from one side to the other, allowing adhesive to dry clear.
Step 5: Once adhesive is clear, apply glitter using puff bottle. Gently move litter around the entire stamped area with the lollipop pad and press the glitter into the stamp pattern. Use soft makeup brush to remove excess glitter. You can save the excess glitter for a future rainbow body art.
Recommendations:
We suggest that body art only be placed on arms and lower legs, not on faces.
Do NOT let adhesive to freeze, it will turn solid.
To remove body art, gently rub with alcohol or baby oil.
To open bottles, press a pin into the top of the bottles. A smaller hole allows you to control the products best during the application process.
View full product details
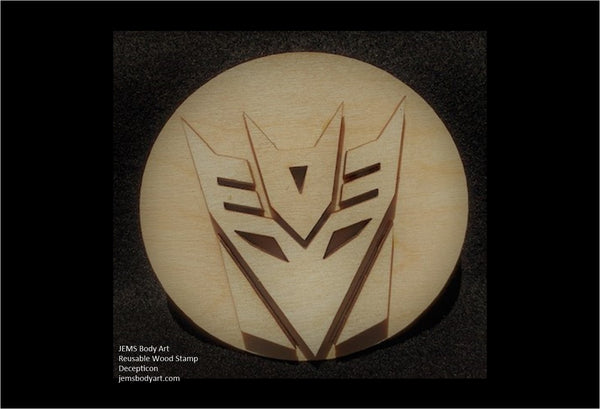

Decepticon
$4.95
- Size: 2.0" wide
- Features: Wooden stamp is designed for the sole purpose of applying adhesive to create glitter tattoos as directed by instructions provided with purchase. (NOTE: Actual stamp may have some slight variations from picture shown here.)
-
Step 1: Clean the skin area with JEMS Skin Cleaner with a cotton ball.
Step 2: Dry the skin with JEMS Prep Compound by lightly dusting application area and brushing it with a soft bristle brush.
Step 3: Apply adhesive to the beveled edge of sponge brush and dab adhesive onto the desired body stamp. DO NOT brush adhesive onto the stamp, a bubble texture on the stamp is alright.
Step 4: Roll the stamp with adhesive onto prepared skin area. It is very important to use a simple rolling motion from one side to the other, allowing adhesive to dry clear.
Step 5: Once adhesive is clear, apply glitter using puff bottle. Gently move litter around the entire stamped area with the lollipop pad and press the glitter into the stamp pattern. Use soft makeup brush to remove excess glitter. You can save the excess glitter for a future rainbow body art.
Recommendations:
We suggest that body art only be placed on arms and lower legs, not on faces.
Do NOT let adhesive to freeze, it will turn solid.
To remove body art, gently rub with alcohol or baby oil.
To open bottles, press a pin into the top of the bottles. A smaller hole allows you to control the products best during the application process.
View full product details
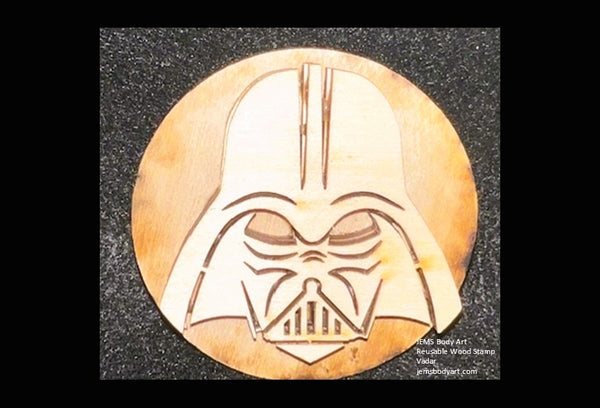

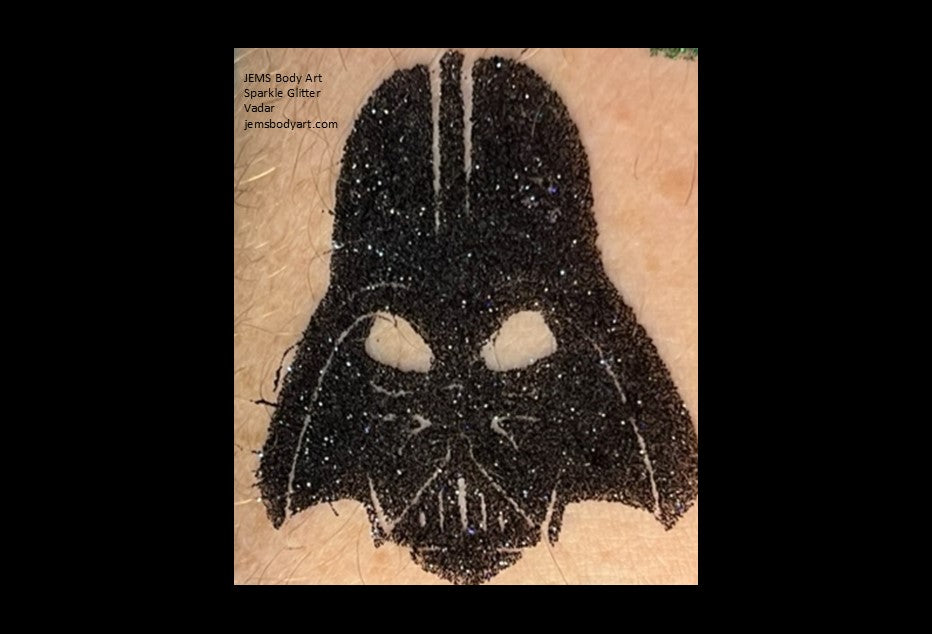
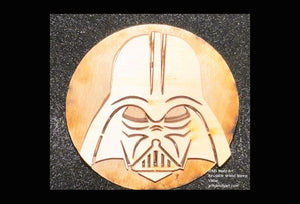
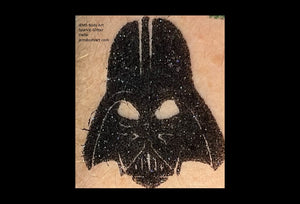
Vadar
$4.95
- Size: 2.25"Tall x 2.25"Wide
- Features: Wooden stamp is designed for the sole purpose of applying adhesive to create glitter tattoos as directed by instructions provided with purchase. (NOTE: Actual stamp may have some slight variations from picture shown here.)
-
Step 1: Clean the skin area with JEMS Skin Cleaner with a cotton ball.
Step 2: Dry the skin with JEMS Prep Compound by lightly dusting application area and brushing it with a soft bristle brush.
Step 3: Apply adhesive to the beveled edge of sponge brush and dab adhesive onto the desired body stamp. DO NOT brush adhesive onto the stamp, a bubble texture on the stamp is alright.
Step 4: Roll the stamp with adhesive onto prepared skin area. It is very important to use a simple rolling motion from one side to the other, allowing adhesive to dry clear.
Step 5: Once adhesive is clear, apply glitter using puff bottle. Gently move litter around the entire stamped area with the lollipop pad and press the glitter into the stamp pattern. Use soft makeup brush to remove excess glitter. You can save the excess glitter for a future rainbow body art.
Recommendations:
We suggest that body art only be placed on arms and lower legs, not on faces.
Do NOT let adhesive to freeze, it will turn solid.
To remove body art, gently rub with alcohol or baby oil.
To open bottles, press a pin into the top of the bottles. A smaller hole allows you to control the products best during the application process.
View full product details

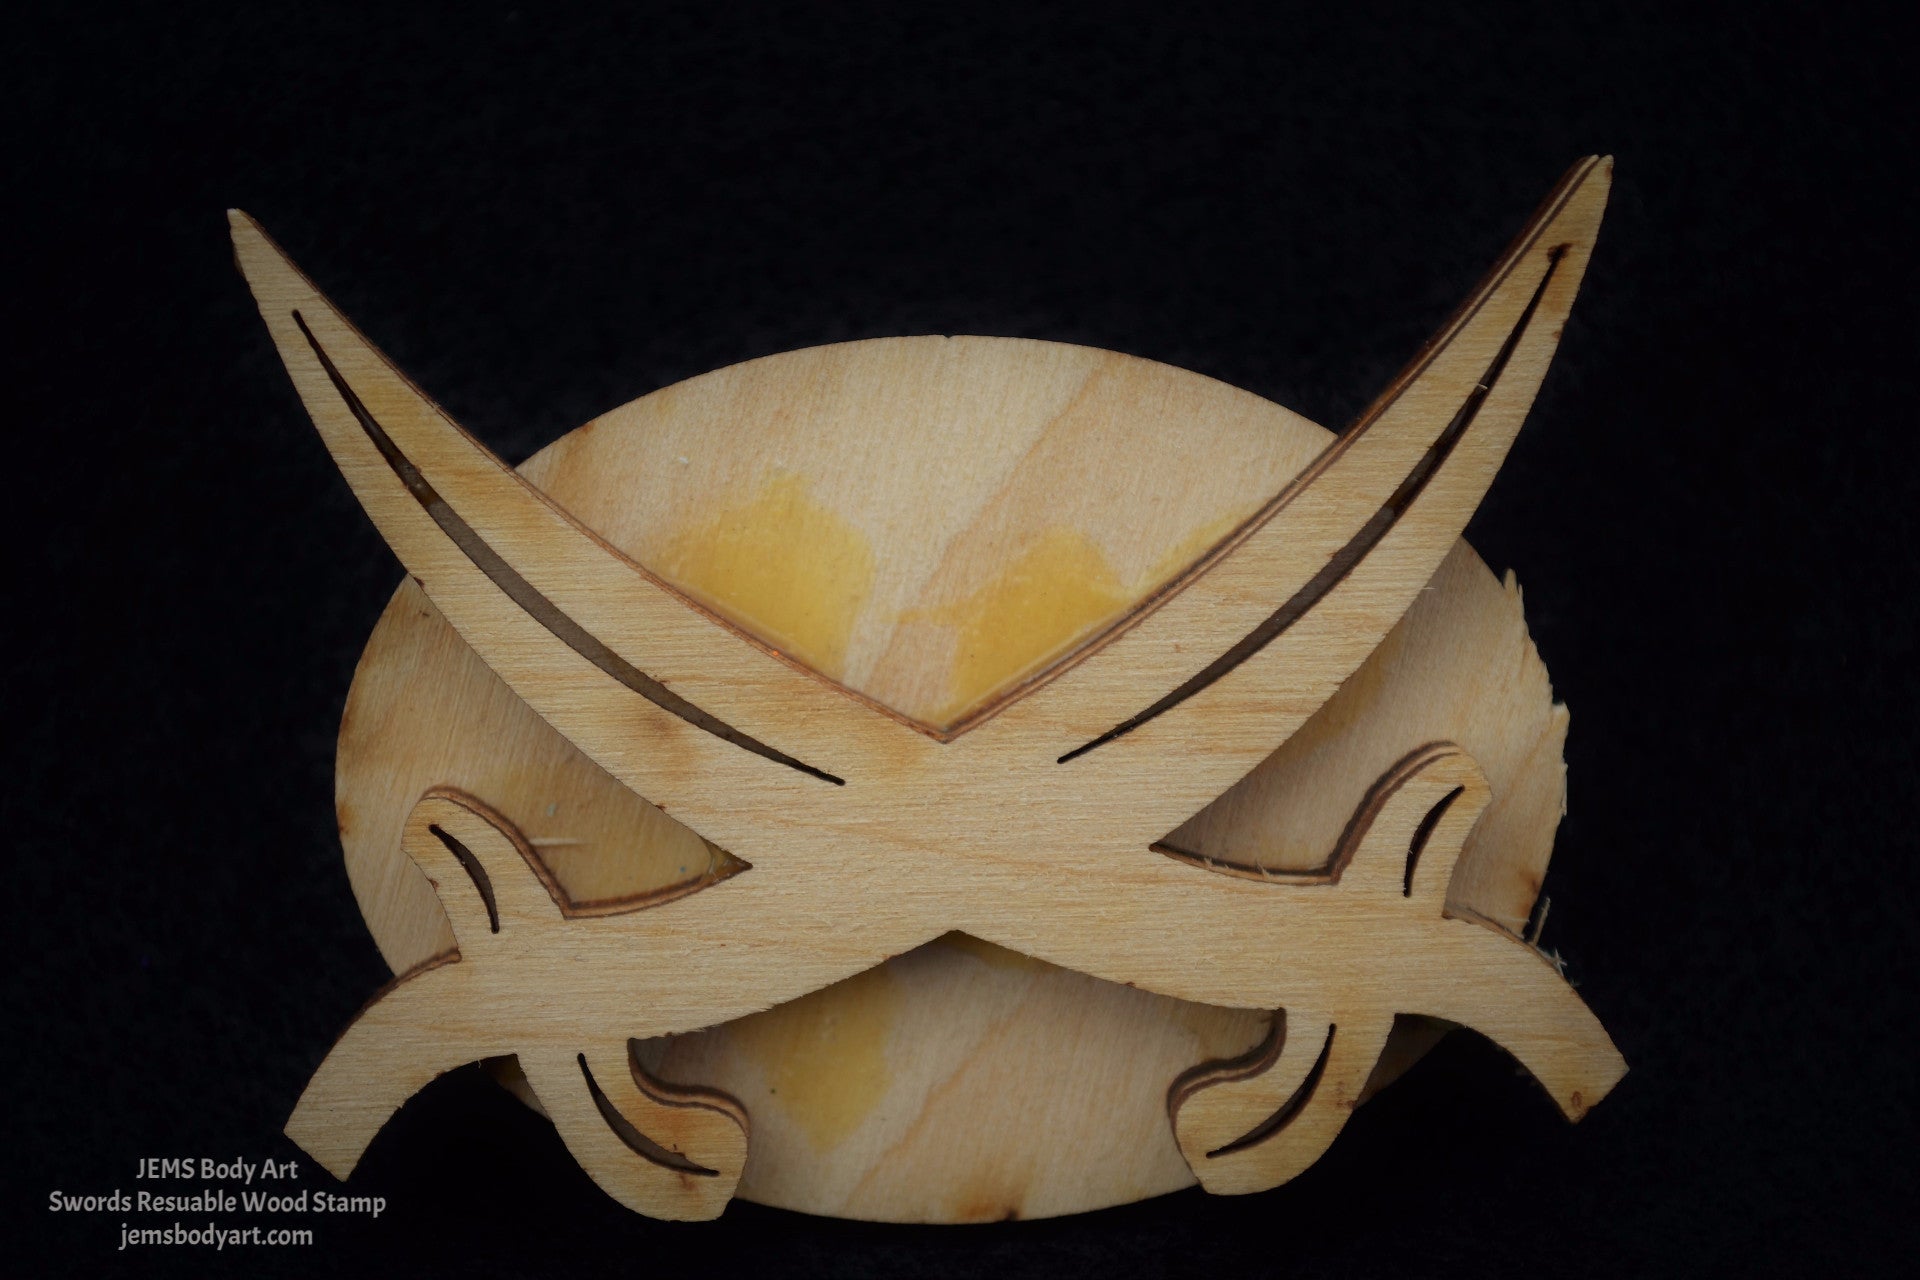
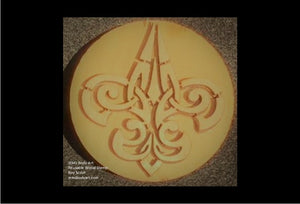
Swords
$4.95
-
Size: 3.0" x 2.25"
Features: Wooden stamp is designed for the sole purpose of applying adhesive to create glitter tattoos as directed by instructions provided with purchase. (NOTE: Actual stamp may have some slight variations from picture shown here.) -
Step 1: Clean the skin area with JEMS Skin Cleaner with a cotton ball.
Step 2: Dry the skin with JEMS Prep Compound by lightly dusting application area and brushing it with a soft bristle brush.
Step 3: Apply adhesive to the beveled edge of sponge brush and dab adhesive onto the desired body stamp. DO NOT brush adhesive onto the stamp, a bubble texture on the stamp is alright.
Step 4: Roll the stamp with adhesive onto prepared skin area. It is very important to use a simple rolling motion from one side to the other, allowing adhesive to dry clear.
Step 5: Once adhesive is clear, apply glitter using puff bottle. Gently move litter around the entire stamped area with the lollipop pad and press the glitter into the stamp pattern. Use soft makeup brush to remove excess glitter. You can save the excess glitter for a future rainbow body art.
Recommendations:
We suggest that body art only be placed on arms and lower legs, not on faces.
Do NOT let adhesive to freeze, it will turn solid.
To remove body art, gently rub with alcohol or baby oil.
To open bottles, press a pin into the top of the bottles. A smaller hole allows you to control the products best during the application process.
View full product details

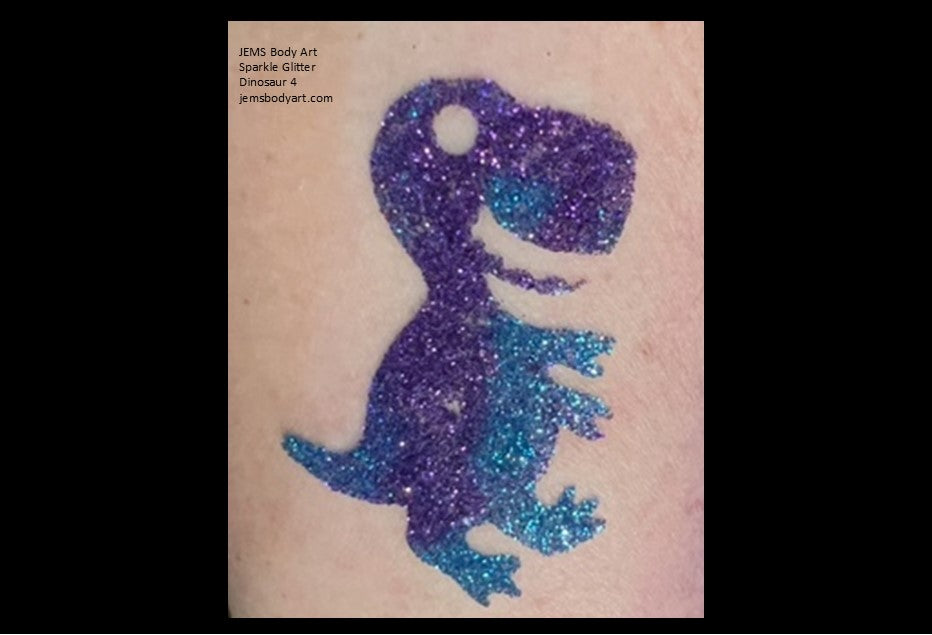
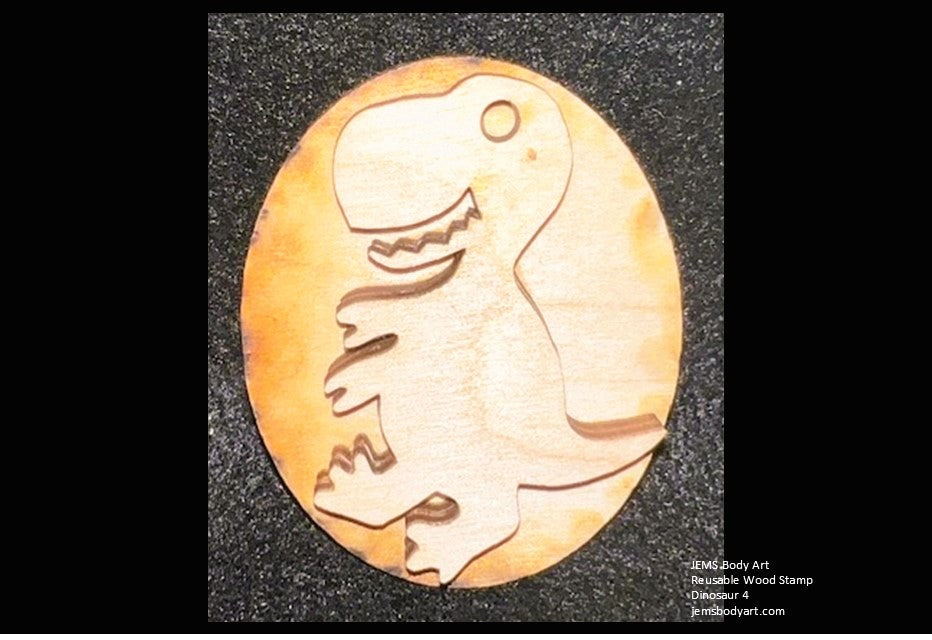
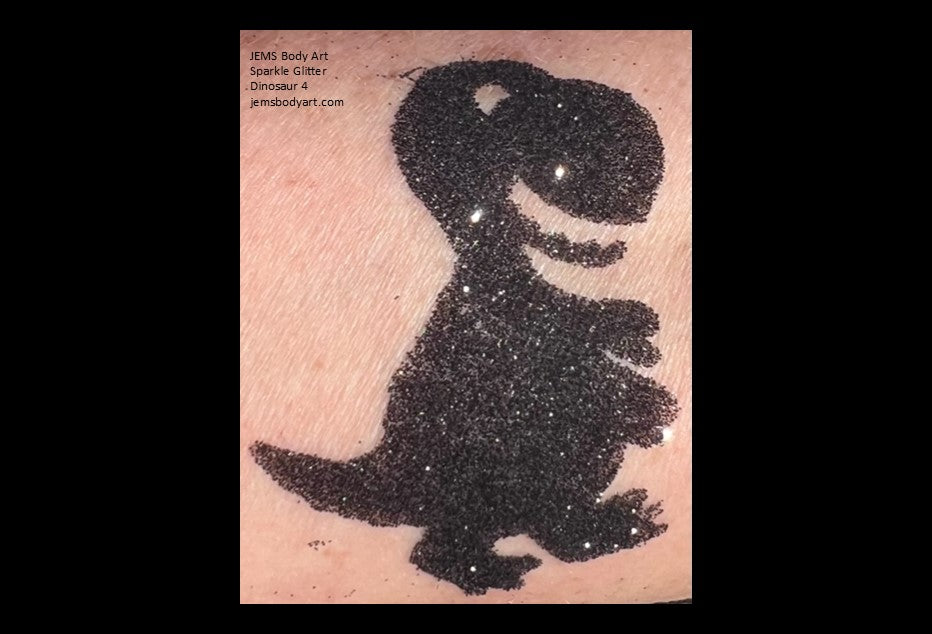

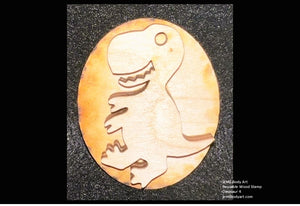
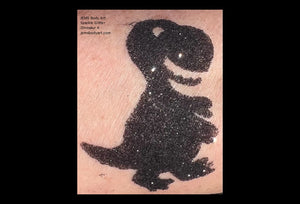
Dinosaur 4
$4.95
- Size: 2"Tall x 1.5"Wide
- Features: Wooden stamp is designed for the sole purpose of applying adhesive to create glitter tattoos as directed by instructions provided with purchase. (NOTE: Actual stamp may have some slight variations from picture shown here.)
-
Step 1: Clean the skin area with JEMS Skin Cleaner with a cotton ball.
Step 2: Dry the skin with JEMS Prep Compound by lightly dusting application area and brushing it with a soft bristle brush.
Step 3: Apply adhesive to the beveled edge of sponge brush and dab adhesive onto the desired body stamp. DO NOT brush adhesive onto the stamp, a bubble texture on the stamp is alright.
Step 4: Roll the stamp with adhesive onto prepared skin area. It is very important to use a simple rolling motion from one side to the other, allowing adhesive to dry clear.
Step 5: Once adhesive is clear, apply glitter using puff bottle. Gently move litter around the entire stamped area with the lollipop pad and press the glitter into the stamp pattern. Use soft makeup brush to remove excess glitter. You can save the excess glitter for a future rainbow body art.
Recommendations:
We suggest that body art only be placed on arms and lower legs, not on faces.
Do NOT let adhesive to freeze, it will turn solid.
To remove body art, gently rub with alcohol or baby oil.
To open bottles, press a pin into the top of the bottles. A smaller hole allows you to control the products best during the application process.
View full product details

T-Rex Dinosaur Head
$4.95
- Size: 2.25" x 2.5"
- Features: Wooden stamp is designed for the sole purpose of applying adhesive to create glitter tattoos as directed by instructions provided with purchase. (NOTE: Actual stamp may have some slight variations from picture shown here.)
-
Step 1: Clean the skin area with JEMS Skin Cleaner with a cotton ball.
Step 2: Dry the skin with JEMS Prep Compound by lightly dusting application area and brushing it with a soft bristle brush.
Step 3: Apply adhesive to the beveled edge of sponge brush and dab adhesive onto the desired body stamp. DO NOT brush adhesive onto the stamp, a bubble texture on the stamp is alright.
Step 4: Roll the stamp with adhesive onto prepared skin area. It is very important to use a simple rolling motion from one side to the other, allowing adhesive to dry clear.
Step 5: Once adhesive is clear, apply glitter using puff bottle. Gently move litter around the entire stamped area with the lollipop pad and press the glitter into the stamp pattern. Use soft makeup brush to remove excess glitter. You can save the excess glitter for a future rainbow body art.
Recommendations:
We suggest that body art only be placed on arms and lower legs, not on faces.
Do NOT let adhesive to freeze, it will turn solid.
To remove body art, gently rub with alcohol or baby oil.
To open bottles, press a pin into the top of the bottles. A smaller hole allows you to control the products best during the application process.
View full product details
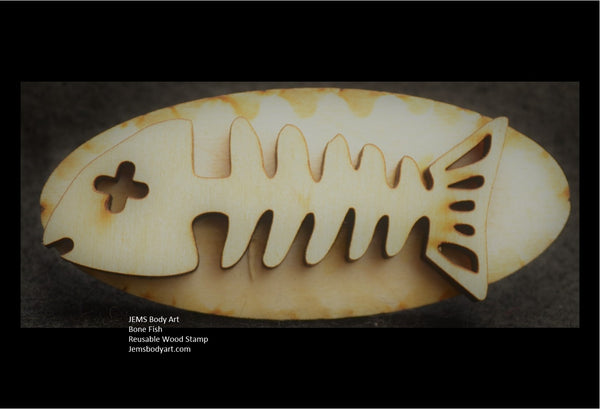
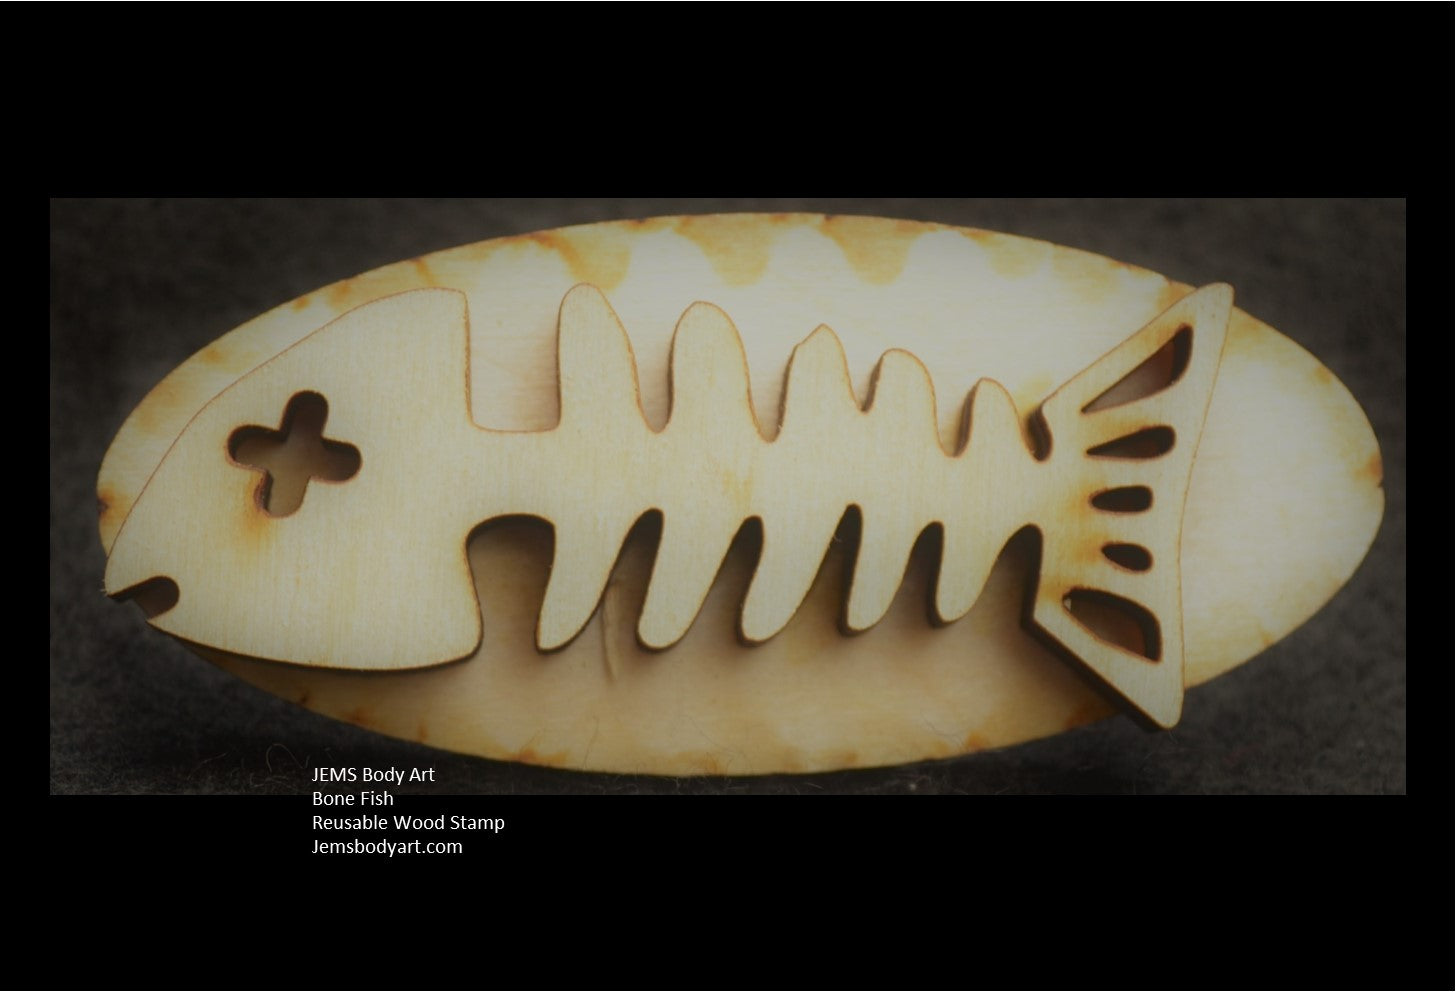
Bone Fish
$4.95
- Size: 1.5" x 3.0"
- Features: Wooden stamp is designed for the sole purpose of applying adhesive to create glitter tattoos as directed by instructions provided with purchase. (NOTE: Actual stamp may have some slight variations from picture shown here.)
-
Step 1: Clean the skin area with JEMS Skin Cleaner with a cotton ball.
Step 2: Dry the skin with JEMS Prep Compound by lightly dusting application area and brushing it with a soft bristle brush.
Step 3: Apply adhesive to the beveled edge of sponge brush and dab adhesive onto the desired body stamp. DO NOT brush adhesive onto the stamp, a bubble texture on the stamp is alright.
Step 4: Roll the stamp with adhesive onto prepared skin area. It is very important to use a simple rolling motion from one side to the other, allowing adhesive to dry clear.
Step 5: Once adhesive is clear, apply glitter using puff bottle. Gently move litter around the entire stamped area with the lollipop pad and press the glitter into the stamp pattern. Use soft makeup brush to remove excess glitter. You can save the excess glitter for a future rainbow body art.
Recommendations:
We suggest that body art only be placed on arms and lower legs, not on faces.
Do NOT let adhesive to freeze, it will turn solid.
To remove body art, gently rub with alcohol or baby oil.
To open bottles, press a pin into the top of the bottles. A smaller hole allows you to control the products best during the application process.
View full product details

Tribal Sword
$4.95
- Size: 2.75" x 2.5"
- Features: Wooden stamp is designed for the sole purpose of applying adhesive to create glitter tattoos as directed by instructions provided with purchase. (NOTE: Actual stamp may have some slight variations from picture shown here.)
-
Step 1: Clean the skin area with JEMS Skin Cleaner with a cotton ball.
Step 2: Dry the skin with JEMS Prep Compound by lightly dusting application area and brushing it with a soft bristle brush.
Step 3: Apply adhesive to the beveled edge of sponge brush and dab adhesive onto the desired body stamp. DO NOT brush adhesive onto the stamp, a bubble texture on the stamp is alright.
Step 4: Roll the stamp with adhesive onto prepared skin area. It is very important to use a simple rolling motion from one side to the other, allowing adhesive to dry clear.
Step 5: Once adhesive is clear, apply glitter using puff bottle. Gently move litter around the entire stamped area with the lollipop pad and press the glitter into the stamp pattern. Use soft makeup brush to remove excess glitter. You can save the excess glitter for a future rainbow body art.
Recommendations:
We suggest that body art only be placed on arms and lower legs, not on faces.
Do NOT let adhesive to freeze, it will turn solid.
To remove body art, gently rub with alcohol or baby oil.
To open bottles, press a pin into the top of the bottles. A smaller hole allows you to control the products best during the application process.
View full product details
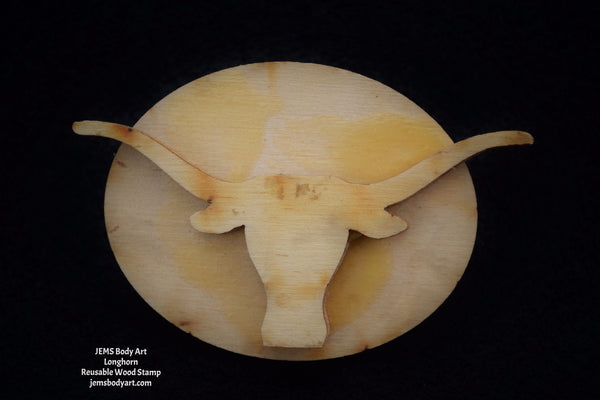
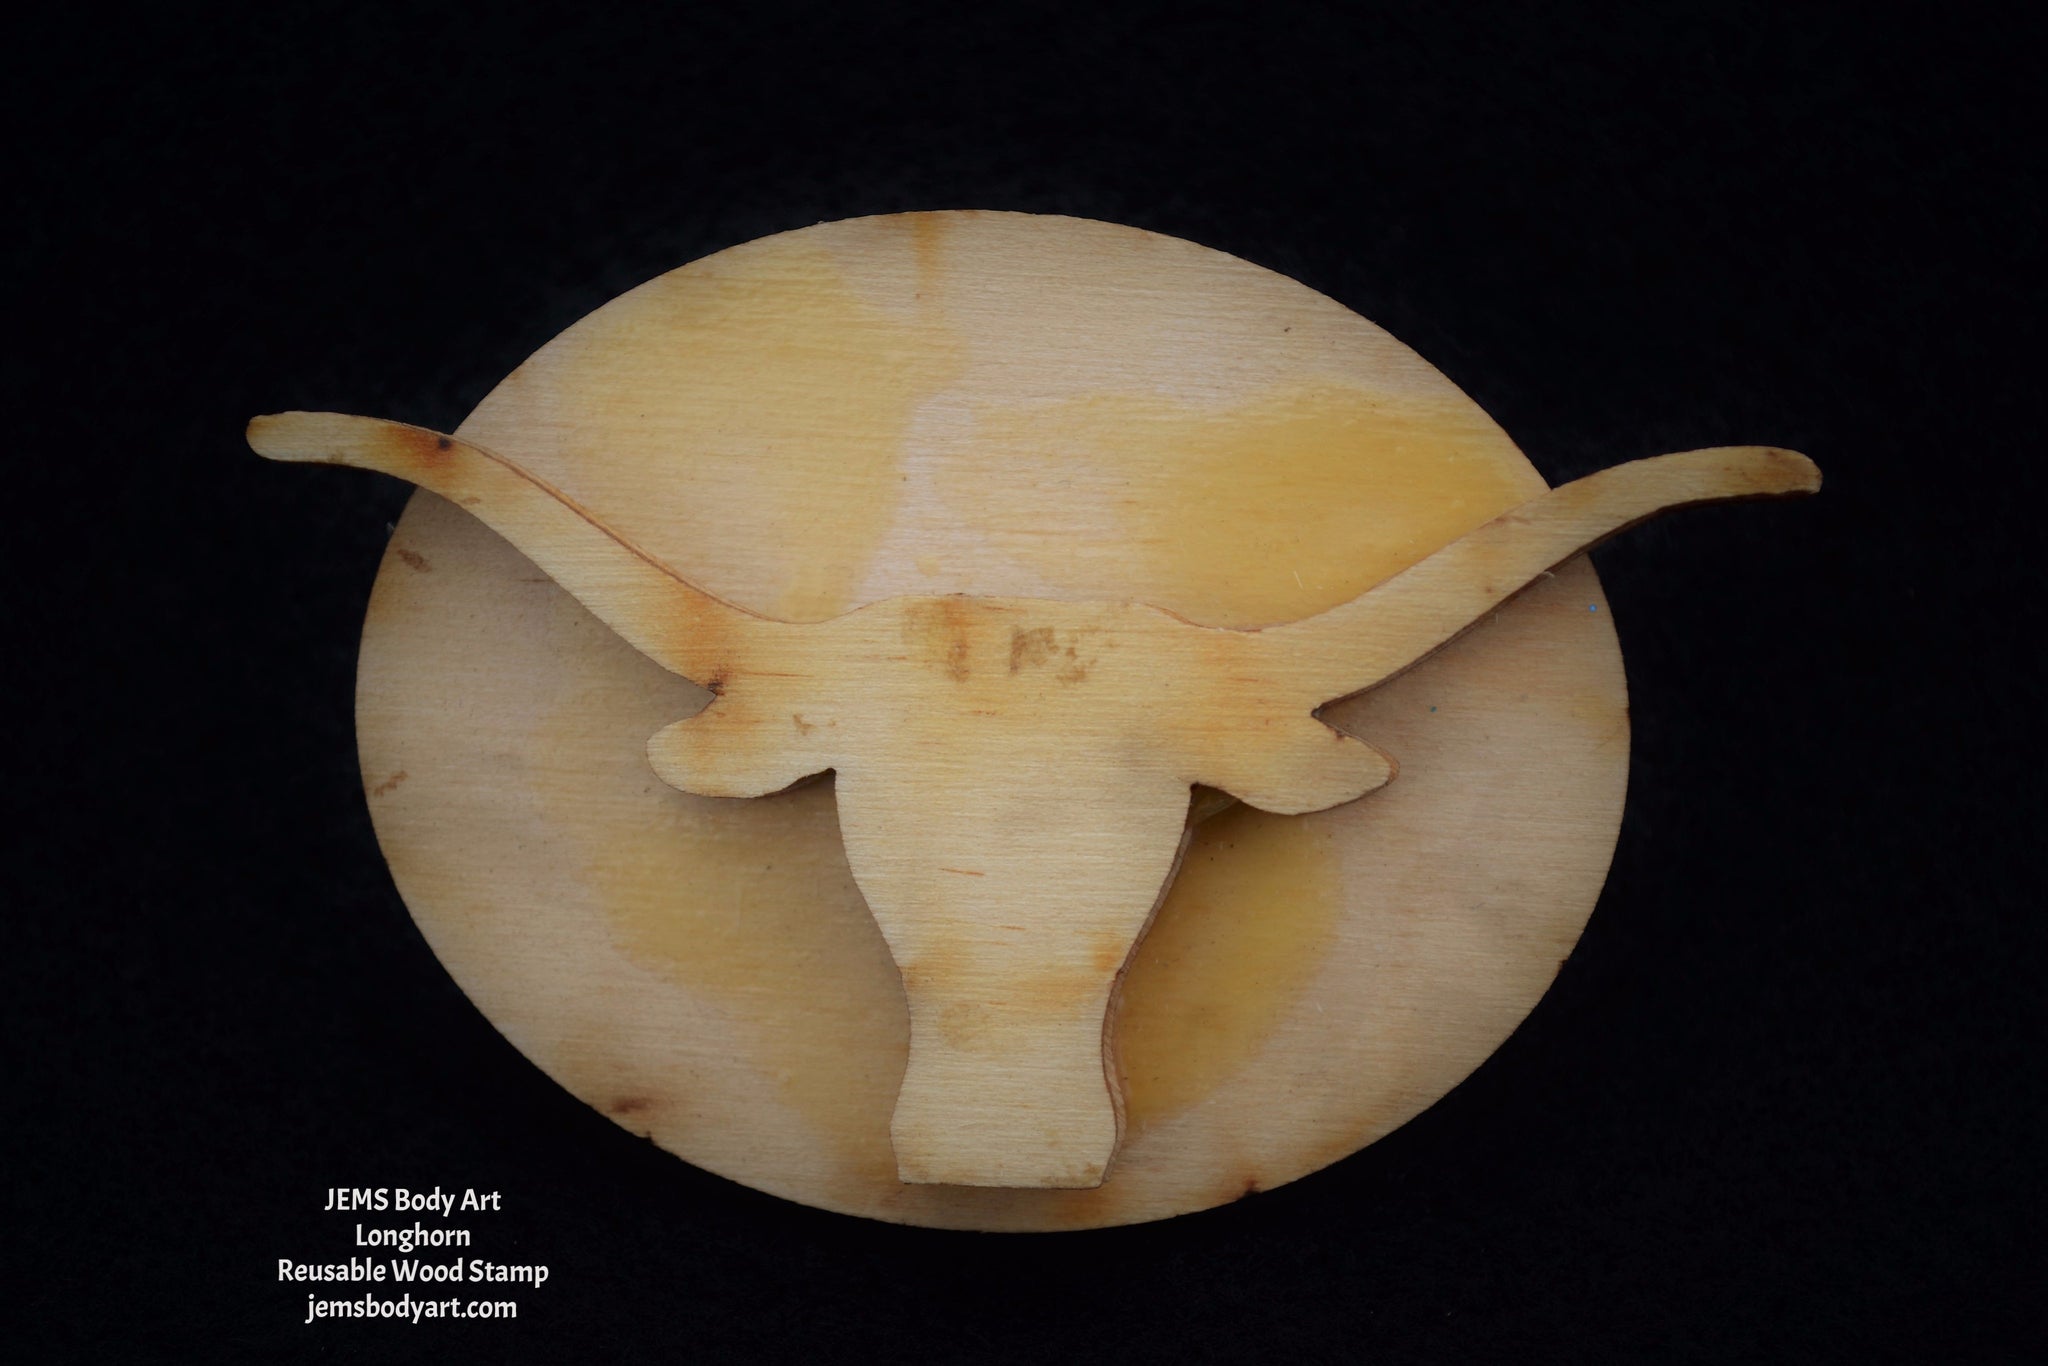
Longhorn
$4.95
-
Size: 3.0" x 1.5"
Features: Wooden stamp is designed for the sole purpose of applying adhesive to create glitter tattoos as directed by instructions provided with purchase. (NOTE: Actual stamp may have some slight variations from picture shown here.) -
Step 1: Clean the skin area with JEMS Skin Cleaner with a cotton ball.
Step 2: Dry the skin with JEMS Prep Compound by lightly dusting application area and brushing it with a soft bristle brush.
Step 3: Apply adhesive to the beveled edge of sponge brush and dab adhesive onto the desired body stamp. DO NOT brush adhesive onto the stamp, a bubble texture on the stamp is alright.
Step 4: Roll the stamp with adhesive onto prepared skin area. It is very important to use a simple rolling motion from one side to the other, allowing adhesive to dry clear.
Step 5: Once adhesive is clear, apply glitter using puff bottle. Gently move litter around the entire stamped area with the lollipop pad and press the glitter into the stamp pattern. Use soft makeup brush to remove excess glitter. You can save the excess glitter for a future rainbow body art.
Recommendations:
We suggest that body art only be placed on arms and lower legs, not on faces.
Do NOT let adhesive to freeze, it will turn solid.
To remove body art, gently rub with alcohol or baby oil.
To open bottles, press a pin into the top of the bottles. A smaller hole allows you to control the products best during the application process.
View full product details


Mickey
$4.95
-
Size: 2.75" x 2.0"
Features: Wooden stamp is designed for the sole purpose of applying adhesive to create glitter tattoos as directed by instructions provided with purchase. (NOTE: Actual stamp may have some slight variations from picture shown here.) -
Step 1: Clean the skin area with JEMS Skin Cleaner with a cotton ball.
Step 2: Dry the skin with JEMS Prep Compound by lightly dusting application area and brushing it with a soft bristle brush.
Step 3: Apply adhesive to the beveled edge of sponge brush and dab adhesive onto the desired body stamp. DO NOT brush adhesive onto the stamp, a bubble texture on the stamp is alright.
Step 4: Roll the stamp with adhesive onto prepared skin area. It is very important to use a simple rolling motion from one side to the other, allowing adhesive to dry clear.
Step 5: Once adhesive is clear, apply glitter using puff bottle. Gently move litter around the entire stamped area with the lollipop pad and press the glitter into the stamp pattern. Use soft makeup brush to remove excess glitter. You can save the excess glitter for a future rainbow body art.
Recommendations:
We suggest that body art only be placed on arms and lower legs, not on faces.
Do NOT let adhesive to freeze, it will turn solid.
To remove body art, gently rub with alcohol or baby oil.
To open bottles, press a pin into the top of the bottles. A smaller hole allows you to control the products best during the application process.
View full product details


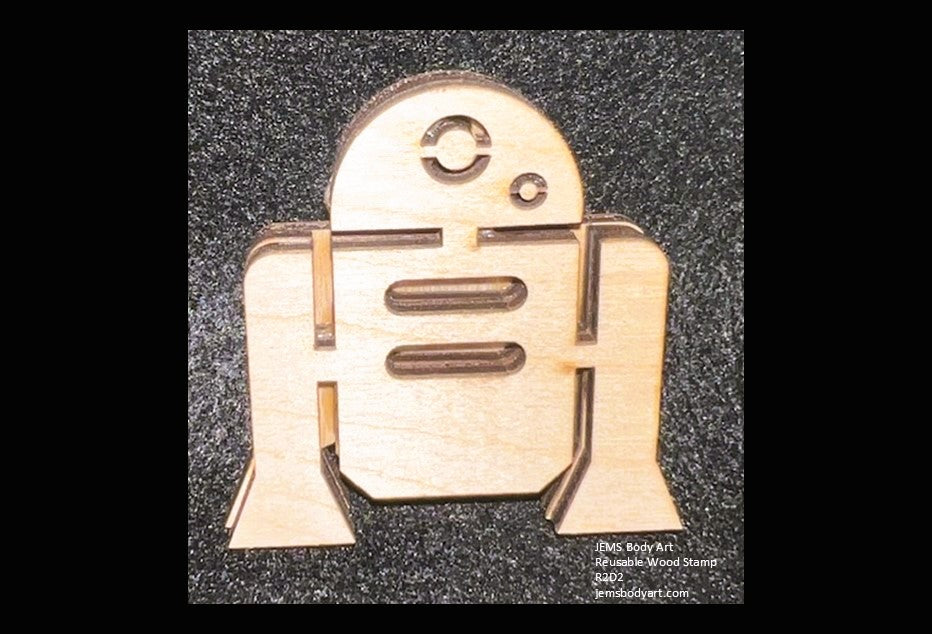
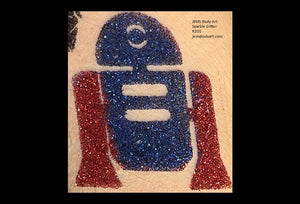
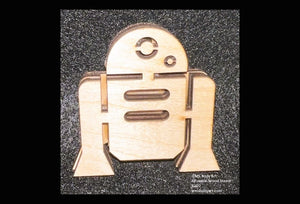
Droid
$4.95
- Size: 2"Tall x 2"Wide
- Features: Wooden stamp is designed for the sole purpose of applying adhesive to create glitter tattoos as directed by instructions provided with purchase. (NOTE: Actual stamp may have some slight variations from picture shown here.)
-
Step 1: Clean the skin area with JEMS Skin Cleaner with a cotton ball.
Step 2: Dry the skin with JEMS Prep Compound by lightly dusting application area and brushing it with a soft bristle brush.
Step 3: Apply adhesive to the beveled edge of sponge brush and dab adhesive onto the desired body stamp. DO NOT brush adhesive onto the stamp, a bubble texture on the stamp is alright.
Step 4: Roll the stamp with adhesive onto prepared skin area. It is very important to use a simple rolling motion from one side to the other, allowing adhesive to dry clear.
Step 5: Once adhesive is clear, apply glitter using puff bottle. Gently move litter around the entire stamped area with the lollipop pad and press the glitter into the stamp pattern. Use soft makeup brush to remove excess glitter. You can save the excess glitter for a future rainbow body art.
Recommendations:
We suggest that body art only be placed on arms and lower legs, not on faces.
Do NOT let adhesive to freeze, it will turn solid.
To remove body art, gently rub with alcohol or baby oil.
To open bottles, press a pin into the top of the bottles. A smaller hole allows you to control the products best during the application process.
View full product details


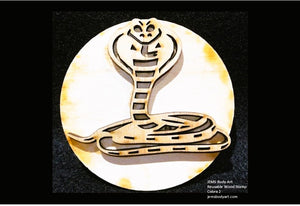
Cobra 2
$4.95
- Size: 2.5"Tall x 3"Wide
- Features: Wooden stamp is designed for the sole purpose of applying adhesive to create glitter tattoos as directed by instructions provided with purchase. (NOTE: Actual stamp may have some slight variations from picture shown here.)
-
Step 1: Clean the skin area with JEMS Skin Cleaner with a cotton ball.
Step 2: Dry the skin with JEMS Prep Compound by lightly dusting application area and brushing it with a soft bristle brush.
Step 3: Apply adhesive to the beveled edge of sponge brush and dab adhesive onto the desired body stamp. DO NOT brush adhesive onto the stamp, a bubble texture on the stamp is alright.
Step 4: Roll the stamp with adhesive onto prepared skin area. It is very important to use a simple rolling motion from one side to the other, allowing adhesive to dry clear.
Step 5: Once adhesive is clear, apply glitter using puff bottle. Gently move litter around the entire stamped area with the lollipop pad and press the glitter into the stamp pattern. Use soft makeup brush to remove excess glitter. You can save the excess glitter for a future rainbow body art.
Recommendations:
We suggest that body art only be placed on arms and lower legs, not on faces.
Do NOT let adhesive to freeze, it will turn solid.
To remove body art, gently rub with alcohol or baby oil.
To open bottles, press a pin into the top of the bottles. A smaller hole allows you to control the products best during the application process.
View full product details
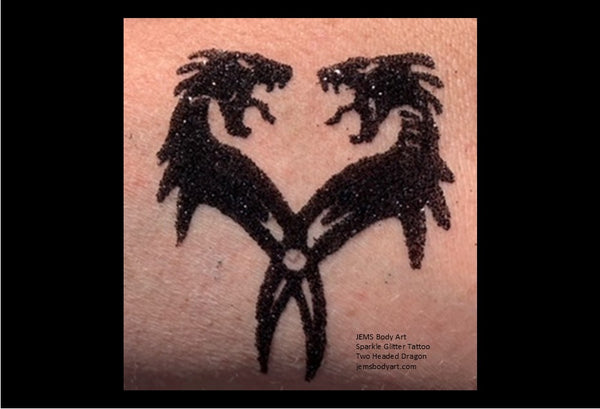

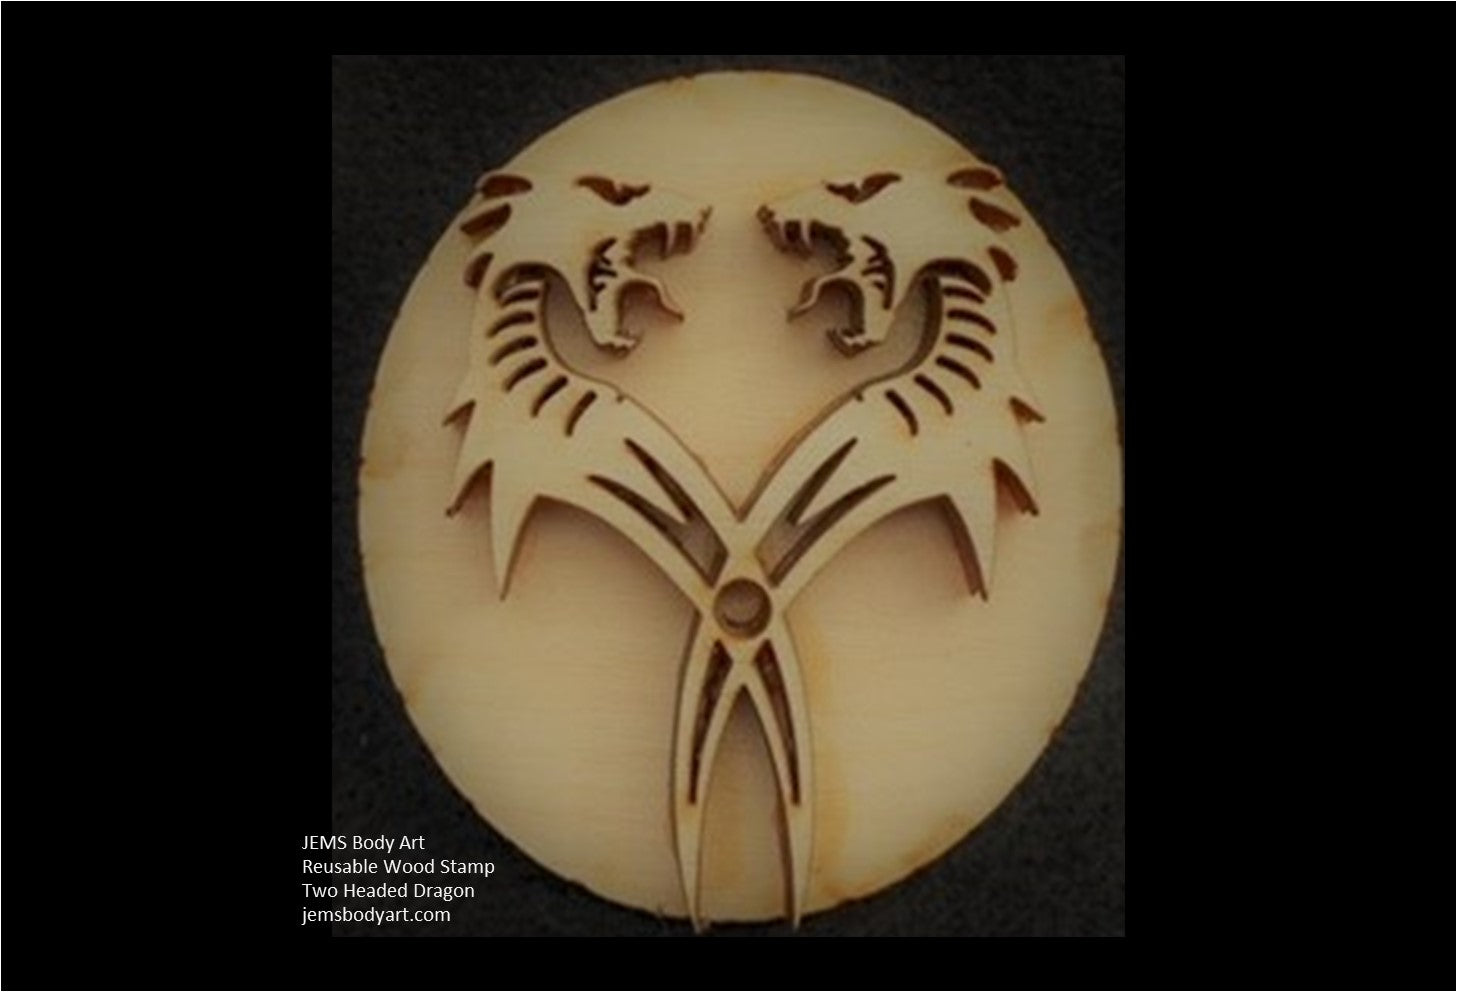
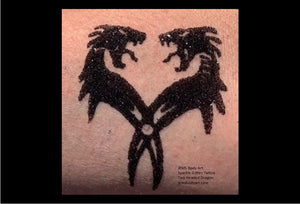
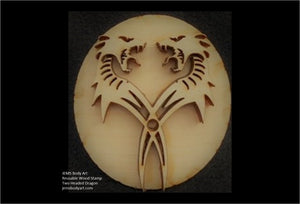
Two Headed Dragon
$4.95
- Size: 2.25" tall x 2.0" wide
- Features: Wooden stamp is designed for the sole purpose of applying adhesive to create glitter tattoos as directed by instructions provided with purchase. (NOTE: Actual stamp may have some slight variations from picture shown here.)
-
Step 1: Clean the skin area with JEMS Skin Cleaner with a cotton ball.
Step 2: Dry the skin with JEMS Prep Compound by lightly dusting application area and brushing it with a soft bristle brush.
Step 3: Apply adhesive to the beveled edge of sponge brush and dab adhesive onto the desired body stamp. DO NOT brush adhesive onto the stamp, a bubble texture on the stamp is alright.
Step 4: Roll the stamp with adhesive onto prepared skin area. It is very important to use a simple rolling motion from one side to the other, allowing adhesive to dry clear.
Step 5: Once adhesive is clear, apply glitter using puff bottle. Gently move litter around the entire stamped area with the lollipop pad and press the glitter into the stamp pattern. Use soft makeup brush to remove excess glitter. You can save the excess glitter for a future rainbow body art.
Recommendations:
We suggest that body art only be placed on arms and lower legs, not on faces.
Do NOT let adhesive to freeze, it will turn solid.
To remove body art, gently rub with alcohol or baby oil.
To open bottles, press a pin into the top of the bottles. A smaller hole allows you to control the products best during the application process.
View full product details


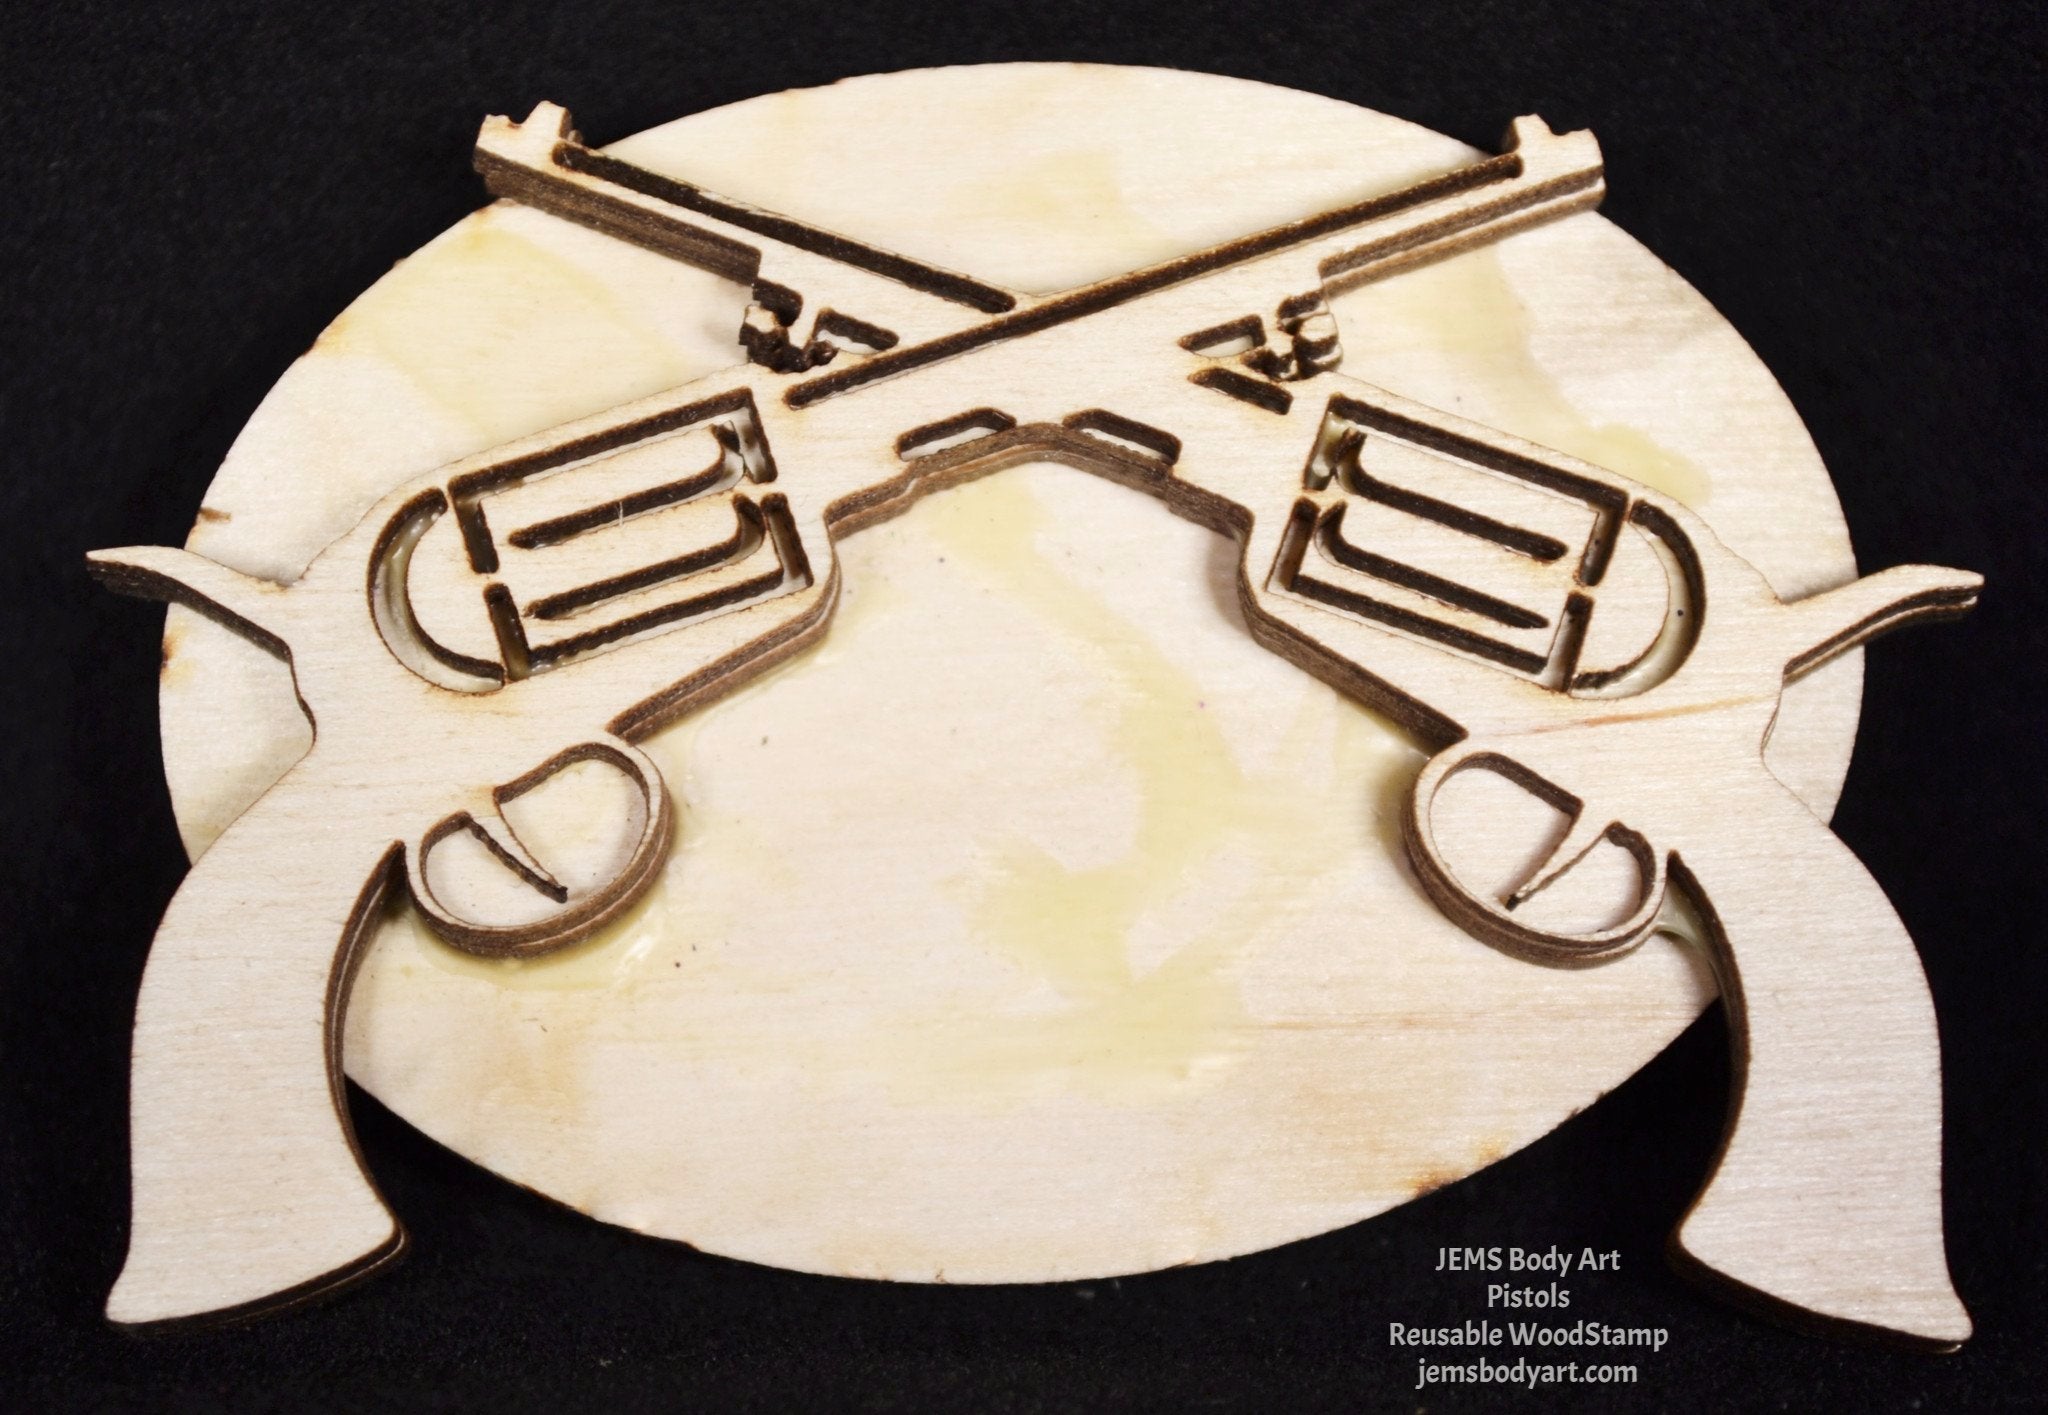
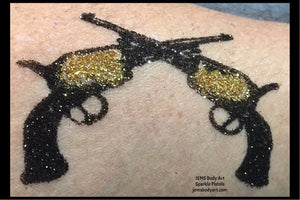

Pistols
$4.95
-
Size: 3.0" x 2.0"
Features: Wooden stamp is designed for the sole purpose of applying adhesive to create glitter tattoos as directed by instructions provided with purchase. (NOTE: Actual stamp may have some slight variations from picture shown here.) -
Step 1: Clean the skin area with JEMS Skin Cleaner with a cotton ball.
Step 2: Dry the skin with JEMS Prep Compound by lightly dusting application area and brushing it with a soft bristle brush.
Step 3: Apply adhesive to the beveled edge of sponge brush and dab adhesive onto the desired body stamp. DO NOT brush adhesive onto the stamp, a bubble texture on the stamp is alright.
Step 4: Roll the stamp with adhesive onto prepared skin area. It is very important to use a simple rolling motion from one side to the other, allowing adhesive to dry clear.
Step 5: Once adhesive is clear, apply glitter using puff bottle. Gently move litter around the entire stamped area with the lollipop pad and press the glitter into the stamp pattern. Use soft makeup brush to remove excess glitter. You can save the excess glitter for a future rainbow body art.
Recommendations:
We suggest that body art only be placed on arms and lower legs, not on faces.
Do NOT let adhesive to freeze, it will turn solid.
To remove body art, gently rub with alcohol or baby oil.
To open bottles, press a pin into the top of the bottles. A smaller hole allows you to control the products best during the application process.
View full product details


Mandalorian Helmet
$4.95
- Size: 2"Tall x 2.5"Wide
- Features: Wooden stamp is designed for the sole purpose of applying adhesive to create glitter tattoos as directed by instructions provided with purchase. (NOTE: Actual stamp may have some slight variations from picture shown here.)
-
Step 1: Clean the skin area with JEMS Skin Cleaner with a cotton ball.
Step 2: Dry the skin with JEMS Prep Compound by lightly dusting application area and brushing it with a soft bristle brush.
Step 3: Apply adhesive to the beveled edge of sponge brush and dab adhesive onto the desired body stamp. DO NOT brush adhesive onto the stamp, a bubble texture on the stamp is alright.
Step 4: Roll the stamp with adhesive onto prepared skin area. It is very important to use a simple rolling motion from one side to the other, allowing adhesive to dry clear.
Step 5: Once adhesive is clear, apply glitter using puff bottle. Gently move litter around the entire stamped area with the lollipop pad and press the glitter into the stamp pattern. Use soft makeup brush to remove excess glitter. You can save the excess glitter for a future rainbow body art.
Recommendations:
We suggest that body art only be placed on arms and lower legs, not on faces.
Do NOT let adhesive to freeze, it will turn solid.
To remove body art, gently rub with alcohol or baby oil.
To open bottles, press a pin into the top of the bottles. A smaller hole allows you to control the products best during the application process.
View full product details

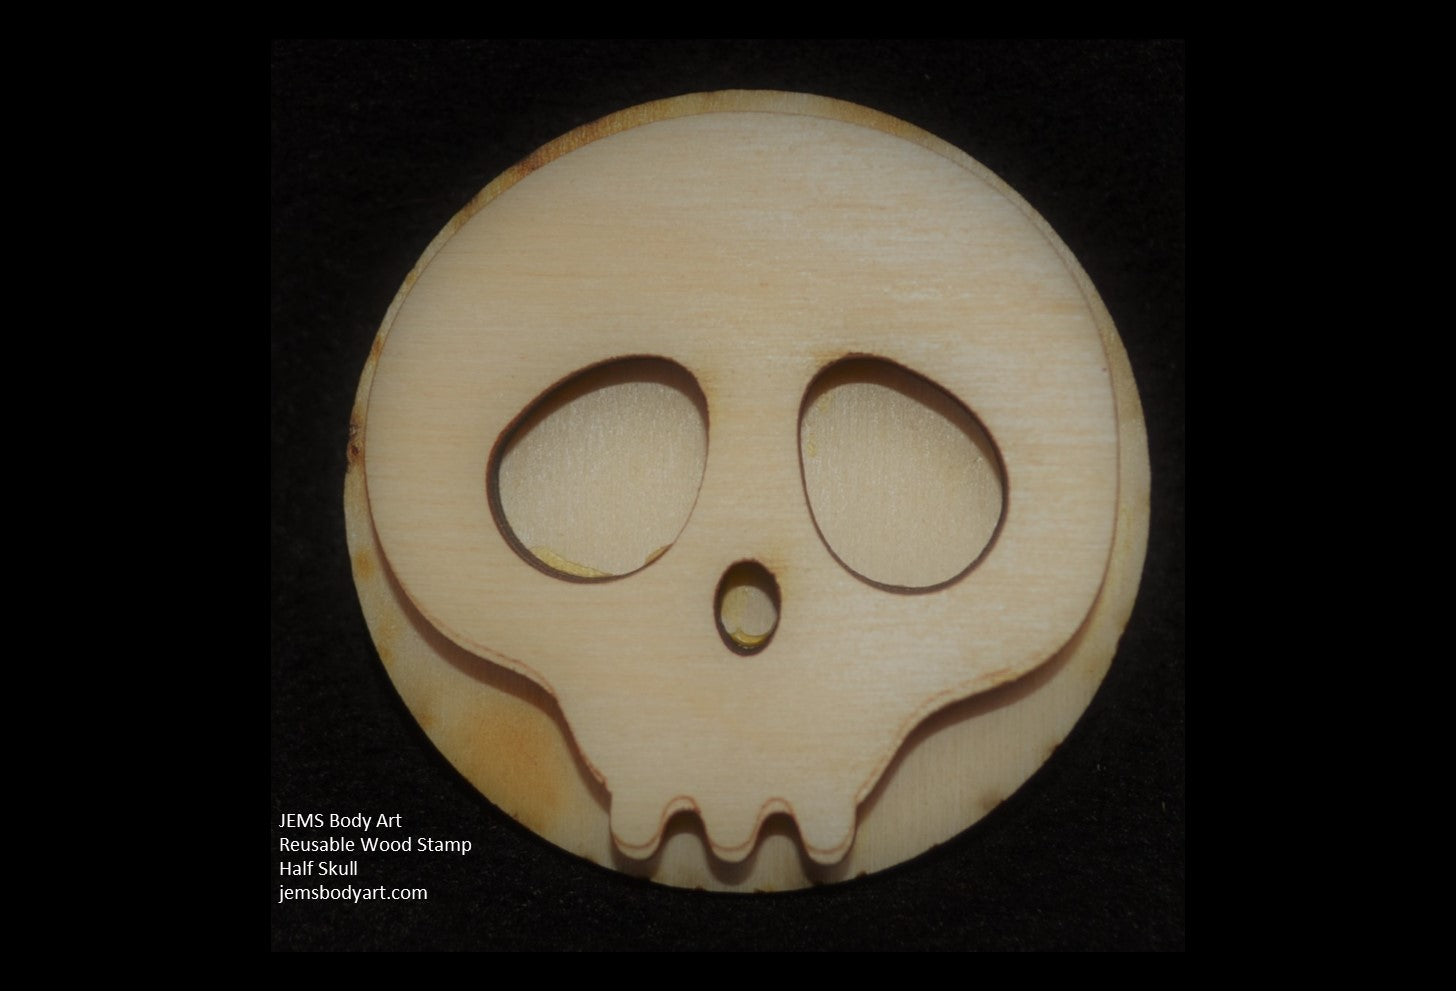

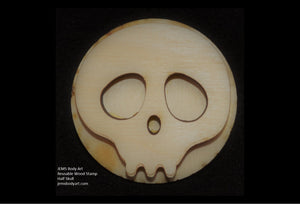
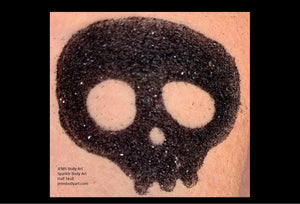
Half Skull
$4.95
- Size: 2" Round
- Features: Wooden stamp is designed for the sole purpose of applying adhesive to create glitter tattoos as directed by instructions provided with purchase. (NOTE: Actual stamp may have some slight variations from picture shown here.)
-
Step 1: Clean the skin area with JEMS Skin Cleaner with a cotton ball.
Step 2: Dry the skin with JEMS Prep Compound by lightly dusting application area and brushing it with a soft bristle brush.
Step 3: Apply adhesive to the beveled edge of sponge brush and dab adhesive onto the desired body stamp. DO NOT brush adhesive onto the stamp, a bubble texture on the stamp is alright.
Step 4: Roll the stamp with adhesive onto prepared skin area. It is very important to use a simple rolling motion from one side to the other, allowing adhesive to dry clear.
Step 5: Once adhesive is clear, apply glitter using puff bottle. Gently move litter around the entire stamped area with the lollipop pad and press the glitter into the stamp pattern. Use soft makeup brush to remove excess glitter. You can save the excess glitter for a future rainbow body art.
Recommendations:
We suggest that body art only be placed on arms and lower legs, not on faces.
Do NOT let adhesive to freeze, it will turn solid.
To remove body art, gently rub with alcohol or baby oil.
To open bottles, press a pin into the top of the bottles. A smaller hole allows you to control the products best during the application process.
View full product details


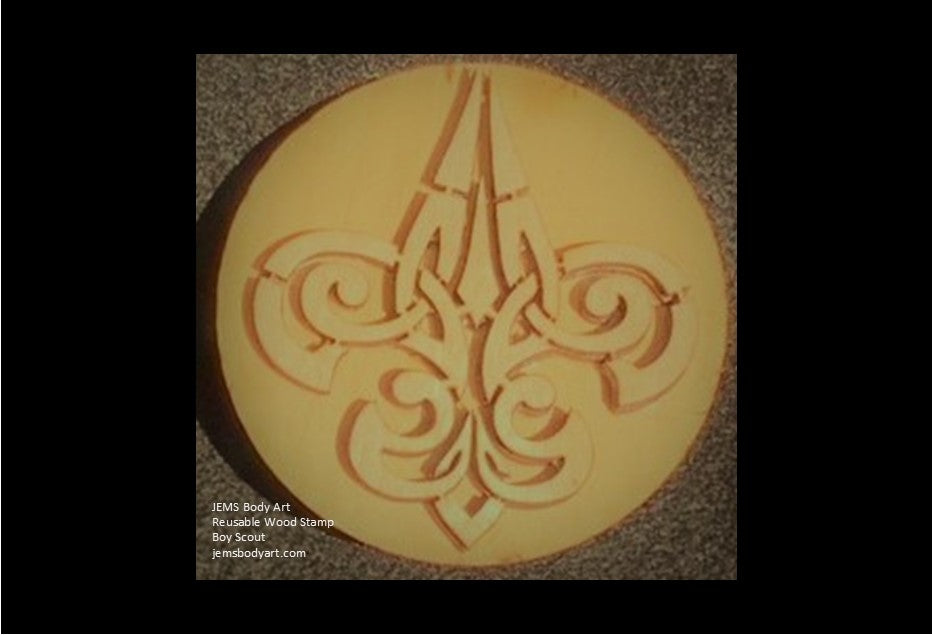
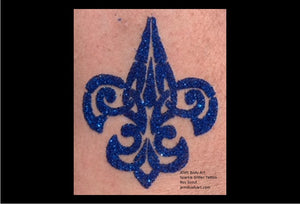
Boy Scout
$4.95
- Size: 2.5" tall x 2.25" wide
- Features: Wooden stamp is designed for the sole purpose of applying adhesive to create glitter tattoos as directed by instructions provided with purchase. (NOTE: Actual stamp may have some slight variations from picture shown here.)
-
Step 1: Clean the skin area with JEMS Skin Cleaner with a cotton ball.
Step 2: Dry the skin with JEMS Prep Compound by lightly dusting application area and brushing it with a soft bristle brush.
Step 3: Apply adhesive to the beveled edge of sponge brush and dab adhesive onto the desired body stamp. DO NOT brush adhesive onto the stamp, a bubble texture on the stamp is alright.
Step 4: Roll the stamp with adhesive onto prepared skin area. It is very important to use a simple rolling motion from one side to the other, allowing adhesive to dry clear.
Step 5: Once adhesive is clear, apply glitter using puff bottle. Gently move litter around the entire stamped area with the lollipop pad and press the glitter into the stamp pattern. Use soft makeup brush to remove excess glitter. You can save the excess glitter for a future rainbow body art.
Recommendations:
We suggest that body art only be placed on arms and lower legs, not on faces.
Do NOT let adhesive to freeze, it will turn solid.
To remove body art, gently rub with alcohol or baby oil.
To open bottles, press a pin into the top of the bottles. A smaller hole allows you to control the products best during the application process.
View full product details
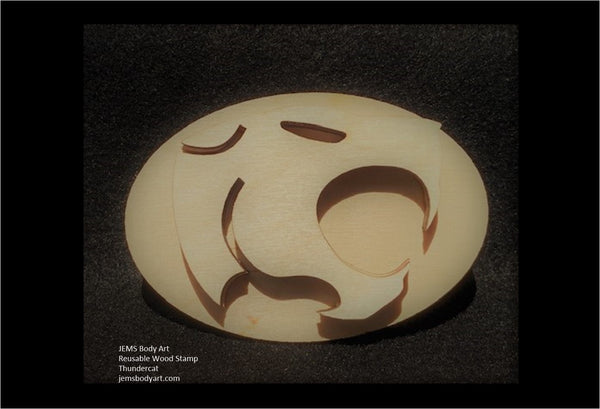

Thundercat
$4.95
- Size: 1.5" tall x 2.0" wide
- Features: Wooden stamp is designed for the sole purpose of applying adhesive to create glitter tattoos as directed by instructions provided with purchase. (NOTE: Actual stamp may have some slight variations from picture shown here.)
-
Step 1: Clean the skin area with JEMS Skin Cleaner with a cotton ball.
Step 2: Dry the skin with JEMS Prep Compound by lightly dusting application area and brushing it with a soft bristle brush.
Step 3: Apply adhesive to the beveled edge of sponge brush and dab adhesive onto the desired body stamp. DO NOT brush adhesive onto the stamp, a bubble texture on the stamp is alright.
Step 4: Roll the stamp with adhesive onto prepared skin area. It is very important to use a simple rolling motion from one side to the other, allowing adhesive to dry clear.
Step 5: Once adhesive is clear, apply glitter using puff bottle. Gently move litter around the entire stamped area with the lollipop pad and press the glitter into the stamp pattern. Use soft makeup brush to remove excess glitter. You can save the excess glitter for a future rainbow body art.
Recommendations:
We suggest that body art only be placed on arms and lower legs, not on faces.
Do NOT let adhesive to freeze, it will turn solid.
To remove body art, gently rub with alcohol or baby oil.
To open bottles, press a pin into the top of the bottles. A smaller hole allows you to control the products best during the application process.
View full product details