


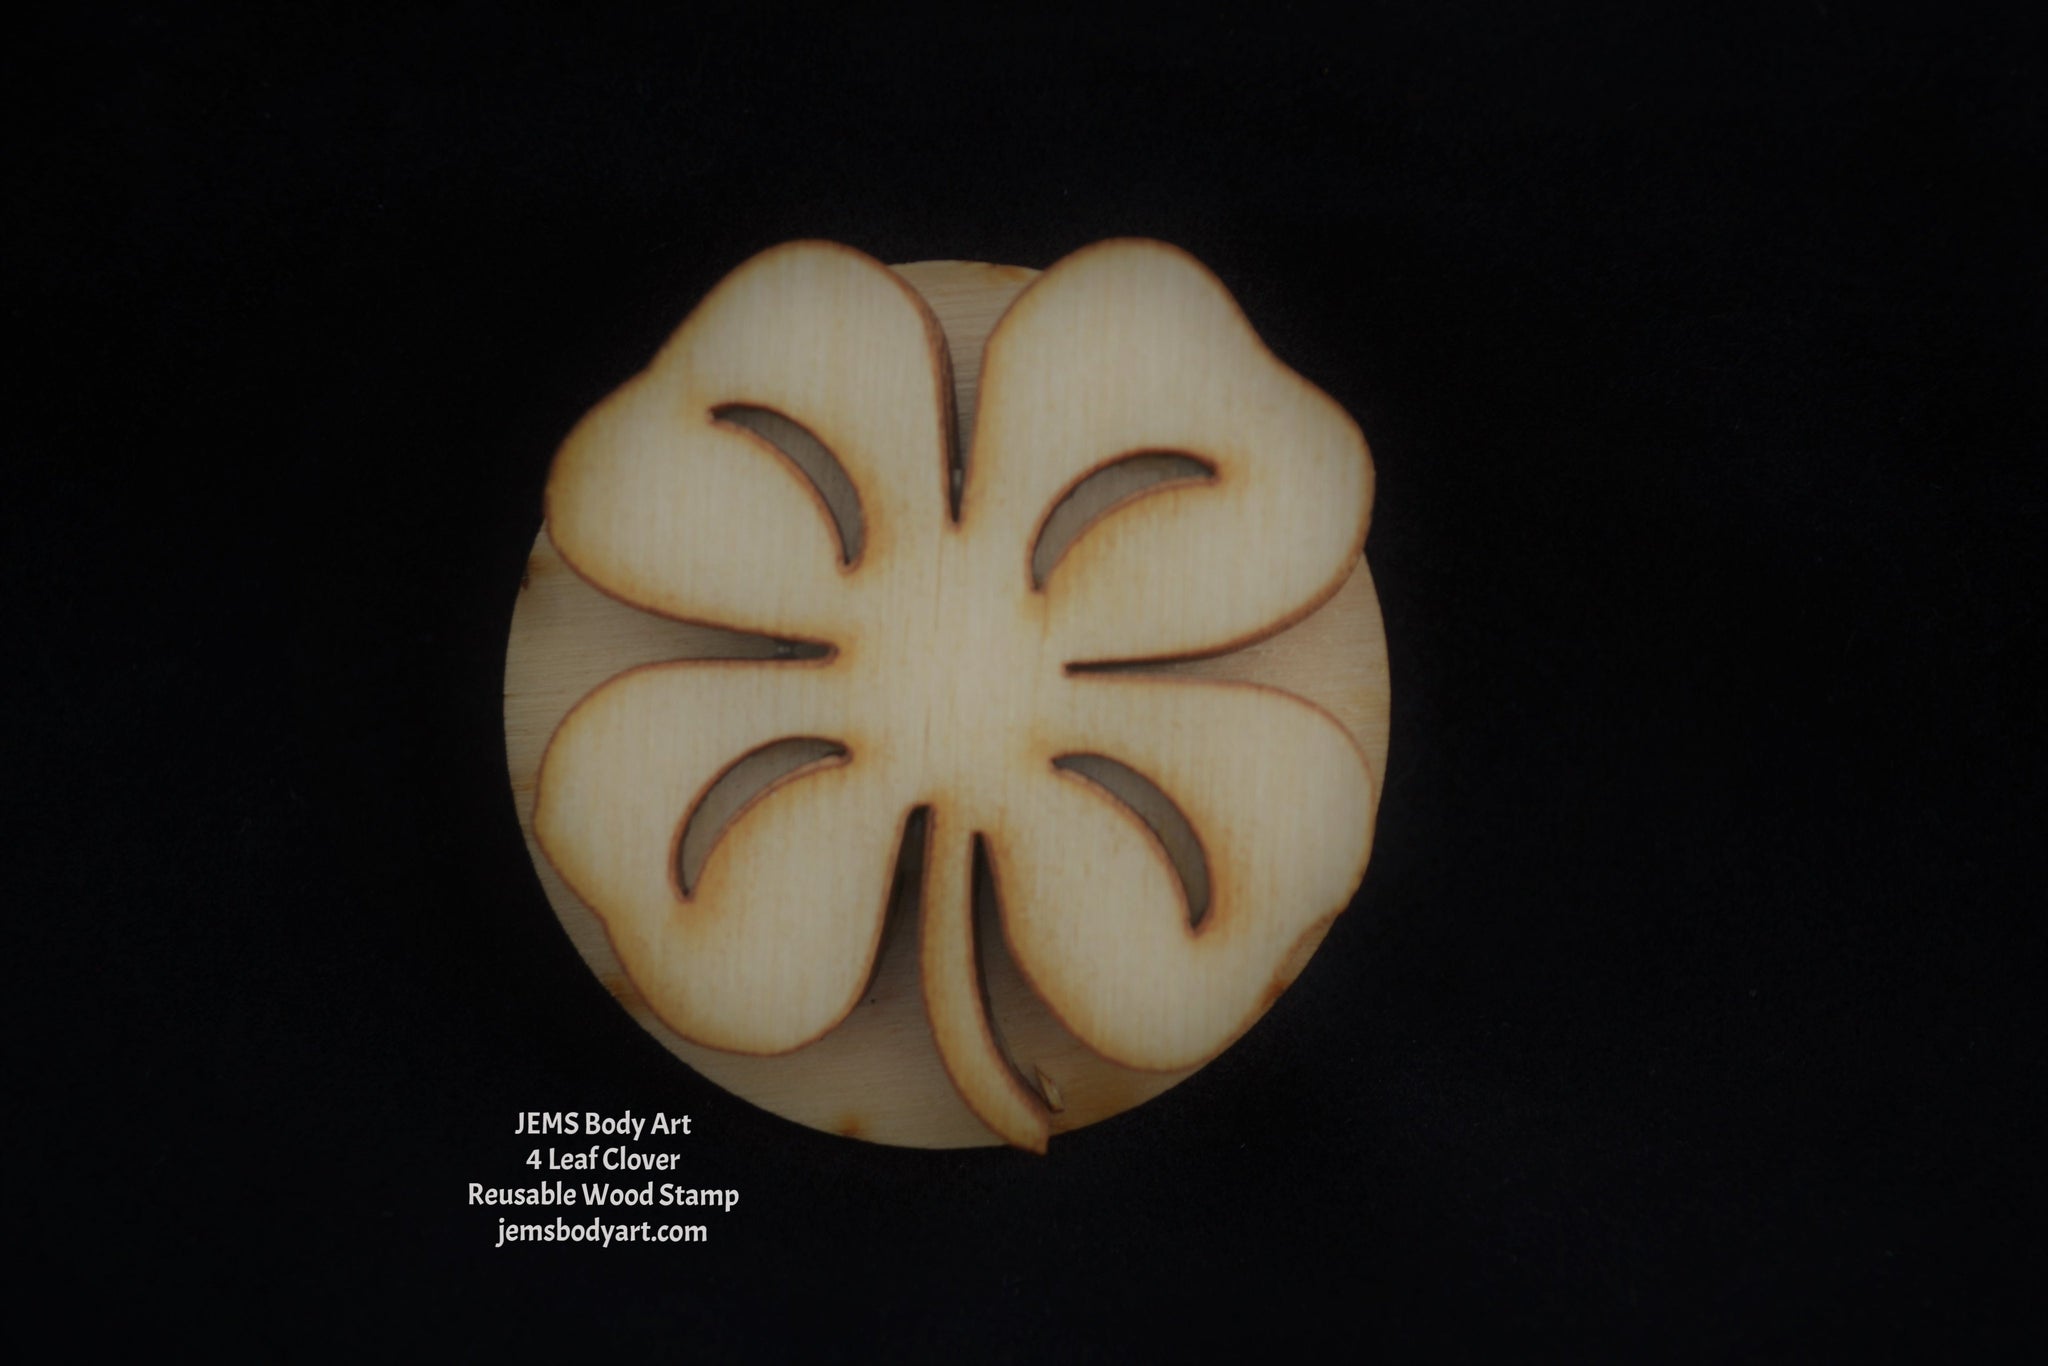
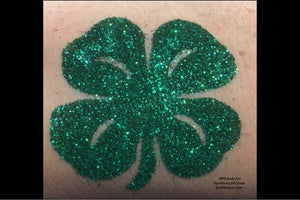
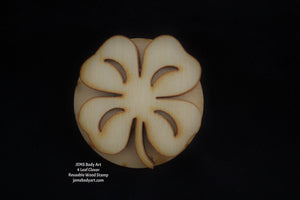
4-Leaf Clover
$4.95
-
Size: 2" round
Features: Wooden stamp is designed for the sole purpose of applying adhesive to create glitter tattoos as directed by instructions provided with purchase. (NOTE: Actual stamp may have some slight variations from picture shown here.) -
Step 1: Clean the skin area with JEMS Skin Cleaner with a cotton ball.
Step 2: Dry the skin with JEMS Prep Compound by lightly dusting application area and brushing it with a soft bristle brush.
Step 3: Apply adhesive to the beveled edge of sponge brush and dab adhesive onto the desired body stamp. DO NOT brush adhesive onto the stamp, a bubble texture on the stamp is alright.
Step 4: Roll the stamp with adhesive onto prepared skin area. It is very important to use a simple rolling motion from one side to the other, allowing adhesive to dry clear.
Step 5: Once adhesive is clear, apply glitter using puff bottle. Gently move litter around the entire stamped area with the lollipop pad and press the glitter into the stamp pattern. Use soft makeup brush to remove excess glitter. You can save the excess glitter for a future rainbow body art.
Recommendations:
We suggest that body art only be placed on arms and lower legs, not on faces.
Do NOT let adhesive to freeze, it will turn solid.
To remove body art, gently rub with alcohol or baby oil.
To open bottles, press a pin into the top of the bottles. A smaller hole allows you to control the products best during the application process.
View full product details

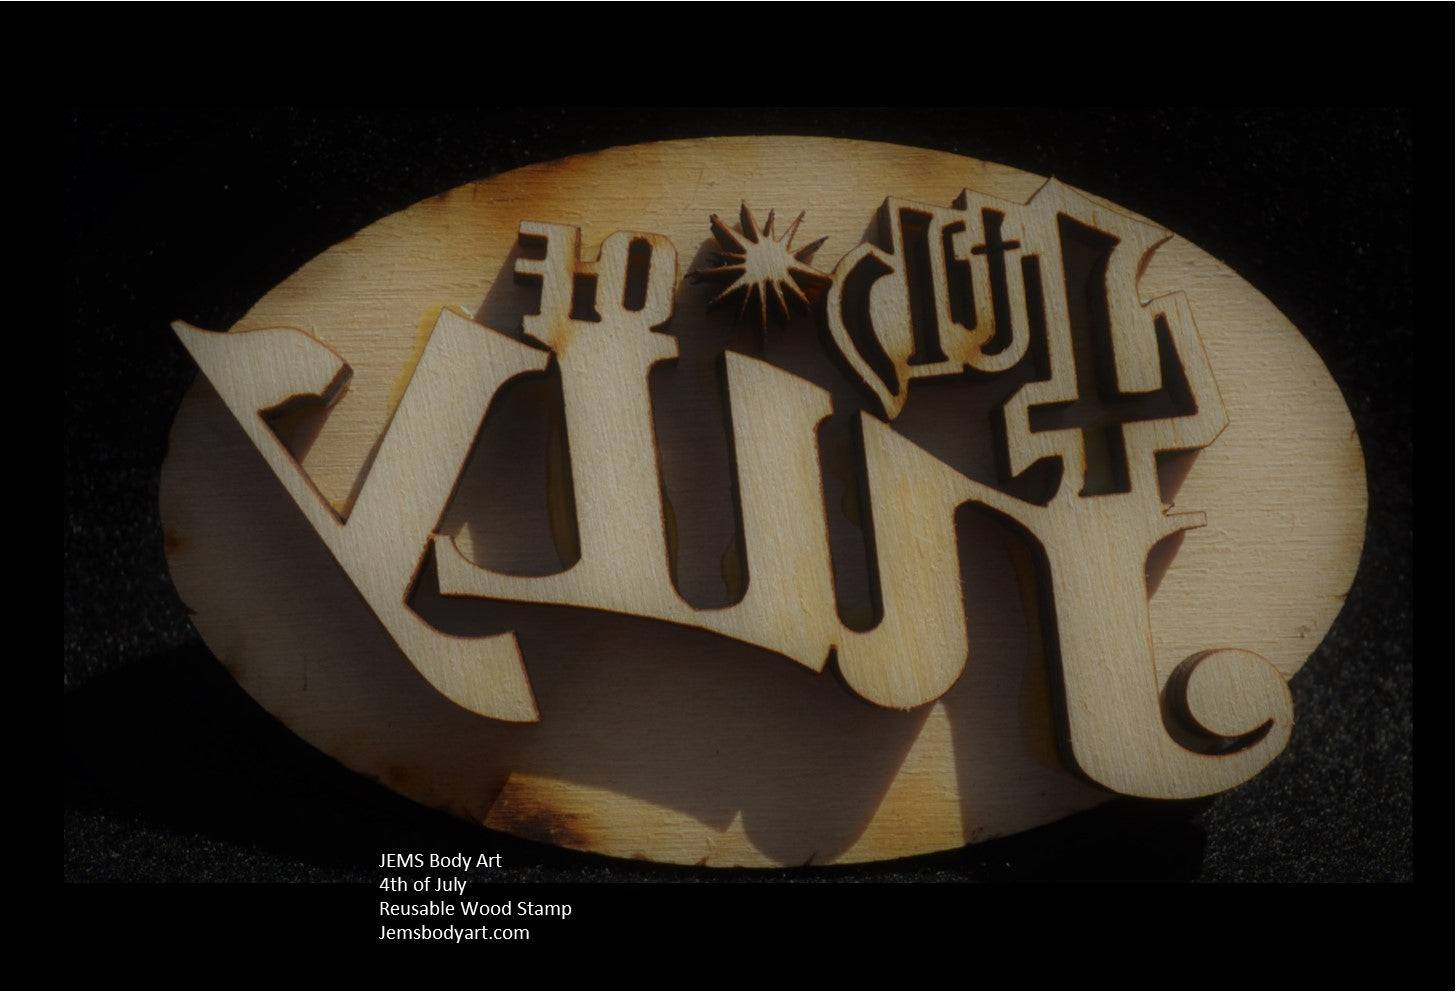
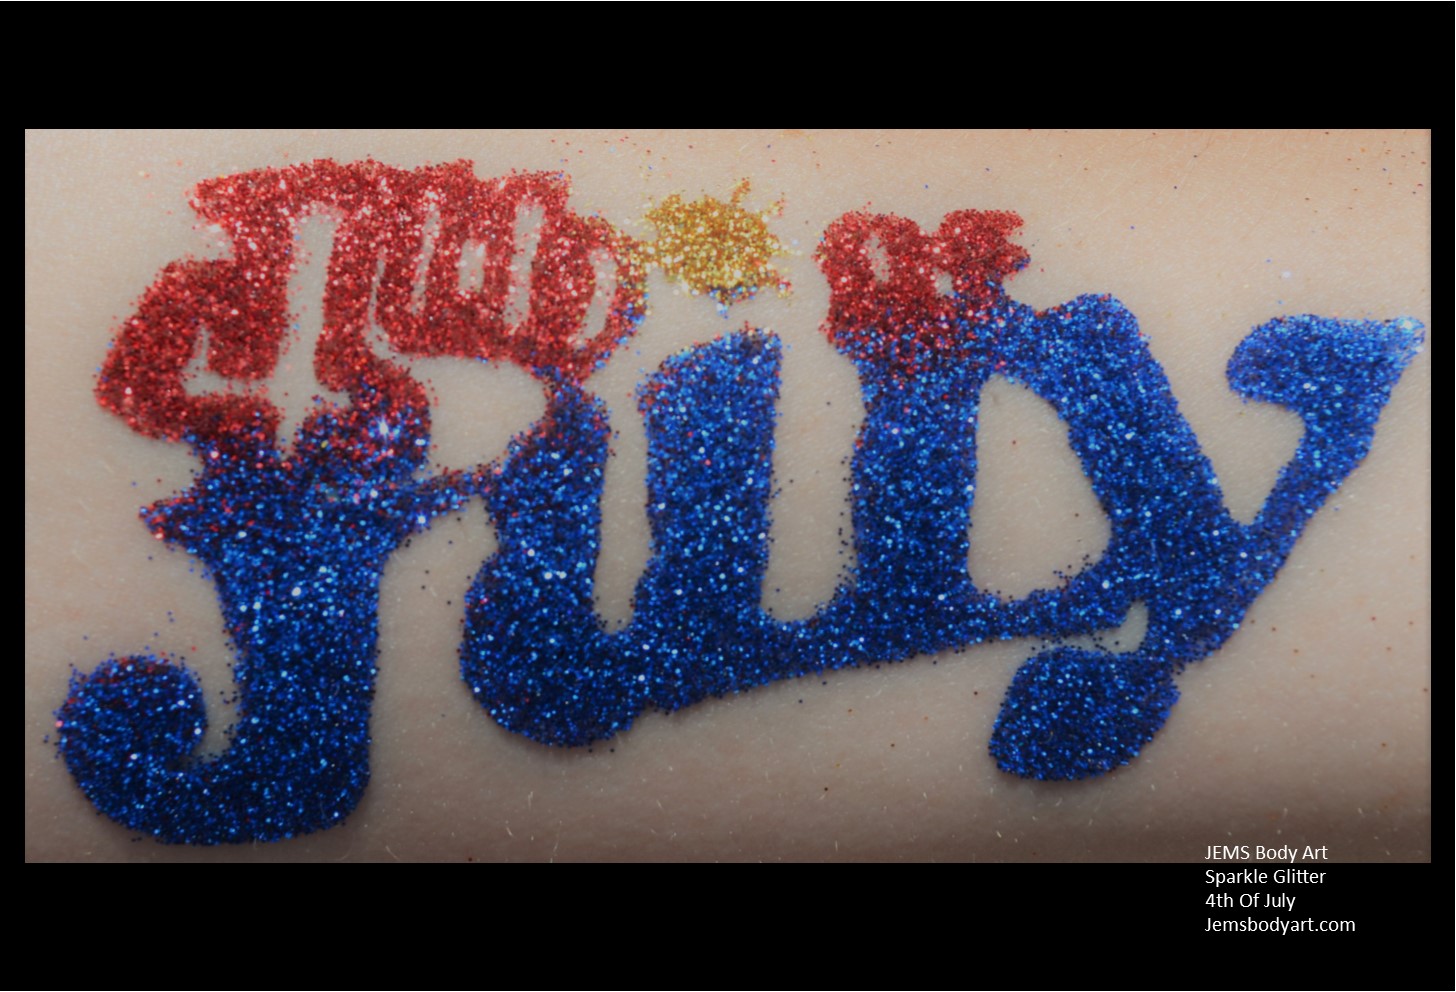

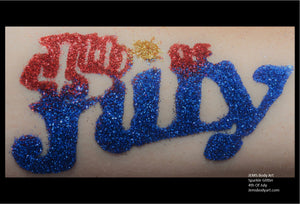
4th Of July
$4.95
- Size: 3.25" x 2"
- Features: Wooden stamp is designed for the sole purpose of applying adhesive to create glitter tattoos as directed by instructions provided with purchase. (NOTE: Actual stamp may have some slight variations from picture shown here.)
-
Step 1: Clean the skin area with JEMS Skin Cleaner with a cotton ball.
Step 2: Dry the skin with JEMS Prep Compound by lightly dusting application area and brushing it with a soft bristle brush.
Step 3: Apply adhesive to the beveled edge of sponge brush and dab adhesive onto the desired body stamp. DO NOT brush adhesive onto the stamp, a bubble texture on the stamp is alright.
Step 4: Roll the stamp with adhesive onto prepared skin area. It is very important to use a simple rolling motion from one side to the other, allowing adhesive to dry clear.
Step 5: Once adhesive is clear, apply glitter using puff bottle. Gently move litter around the entire stamped area with the lollipop pad and press the glitter into the stamp pattern. Use soft makeup brush to remove excess glitter. You can save the excess glitter for a future rainbow body art.
Recommendations:
We suggest that body art only be placed on arms and lower legs, not on faces.
Do NOT let adhesive to freeze, it will turn solid.
To remove body art, gently rub with alcohol or baby oil.
To open bottles, press a pin into the top of the bottles. A smaller hole allows you to control the products best during the application process.
View full product details


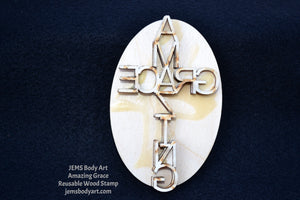
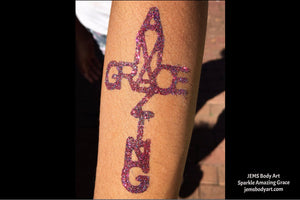
Amazing Grace
$4.95
-
Size: 3.5" x 2"
Features: Wooden stamp is designed for the sole purpose of applying adhesive to create glitter tattoos as directed by instructions provided with purchase. (NOTE: Actual stamp may have some slight variations from picture shown here.) -
Step 1: Clean the skin area with JEMS Skin Cleaner with a cotton ball.
Step 2: Dry the skin with JEMS Prep Compound by lightly dusting application area and brushing it with a soft bristle brush.
Step 3: Apply adhesive to the beveled edge of sponge brush and dab adhesive onto the desired body stamp. DO NOT brush adhesive onto the stamp, a bubble texture on the stamp is alright.
Step 4: Roll the stamp with adhesive onto prepared skin area. It is very important to use a simple rolling motion from one side to the other, allowing adhesive to dry clear.
Step 5: Once adhesive is clear, apply glitter using puff bottle. Gently move litter around the entire stamped area with the lollipop pad and press the glitter into the stamp pattern. Use soft makeup brush to remove excess glitter. You can save the excess glitter for a future rainbow body art.
Recommendations:
We suggest that body art only be placed on arms and lower legs, not on faces.
Do NOT let adhesive to freeze, it will turn solid.
To remove body art, gently rub with alcohol or baby oil.
To open bottles, press a pin into the top of the bottles. A smaller hole allows you to control the products best during the application process.
View full product details

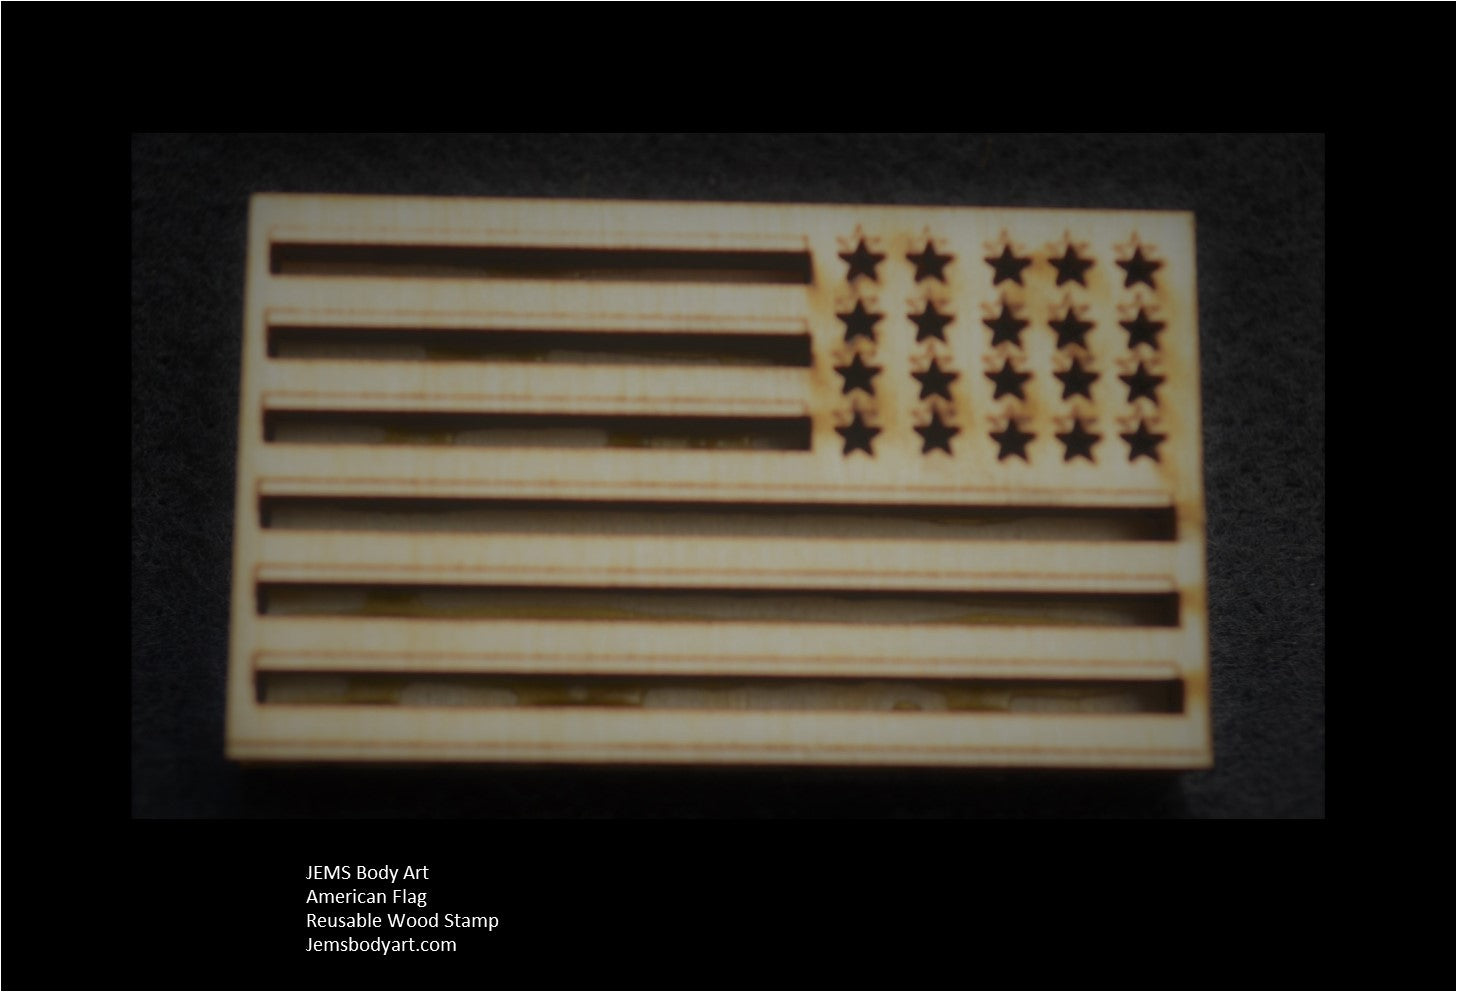
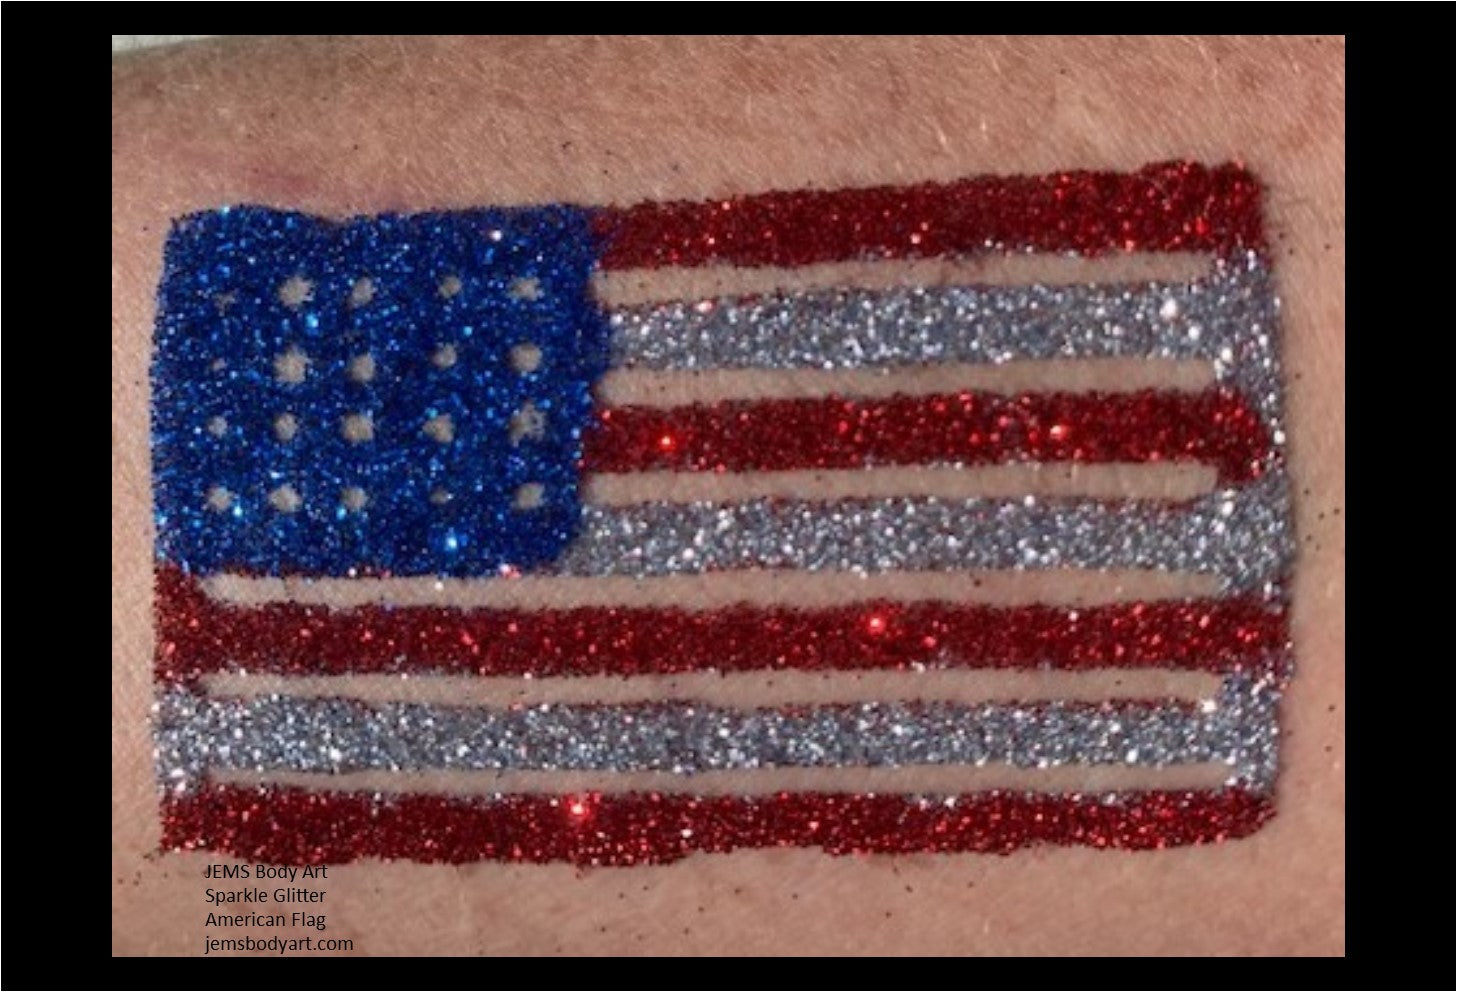

American Flag
$4.95
-
Size: 1.25" x 1.75"
Features: Wooden stamp is designed for the sole purpose of applying adhesive to create glitter tattoos as directed by instructions provided with purchase. (NOTE: Actual stamp may have some slight variations from picture shown here.) -
Step 1: Clean the skin area with JEMS Skin Cleaner with a cotton ball.
Step 2: Dry the skin with JEMS Prep Compound by lightly dusting application area and brushing it with a soft bristle brush.
Step 3: Apply adhesive to the beveled edge of sponge brush and dab adhesive onto the desired body stamp. DO NOT brush adhesive onto the stamp, a bubble texture on the stamp is alright.
Step 4: Roll the stamp with adhesive onto prepared skin area. It is very important to use a simple rolling motion from one side to the other, allowing adhesive to dry clear.
Step 5: Once adhesive is clear, apply glitter using puff bottle. Gently move litter around the entire stamped area with the lollipop pad and press the glitter into the stamp pattern. Use soft makeup brush to remove excess glitter. You can save the excess glitter for a future rainbow body art.
Recommendations:
We suggest that body art only be placed on arms and lower legs, not on faces.
Do NOT let adhesive to freeze, it will turn solid.
To remove body art, gently rub with alcohol or baby oil.
To open bottles, press a pin into the top of the bottles. A smaller hole allows you to control the products best during the application process.
View full product details
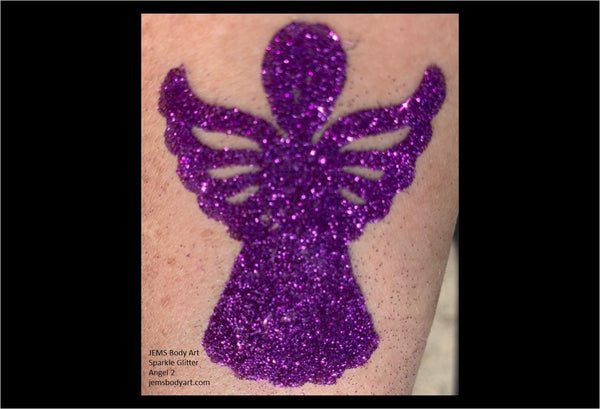
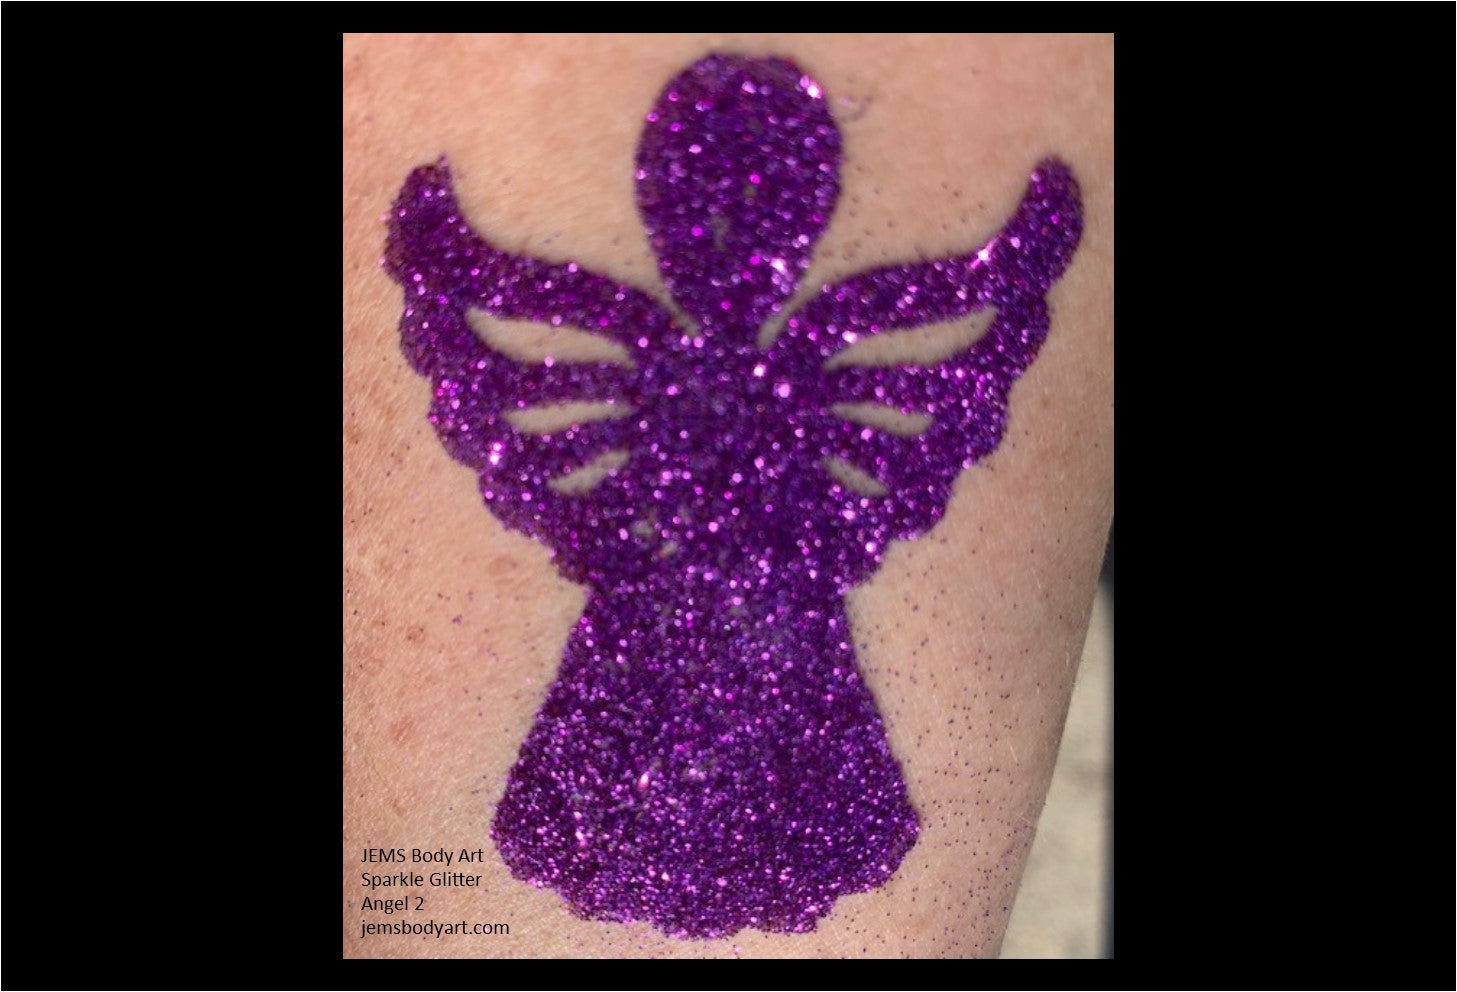


Angel 2
$4.95
-
Size: 2.0" x 1.0"
Features: Wooden stamp is designed for the sole purpose of applying adhesive to create glitter tattoos as directed by instructions provided with purchase. (NOTE: Actual stamp may have some slight variations from picture shown here.) -
Step 1: Clean the skin area with JEMS Skin Cleaner with a cotton ball.
Step 2: Dry the skin with JEMS Prep Compound by lightly dusting application area and brushing it with a soft bristle brush.
Step 3: Apply adhesive to the beveled edge of sponge brush and dab adhesive onto the desired body stamp. DO NOT brush adhesive onto the stamp, a bubble texture on the stamp is alright.
Step 4: Roll the stamp with adhesive onto prepared skin area. It is very important to use a simple rolling motion from one side to the other, allowing adhesive to dry clear.
Step 5: Once adhesive is clear, apply glitter using puff bottle. Gently move litter around the entire stamped area with the lollipop pad and press the glitter into the stamp pattern. Use soft makeup brush to remove excess glitter. You can save the excess glitter for a future rainbow body art.
Recommendations:
We suggest that body art only be placed on arms and lower legs, not on faces.
Do NOT let adhesive to freeze, it will turn solid.
To remove body art, gently rub with alcohol or baby oil.
To open bottles, press a pin into the top of the bottles. A smaller hole allows you to control the products best during the application process.
View full product details


Angel Flying
$4.95
-
Size: 2.0" x 1.0"
Features: Wooden stamp is designed for the sole purpose of applying adhesive to create glitter tattoos as directed by instructions provided with purchase. (NOTE: Actual stamp may have some slight variations from picture shown here.) -
Step 1: Clean the skin area with JEMS Skin Cleaner with a cotton ball.
Step 2: Dry the skin with JEMS Prep Compound by lightly dusting application area and brushing it with a soft bristle brush.
Step 3: Apply adhesive to the beveled edge of sponge brush and dab adhesive onto the desired body stamp. DO NOT brush adhesive onto the stamp, a bubble texture on the stamp is alright.
Step 4: Roll the stamp with adhesive onto prepared skin area. It is very important to use a simple rolling motion from one side to the other, allowing adhesive to dry clear.
Step 5: Once adhesive is clear, apply glitter using puff bottle. Gently move litter around the entire stamped area with the lollipop pad and press the glitter into the stamp pattern. Use soft makeup brush to remove excess glitter. You can save the excess glitter for a future rainbow body art.
Recommendations:
We suggest that body art only be placed on arms and lower legs, not on faces.
Do NOT let adhesive to freeze, it will turn solid.
To remove body art, gently rub with alcohol or baby oil.
To open bottles, press a pin into the top of the bottles. A smaller hole allows you to control the products best during the application process.
View full product details
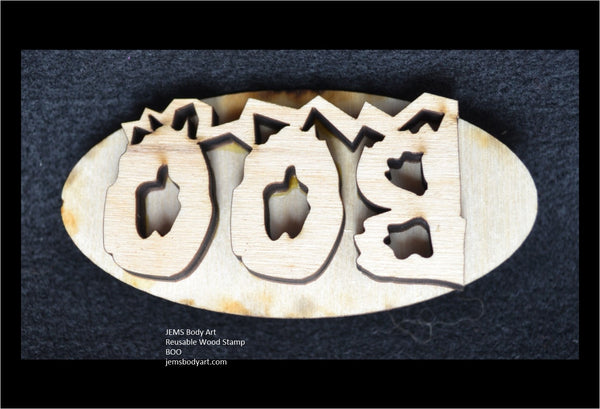

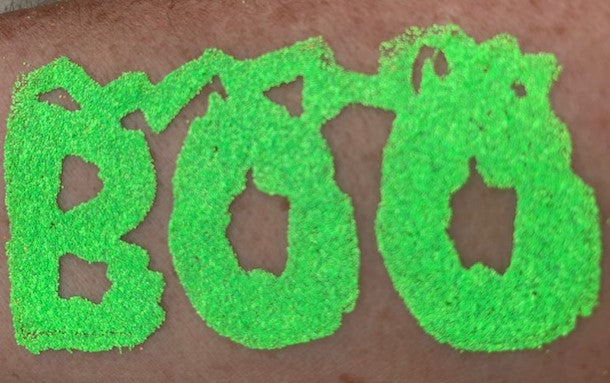


BOO
$4.95
- Size: 3" x 2"
- Features: Wooden stamp is designed for the sole purpose of applying adhesive to create glitter tattoos as directed by instructions provided with purchase. (NOTE: Actual stamp may have some slight variations from picture shown here.)
-
Step 1: Clean the skin area with JEMS Skin Cleaner with a cotton ball.
Step 2: Dry the skin with JEMS Prep Compound by lightly dusting application area and brushing it with a soft bristle brush.
Step 3: Apply adhesive to the beveled edge of sponge brush and dab adhesive onto the desired body stamp. DO NOT brush adhesive onto the stamp, a bubble texture on the stamp is alright.
Step 4: Roll the stamp with adhesive onto prepared skin area. It is very important to use a simple rolling motion from one side to the other, allowing adhesive to dry clear.
Step 5: Once adhesive is clear, apply glitter using puff bottle. Gently move litter around the entire stamped area with the lollipop pad and press the glitter into the stamp pattern. Use soft makeup brush to remove excess glitter. You can save the excess glitter for a future rainbow body art.
Recommendations:
We suggest that body art only be placed on arms and lower legs, not on faces.
Do NOT let adhesive to freeze, it will turn solid.
To remove body art, gently rub with alcohol or baby oil.
To open bottles, press a pin into the top of the bottles. A smaller hole allows you to control the products best during the application process.
View full product details
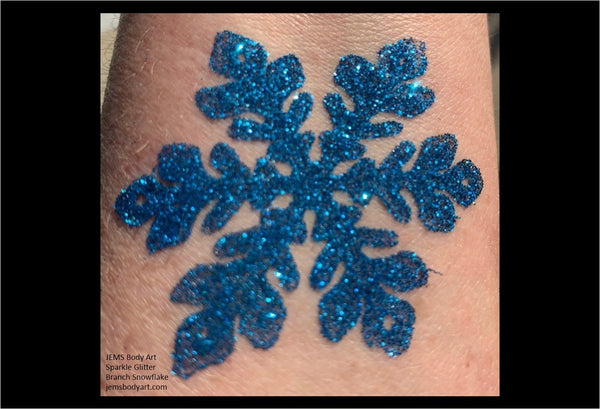

Branch Snowflake
$4.95
-
Size: 2" round
Features: Wooden stamp is designed for the sole purpose of applying adhesive to create glitter tattoos as directed by instructions provided with purchase. (NOTE: Actual stamp may have some slight variations from picture shown here.) -
Step 1: Clean the skin area with JEMS Skin Cleaner with a cotton ball.
Step 2: Dry the skin with JEMS Prep Compound by lightly dusting application area and brushing it with a soft bristle brush.
Step 3: Apply adhesive to the beveled edge of sponge brush and dab adhesive onto the desired body stamp. DO NOT brush adhesive onto the stamp, a bubble texture on the stamp is alright.
Step 4: Roll the stamp with adhesive onto prepared skin area. It is very important to use a simple rolling motion from one side to the other, allowing adhesive to dry clear.
Step 5: Once adhesive is clear, apply glitter using puff bottle. Gently move litter around the entire stamped area with the lollipop pad and press the glitter into the stamp pattern. Use soft makeup brush to remove excess glitter. You can save the excess glitter for a future rainbow body art.
Recommendations:
We suggest that body art only be placed on arms and lower legs, not on faces.
Do NOT let adhesive to freeze, it will turn solid.
To remove body art, gently rub with alcohol or baby oil.
To open bottles, press a pin into the top of the bottles. A smaller hole allows you to control the products best during the application process.
View full product details
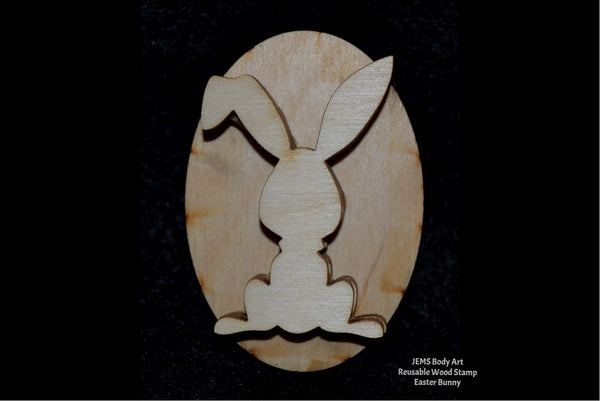
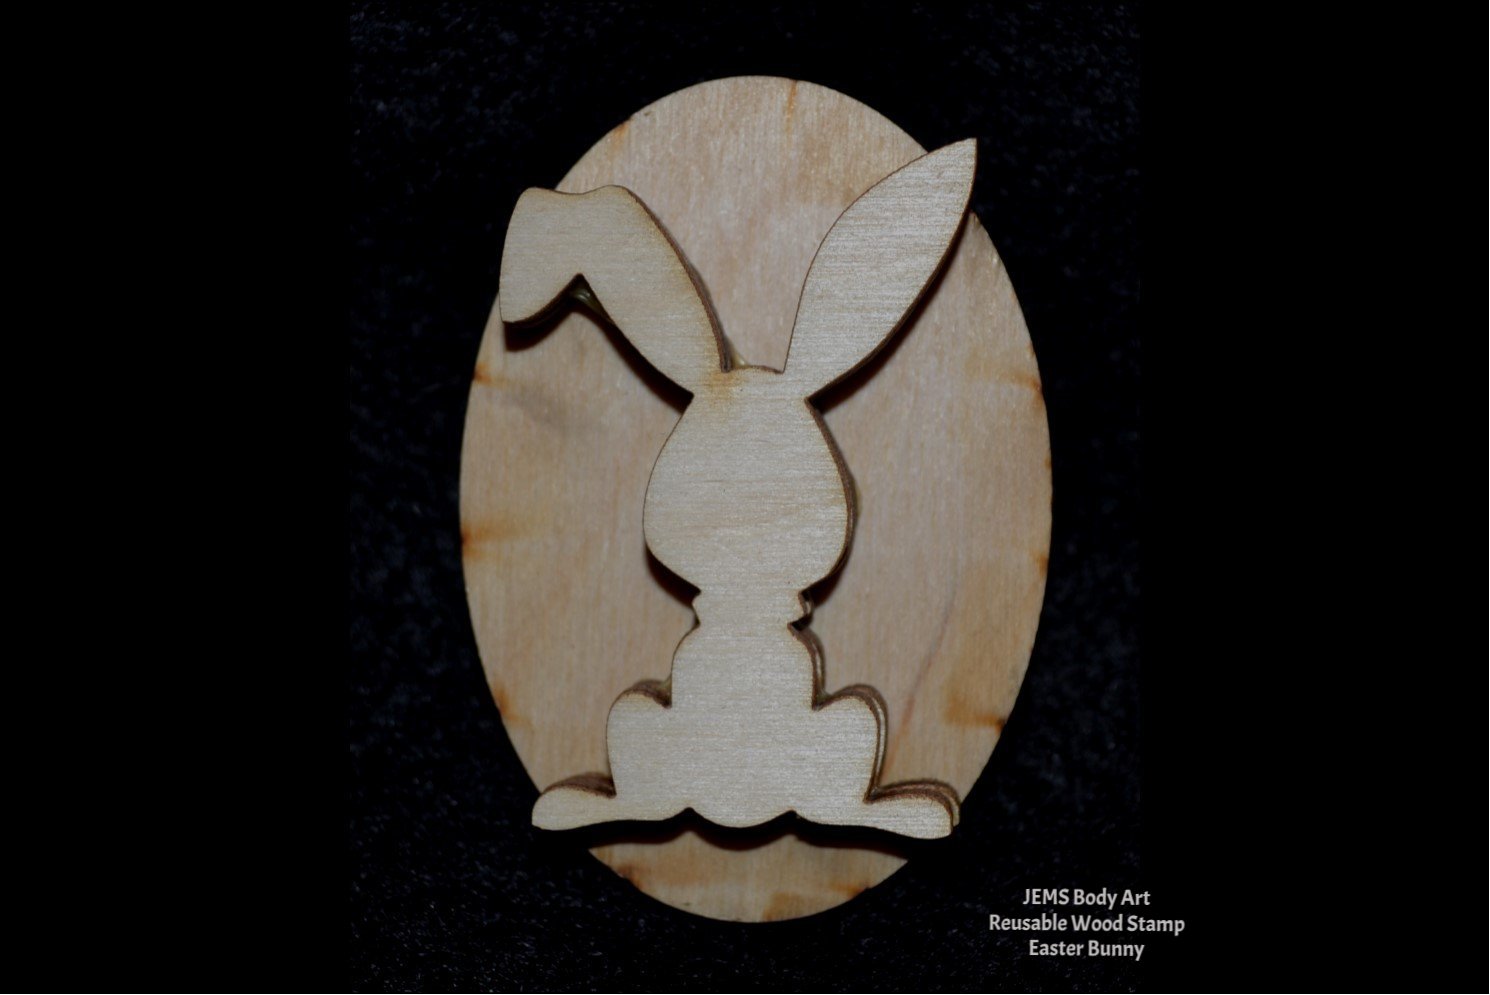
Bunny Rabbit
$4.95
- Size: 2.5" x 1.0"
- Features: Wooden stamp is designed for the sole purpose of applying adhesive to create glitter tattoos as directed by instructions provided with purchase. (NOTE: Actual stamp may have some slight variations from picture shown here.)
-
Step 1: Clean the skin area with JEMS Skin Cleaner with a cotton ball.
Step 2: Dry the skin with JEMS Prep Compound by lightly dusting application area and brushing it with a soft bristle brush.
Step 3: Apply adhesive to the beveled edge of sponge brush and dab adhesive onto the desired body stamp. DO NOT brush adhesive onto the stamp, a bubble texture on the stamp is alright.
Step 4: Roll the stamp with adhesive onto prepared skin area. It is very important to use a simple rolling motion from one side to the other, allowing adhesive to dry clear.
Step 5: Once adhesive is clear, apply glitter using puff bottle. Gently move litter around the entire stamped area with the lollipop pad and press the glitter into the stamp pattern. Use soft makeup brush to remove excess glitter. You can save the excess glitter for a future rainbow body art.
Recommendations:
We suggest that body art only be placed on arms and lower legs, not on faces.
Do NOT let adhesive to freeze, it will turn solid.
To remove body art, gently rub with alcohol or baby oil.
To open bottles, press a pin into the top of the bottles. A smaller hole allows you to control the products best during the application process.
View full product details
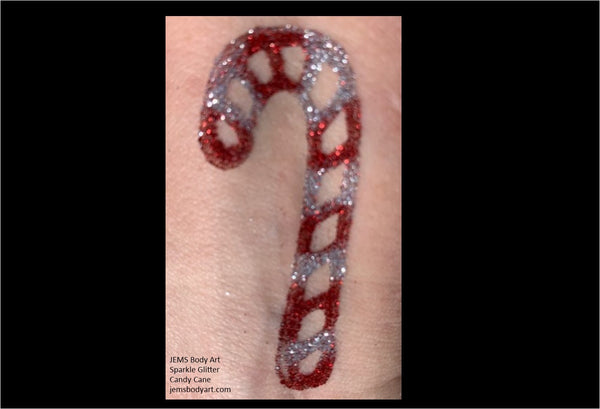

Candy Cane
$4.95
- Size: 2.5" tall x 2.0" wide
- Features: Wooden stamp is designed for the sole purpose of applying adhesive to create glitter tattoos as directed by instructions provided with purchase. (NOTE: Actual stamp may have some slight variations from picture shown here.)
-
Step 1: Clean the skin area with JEMS Skin Cleaner with a cotton ball.
Step 2: Dry the skin with JEMS Prep Compound by lightly dusting application area and brushing it with a soft bristle brush.
Step 3: Apply adhesive to the beveled edge of sponge brush and dab adhesive onto the desired body stamp. DO NOT brush adhesive onto the stamp, a bubble texture on the stamp is alright.
Step 4: Roll the stamp with adhesive onto prepared skin area. It is very important to use a simple rolling motion from one side to the other, allowing adhesive to dry clear.
Step 5: Once adhesive is clear, apply glitter using puff bottle. Gently move litter around the entire stamped area with the lollipop pad and press the glitter into the stamp pattern. Use soft makeup brush to remove excess glitter. You can save the excess glitter for a future rainbow body art.
Recommendations:
We suggest that body art only be placed on arms and lower legs, not on faces.
Do NOT let adhesive to freeze, it will turn solid.
To remove body art, gently rub with alcohol or baby oil.
To open bottles, press a pin into the top of the bottles. A smaller hole allows you to control the products best during the application process.
View full product details


Charlie Brown Christmas Tree
$4.95
- Size: 2.25" x 2"
- Features: Wooden stamp is designed for the sole purpose of applying adhesive to create glitter tattoos as directed by instructions provided with purchase. (NOTE: Actual stamp may have some slight variations from picture shown here.)
-
Step 1: Clean the skin area with JEMS Skin Cleaner with a cotton ball.
Step 2: Dry the skin with JEMS Prep Compound by lightly dusting application area and brushing it with a soft bristle brush.
Step 3: Apply adhesive to the beveled edge of sponge brush and dab adhesive onto the desired body stamp. DO NOT brush adhesive onto the stamp, a bubble texture on the stamp is alright.
Step 4: Roll the stamp with adhesive onto prepared skin area. It is very important to use a simple rolling motion from one side to the other, allowing adhesive to dry clear.
Step 5: Once adhesive is clear, apply glitter using puff bottle. Gently move litter around the entire stamped area with the lollipop pad and press the glitter into the stamp pattern. Use soft makeup brush to remove excess glitter. You can save the excess glitter for a future rainbow body art.
Recommendations:
We suggest that body art only be placed on arms and lower legs, not on faces.
Do NOT let adhesive to freeze, it will turn solid.
To remove body art, gently rub with alcohol or baby oil.
To open bottles, press a pin into the top of the bottles. A smaller hole allows you to control the products best during the application process.
View full product details

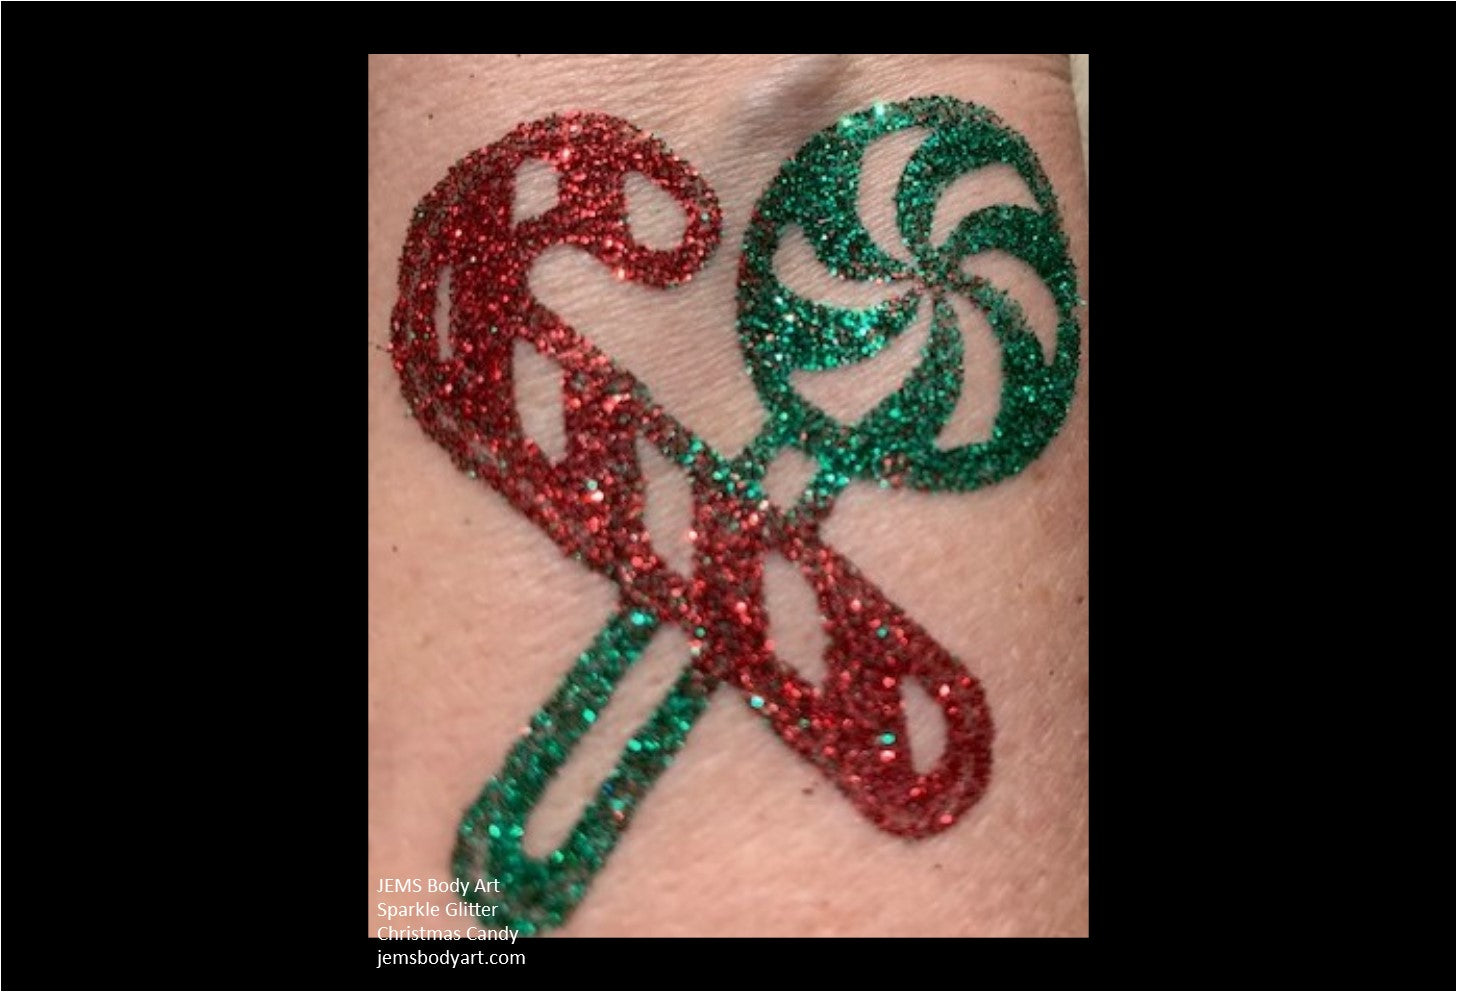


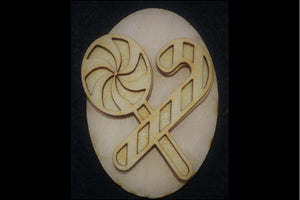
Christmas Candy
$4.95
- Size: 2.5" tall x 2.0" wide
- Features: Wooden stamp is designed for the sole purpose of applying adhesive to create glitter tattoos as directed by instructions provided with purchase. (NOTE: Actual stamp may have some slight variations from picture shown here.)
-
Step 1: Clean the skin area with JEMS Skin Cleaner with a cotton ball.
Step 2: Dry the skin with JEMS Prep Compound by lightly dusting application area and brushing it with a soft bristle brush.
Step 3: Apply adhesive to the beveled edge of sponge brush and dab adhesive onto the desired body stamp. DO NOT brush adhesive onto the stamp, a bubble texture on the stamp is alright.
Step 4: Roll the stamp with adhesive onto prepared skin area. It is very important to use a simple rolling motion from one side to the other, allowing adhesive to dry clear.
Step 5: Once adhesive is clear, apply glitter using puff bottle. Gently move litter around the entire stamped area with the lollipop pad and press the glitter into the stamp pattern. Use soft makeup brush to remove excess glitter. You can save the excess glitter for a future rainbow body art.
Recommendations:
We suggest that body art only be placed on arms and lower legs, not on faces.
Do NOT let adhesive to freeze, it will turn solid.
To remove body art, gently rub with alcohol or baby oil.
To open bottles, press a pin into the top of the bottles. A smaller hole allows you to control the products best during the application process.
View full product details
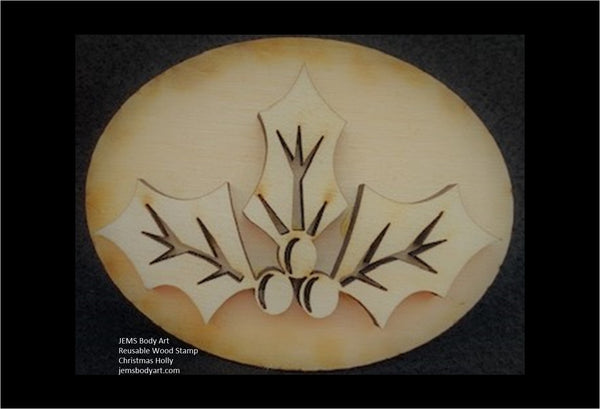
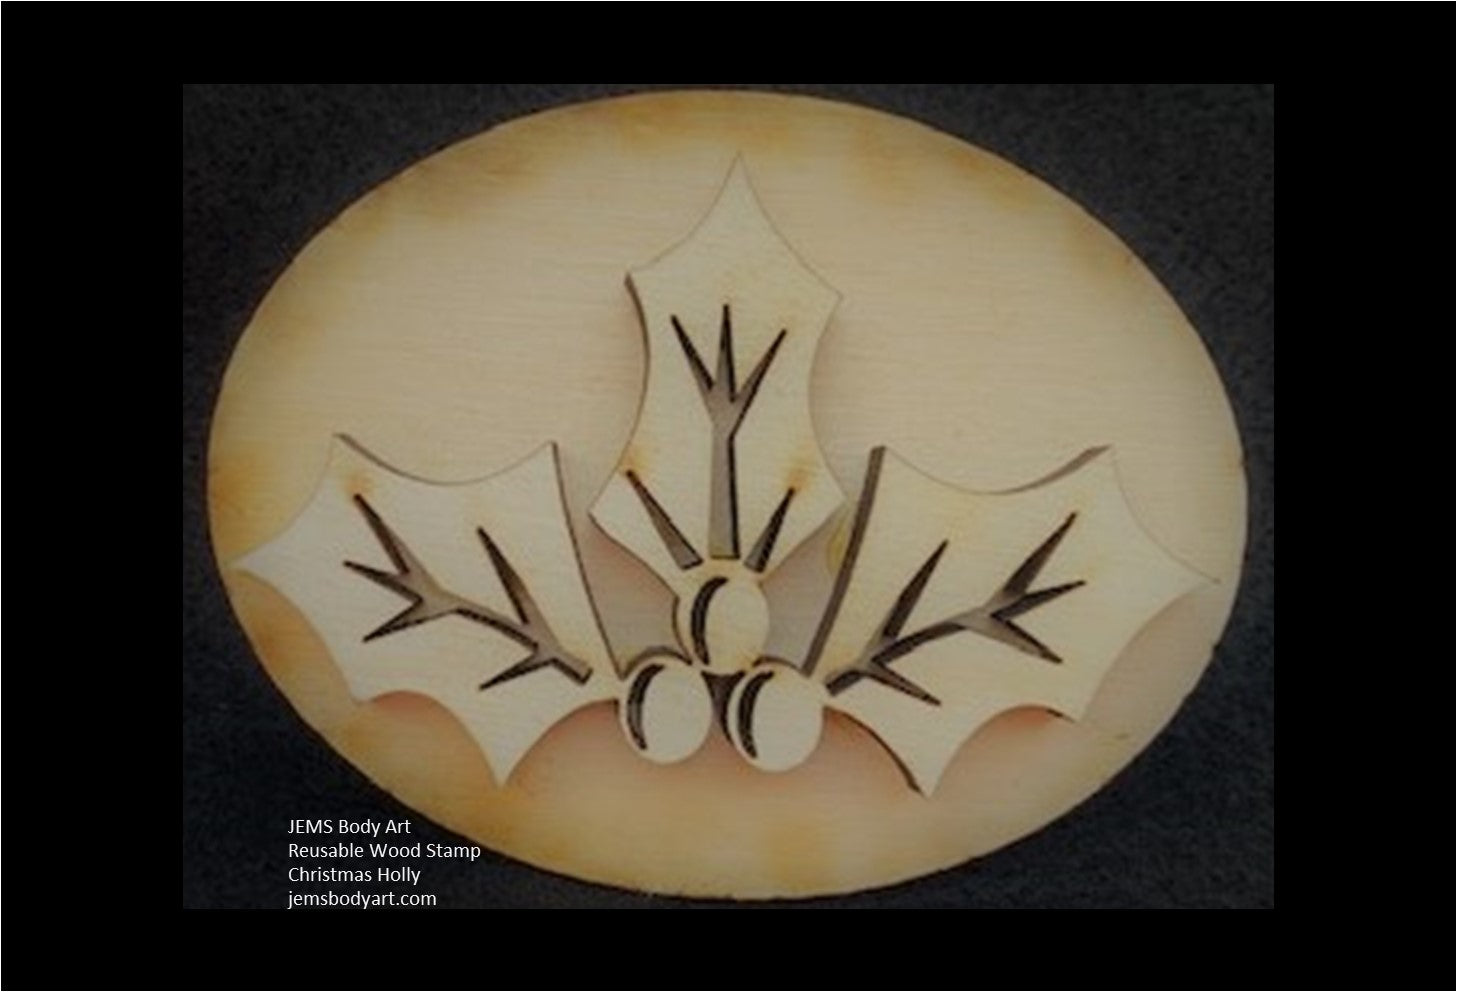
Christmas Holly
$4.95
- Size: 2.5" tall x 2.0" wide
- Features: Wooden stamp is designed for the sole purpose of applying adhesive to create glitter tattoos as directed by instructions provided with purchase. (NOTE: Actual stamp may have some slight variations from picture shown here.)
-
Step 1: Clean the skin area with JEMS Skin Cleaner with a cotton ball.
Step 2: Dry the skin with JEMS Prep Compound by lightly dusting application area and brushing it with a soft bristle brush.
Step 3: Apply adhesive to the beveled edge of sponge brush and dab adhesive onto the desired body stamp. DO NOT brush adhesive onto the stamp, a bubble texture on the stamp is alright.
Step 4: Roll the stamp with adhesive onto prepared skin area. It is very important to use a simple rolling motion from one side to the other, allowing adhesive to dry clear.
Step 5: Once adhesive is clear, apply glitter using puff bottle. Gently move litter around the entire stamped area with the lollipop pad and press the glitter into the stamp pattern. Use soft makeup brush to remove excess glitter. You can save the excess glitter for a future rainbow body art.
Recommendations:
We suggest that body art only be placed on arms and lower legs, not on faces.
Do NOT let adhesive to freeze, it will turn solid.
To remove body art, gently rub with alcohol or baby oil.
To open bottles, press a pin into the top of the bottles. A smaller hole allows you to control the products best during the application process.
View full product details


Christmas Ornament
$4.95
- Size: 2" x 1.75"
- Features: Wooden stamp is designed for the sole purpose of applying adhesive to create glitter tattoos as directed by instructions provided with purchase. (NOTE: Actual stamp may have some slight variations from picture shown here.)
-
Step 1: Clean the skin area with JEMS Skin Cleaner with a cotton ball.
Step 2: Dry the skin with JEMS Prep Compound by lightly dusting application area and brushing it with a soft bristle brush.
Step 3: Apply adhesive to the beveled edge of sponge brush and dab adhesive onto the desired body stamp. DO NOT brush adhesive onto the stamp, a bubble texture on the stamp is alright.
Step 4: Roll the stamp with adhesive onto prepared skin area. It is very important to use a simple rolling motion from one side to the other, allowing adhesive to dry clear.
Step 5: Once adhesive is clear, apply glitter using puff bottle. Gently move litter around the entire stamped area with the lollipop pad and press the glitter into the stamp pattern. Use soft makeup brush to remove excess glitter. You can save the excess glitter for a future rainbow body art.
Recommendations:
We suggest that body art only be placed on arms and lower legs, not on faces.
Do NOT let adhesive to freeze, it will turn solid.
To remove body art, gently rub with alcohol or baby oil.
To open bottles, press a pin into the top of the bottles. A smaller hole allows you to control the products best during the application process.
View full product details


Christmas Snoopy
$4.95
- Size: 2" x 1.75"
- Features: Wooden stamp is designed for the sole purpose of applying adhesive to create glitter tattoos as directed by instructions provided with purchase. (NOTE: Actual stamp may have some slight variations from picture shown here.)
-
Step 1: Clean the skin area with JEMS Skin Cleaner with a cotton ball.
Step 2: Dry the skin with JEMS Prep Compound by lightly dusting application area and brushing it with a soft bristle brush.
Step 3: Apply adhesive to the beveled edge of sponge brush and dab adhesive onto the desired body stamp. DO NOT brush adhesive onto the stamp, a bubble texture on the stamp is alright.
Step 4: Roll the stamp with adhesive onto prepared skin area. It is very important to use a simple rolling motion from one side to the other, allowing adhesive to dry clear.
Step 5: Once adhesive is clear, apply glitter using puff bottle. Gently move litter around the entire stamped area with the lollipop pad and press the glitter into the stamp pattern. Use soft makeup brush to remove excess glitter. You can save the excess glitter for a future rainbow body art.
Recommendations:
We suggest that body art only be placed on arms and lower legs, not on faces.
Do NOT let adhesive to freeze, it will turn solid.
To remove body art, gently rub with alcohol or baby oil.
To open bottles, press a pin into the top of the bottles. A smaller hole allows you to control the products best during the application process.
View full product details

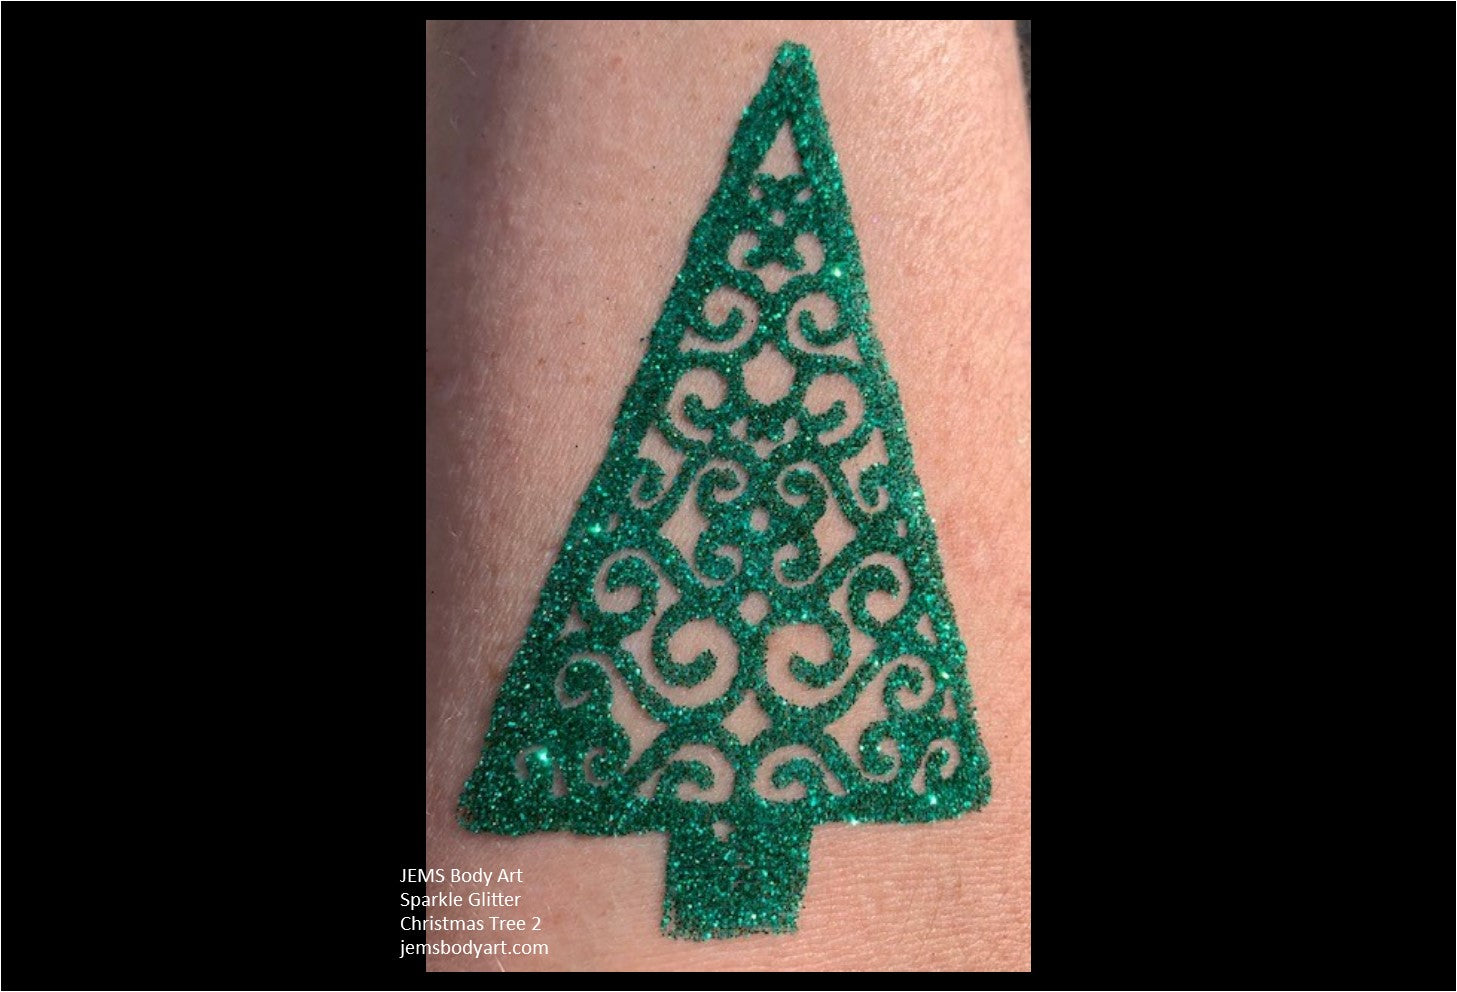
Christmas Tree 2
$4.95
- Size: 2.5" tall x 2.0" wide
- Features: Wooden stamp is designed for the sole purpose of applying adhesive to create glitter tattoos as directed by instructions provided with purchase. (NOTE: Actual stamp may have some slight variations from picture shown here.)
-
Step 1: Clean the skin area with JEMS Skin Cleaner with a cotton ball.
Step 2: Dry the skin with JEMS Prep Compound by lightly dusting application area and brushing it with a soft bristle brush.
Step 3: Apply adhesive to the beveled edge of sponge brush and dab adhesive onto the desired body stamp. DO NOT brush adhesive onto the stamp, a bubble texture on the stamp is alright.
Step 4: Roll the stamp with adhesive onto prepared skin area. It is very important to use a simple rolling motion from one side to the other, allowing adhesive to dry clear.
Step 5: Once adhesive is clear, apply glitter using puff bottle. Gently move litter around the entire stamped area with the lollipop pad and press the glitter into the stamp pattern. Use soft makeup brush to remove excess glitter. You can save the excess glitter for a future rainbow body art.
Recommendations:
We suggest that body art only be placed on arms and lower legs, not on faces.
Do NOT let adhesive to freeze, it will turn solid.
To remove body art, gently rub with alcohol or baby oil.
To open bottles, press a pin into the top of the bottles. A smaller hole allows you to control the products best during the application process.
View full product details


Christmas Wreath
$4.95
- Size: 2" x 2"
- Features: Wooden stamp is designed for the sole purpose of applying adhesive to create glitter tattoos as directed by instructions provided with purchase. (NOTE: Actual stamp may have some slight variations from picture shown here.)
-
Step 1: Clean the skin area with JEMS Skin Cleaner with a cotton ball.
Step 2: Dry the skin with JEMS Prep Compound by lightly dusting application area and brushing it with a soft bristle brush.
Step 3: Apply adhesive to the beveled edge of sponge brush and dab adhesive onto the desired body stamp. DO NOT brush adhesive onto the stamp, a bubble texture on the stamp is alright.
Step 4: Roll the stamp with adhesive onto prepared skin area. It is very important to use a simple rolling motion from one side to the other, allowing adhesive to dry clear.
Step 5: Once adhesive is clear, apply glitter using puff bottle. Gently move litter around the entire stamped area with the lollipop pad and press the glitter into the stamp pattern. Use soft makeup brush to remove excess glitter. You can save the excess glitter for a future rainbow body art.
Recommendations:
We suggest that body art only be placed on arms and lower legs, not on faces.
Do NOT let adhesive to freeze, it will turn solid.
To remove body art, gently rub with alcohol or baby oil.
To open bottles, press a pin into the top of the bottles. A smaller hole allows you to control the products best during the application process.
View full product details
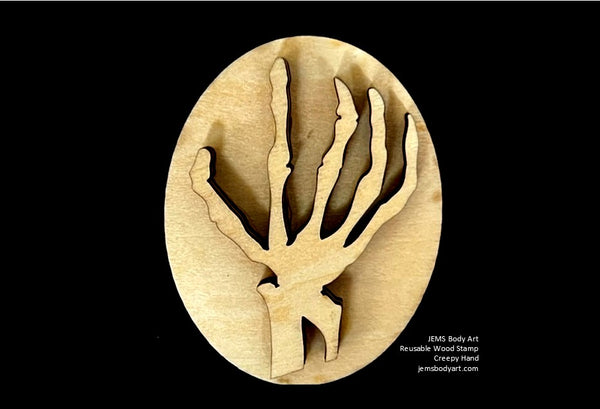

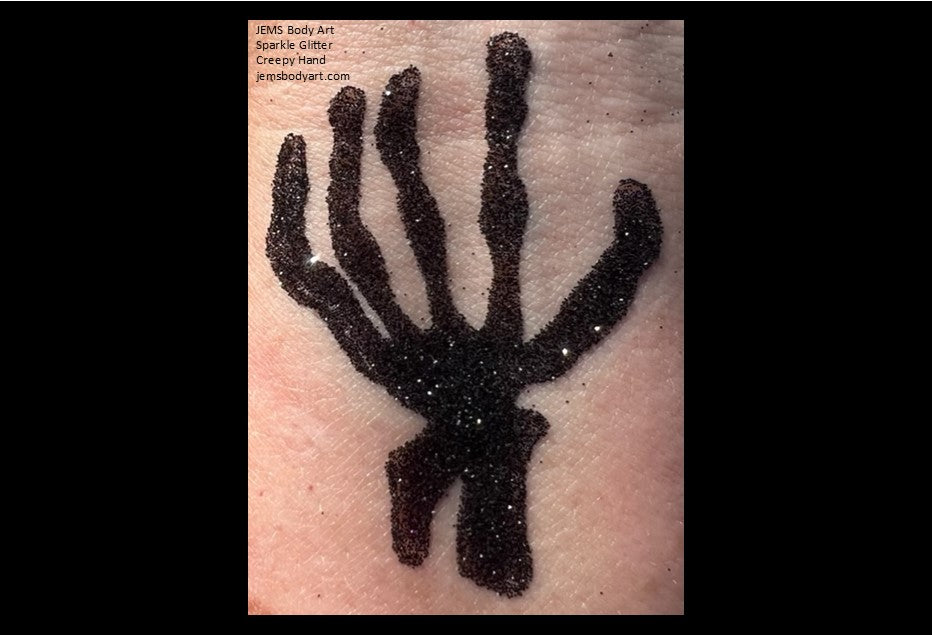

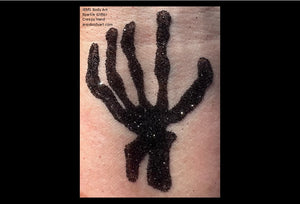
Creepy Hand
$4.95
- Size: 2.0"Tall x 1.5"Wide
- Features: Wooden stamp is designed for the sole purpose of applying adhesive to create glitter tattoos as directed by instructions provided with G. (NOTE: Actual stamp may have some slight variations from picture shown here.)
-
Step 1: Clean the skin area with JEMS Skin Cleaner with a cotton ball.
Step 2: Dry the skin with JEMS Prep Compound by lightly dusting application area and brushing it with a soft bristle brush.
Step 3: Apply adhesive to the beveled edge of sponge brush and dab adhesive onto the desired body stamp. DO NOT brush adhesive onto the stamp, a bubble texture on the stamp is alright.
Step 4: Roll the stamp with adhesive onto prepared skin area. It is very important to use a simple rolling motion from one side to the other, allowing adhesive to dry clear.
Step 5: Once adhesive is clear, apply glitter using puff bottle. Gently move litter around the entire stamped area with the lollipop pad and press the glitter into the stamp pattern. Use soft makeup brush to remove excess glitter. You can save the excess glitter for a future rainbow body art.
Recommendations:
We suggest that body art only be placed on arms and lower legs, not on faces.
Do NOT let adhesive to freeze, it will turn solid.
To remove body art, gently rub with alcohol or baby oil.
To open bottles, press a pin into the top of the bottles. A smaller hole allows you to control the products best during the application process.
View full product details
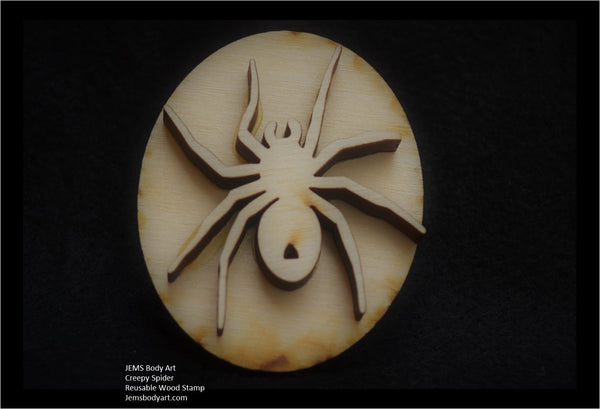
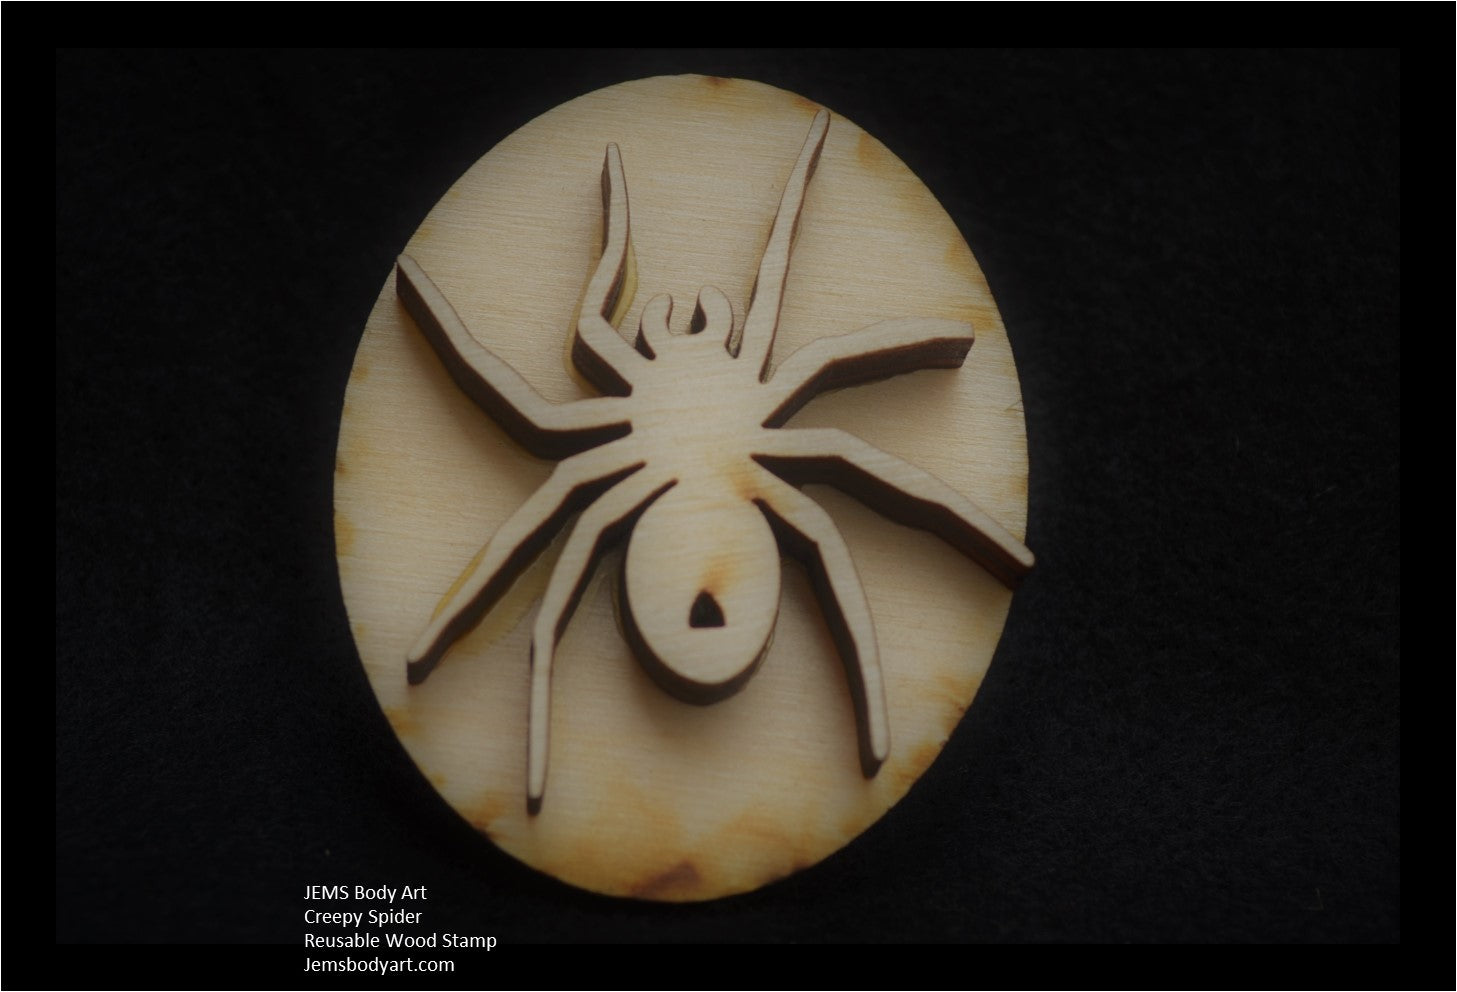
Creepy Spider
$4.95
- Size: 2" x 2"
- Features: Wooden stamp is designed for the sole purpose of applying adhesive to create glitter tattoos as directed by instructions provided with purchase. (NOTE: Actual stamp may have some slight variations from picture shown here.)
-
Step 1: Clean the skin area with JEMS Skin Cleaner with a cotton ball.
Step 2: Dry the skin with JEMS Prep Compound by lightly dusting application area and brushing it with a soft bristle brush.
Step 3: Apply adhesive to the beveled edge of sponge brush and dab adhesive onto the desired body stamp. DO NOT brush adhesive onto the stamp, a bubble texture on the stamp is alright.
Step 4: Roll the stamp with adhesive onto prepared skin area. It is very important to use a simple rolling motion from one side to the other, allowing adhesive to dry clear.
Step 5: Once adhesive is clear, apply glitter using puff bottle. Gently move litter around the entire stamped area with the lollipop pad and press the glitter into the stamp pattern. Use soft makeup brush to remove excess glitter. You can save the excess glitter for a future rainbow body art.
Recommendations:
We suggest that body art only be placed on arms and lower legs, not on faces.
Do NOT let adhesive to freeze, it will turn solid.
To remove body art, gently rub with alcohol or baby oil.
To open bottles, press a pin into the top of the bottles. A smaller hole allows you to control the products best during the application process.
View full product details


Cross with Points
$4.95
-
Size: 1.5" x 2"
Features: Wooden stamp is designed for the sole purpose of applying adhesive to create glitter tattoos as directed by instructions provided with purchase. Actual stamp may have some slight variations from picture shown here. (NOTE: Actual stamp may have some slight variations from picture shown here.) -
Step 1: Clean the skin area with JEMS Skin Cleaner with a cotton ball.
Step 2: Dry the skin with JEMS Prep Compound by lightly dusting application area and brushing it with a soft bristle brush.
Step 3: Apply adhesive to the beveled edge of sponge brush and dab adhesive onto the desired body stamp. DO NOT brush adhesive onto the stamp, a bubble texture on the stamp is alright.
Step 4: Roll the stamp with adhesive onto prepared skin area. It is very important to use a simple rolling motion from one side to the other, allowing adhesive to dry clear.
Step 5: Once adhesive is clear, apply glitter using puff bottle. Gently move litter around the entire stamped area with the lollipop pad and press the glitter into the stamp pattern. Use soft makeup brush to remove excess glitter. You can save the excess glitter for a future rainbow body art.
Recommendations:
We suggest that body art only be placed on arms and lower legs, not on faces.
Do NOT let adhesive to freeze, it will turn solid.
To remove body art, gently rub with alcohol or baby oil.
To open bottles, press a pin into the top of the bottles. A smaller hole allows you to control the products best during the application process.
View full product details


Cupid
$4.95
- Size: 2.25" x 2.25"
- Features: Wooden stamp is designed for the sole purpose of applying adhesive to create glitter tattoos as directed by instructions provided with purchase. (NOTE: Actual stamp may have some slight variations from picture shown here.)
-
Step 1: Clean the skin area with JEMS Skin Cleaner with a cotton ball.
Step 2: Dry the skin with JEMS Prep Compound by lightly dusting application area and brushing it with a soft bristle brush.
Step 3: Apply adhesive to the beveled edge of sponge brush and dab adhesive onto the desired body stamp. DO NOT brush adhesive onto the stamp, a bubble texture on the stamp is alright.
Step 4: Roll the stamp with adhesive onto prepared skin area. It is very important to use a simple rolling motion from one side to the other, allowing adhesive to dry clear.
Step 5: Once adhesive is clear, apply glitter using puff bottle. Gently move litter around the entire stamped area with the lollipop pad and press the glitter into the stamp pattern. Use soft makeup brush to remove excess glitter. You can save the excess glitter for a future rainbow body art.
Recommendations:
We suggest that body art only be placed on arms and lower legs, not on faces.
Do NOT let adhesive to freeze, it will turn solid.
To remove body art, gently rub with alcohol or baby oil.
To open bottles, press a pin into the top of the bottles. A smaller hole allows you to control the products best during the application process.
View full product details


Cupid Arrow
$4.95
- Size: 2.25" x 2.25"
- Features: Wooden stamp is designed for the sole purpose of applying adhesive to create glitter tattoos as directed by instructions provided with purchase. (NOTE: Actual stamp may have some slight variations from picture shown here.)
-
Step 1: Clean the skin area with JEMS Skin Cleaner with a cotton ball.
Step 2: Dry the skin with JEMS Prep Compound by lightly dusting application area and brushing it with a soft bristle brush.
Step 3: Apply adhesive to the beveled edge of sponge brush and dab adhesive onto the desired body stamp. DO NOT brush adhesive onto the stamp, a bubble texture on the stamp is alright.
Step 4: Roll the stamp with adhesive onto prepared skin area. It is very important to use a simple rolling motion from one side to the other, allowing adhesive to dry clear.
Step 5: Once adhesive is clear, apply glitter using puff bottle. Gently move litter around the entire stamped area with the lollipop pad and press the glitter into the stamp pattern. Use soft makeup brush to remove excess glitter. You can save the excess glitter for a future rainbow body art.
Recommendations:
We suggest that body art only be placed on arms and lower legs, not on faces.
Do NOT let adhesive to freeze, it will turn solid.
To remove body art, gently rub with alcohol or baby oil.
To open bottles, press a pin into the top of the bottles. A smaller hole allows you to control the products best during the application process.
View full product details


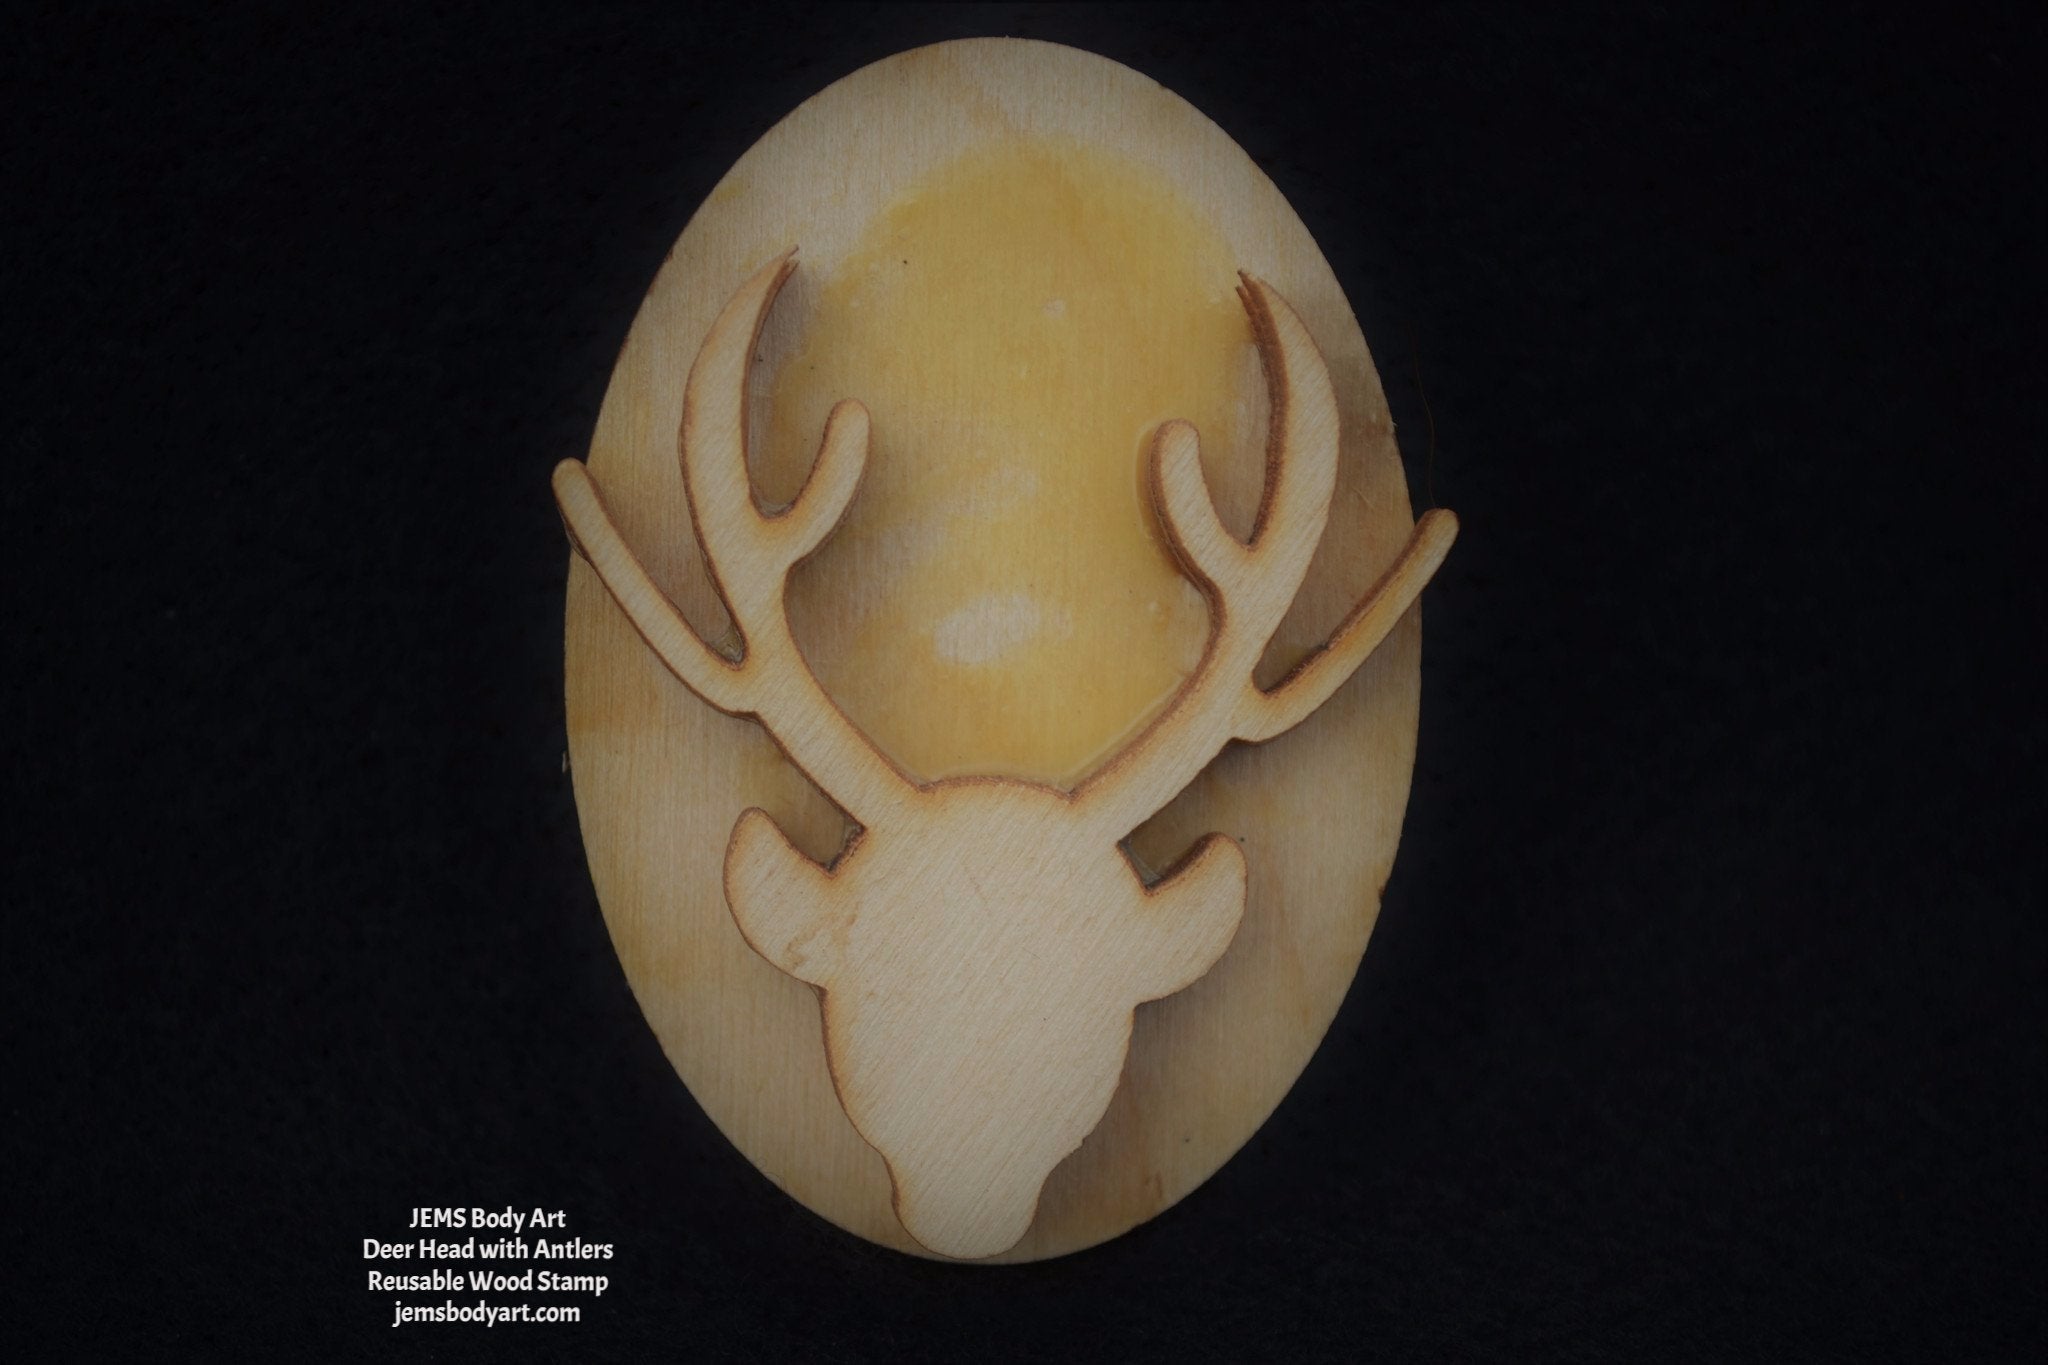
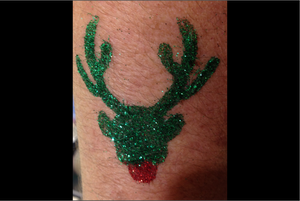
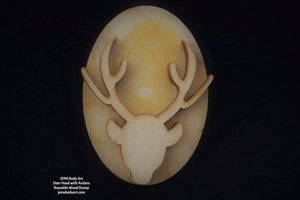
Deer Head with Antlers
$4.95
-
Size: 2" W x 1.75" L
Features: Wooden stamp is designed for the sole purpose of applying adhesive to create glitter tattoos as directed by instructions provided with purchase. (NOTE: Actual stamp may have some slight variations from picture shown here.) -
Step 1: Clean the skin area with JEMS Skin Cleaner with a cotton ball.
Step 2: Dry the skin with JEMS Prep Compound by lightly dusting application area and brushing it with a soft bristle brush.
Step 3: Apply adhesive to the beveled edge of sponge brush and dab adhesive onto the desired body stamp. DO NOT brush adhesive onto the stamp, a bubble texture on the stamp is alright.
Step 4: Roll the stamp with adhesive onto prepared skin area. It is very important to use a simple rolling motion from one side to the other, allowing adhesive to dry clear.
Step 5: Once adhesive is clear, apply glitter using puff bottle. Gently move litter around the entire stamped area with the lollipop pad and press the glitter into the stamp pattern. Use soft makeup brush to remove excess glitter. You can save the excess glitter for a future rainbow body art.
Recommendations:
We suggest that body art only be placed on arms and lower legs, not on faces.
Do NOT let adhesive to freeze, it will turn solid.
To remove body art, gently rub with alcohol or baby oil.
To open bottles, press a pin into the top of the bottles. A smaller hole allows you to control the products best during the application process.
View full product details
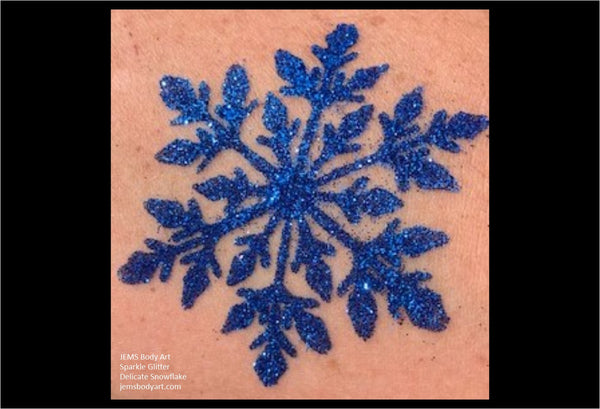

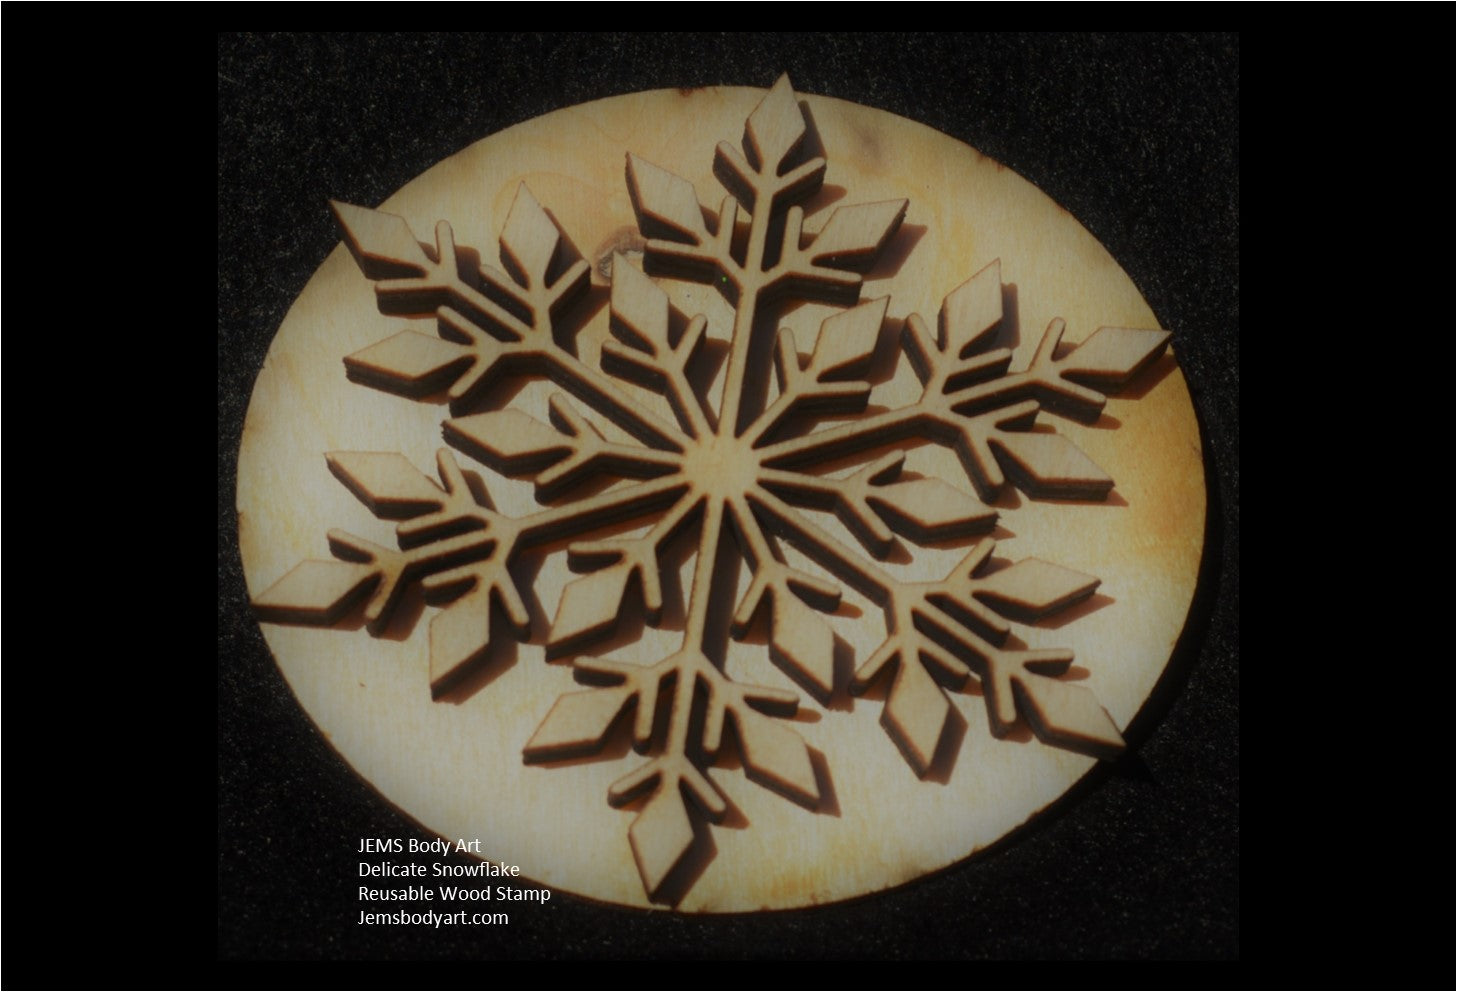
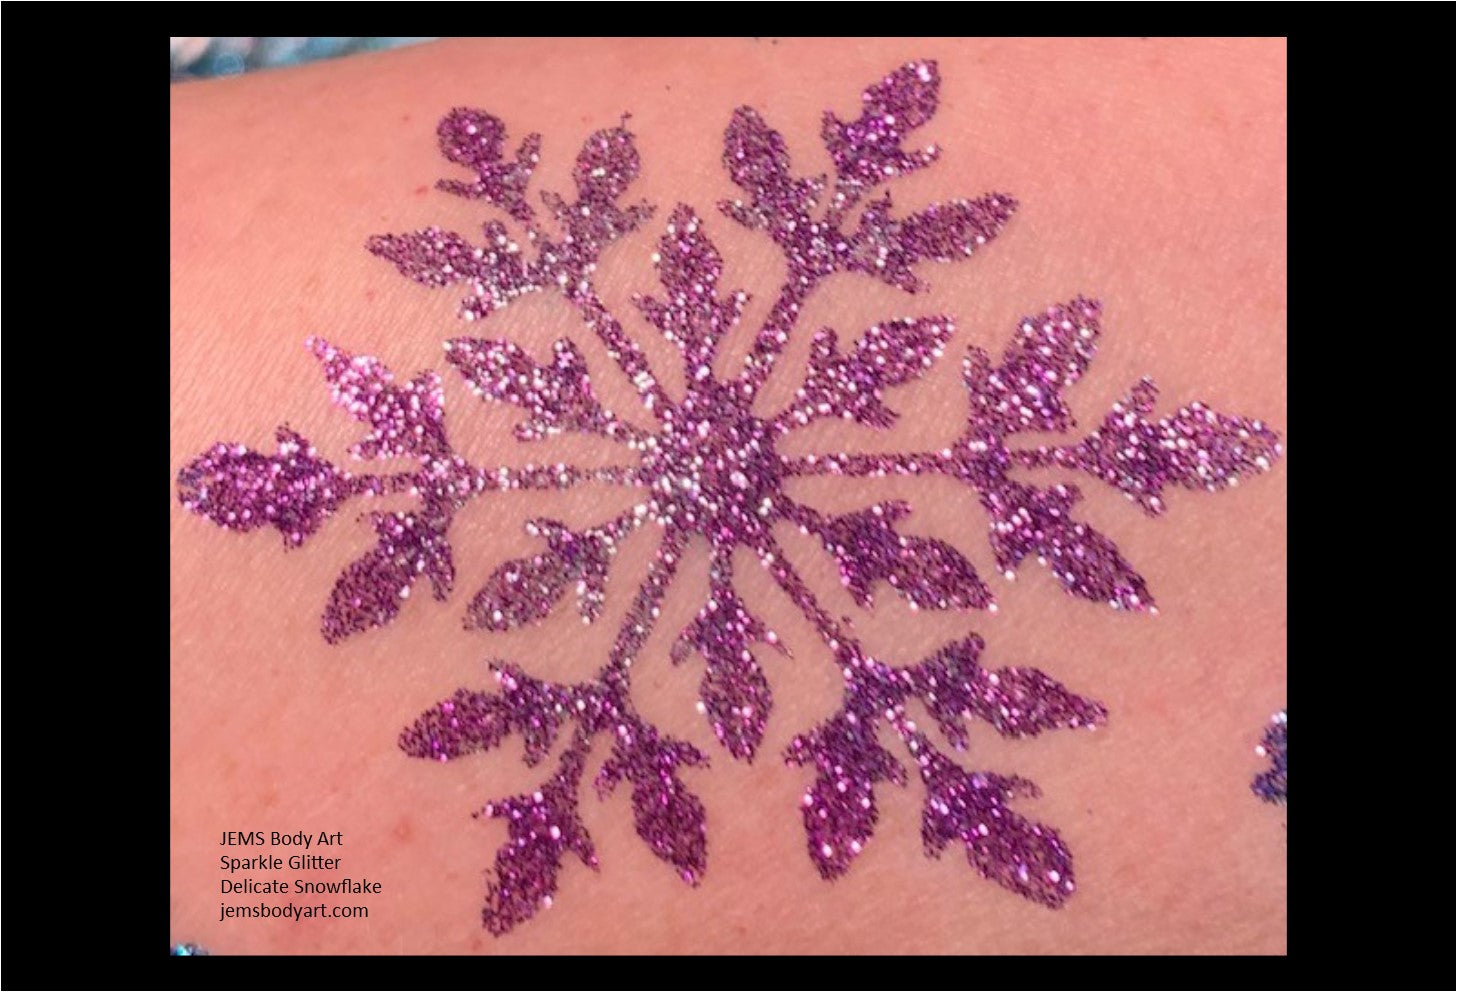
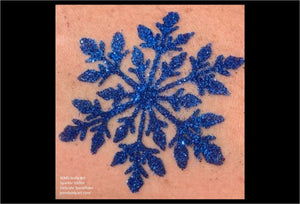

Delicate Snowflake
$4.95
-
Size: 2.25" round
Features: Wooden stamp is designed for the sole purpose of applying adhesive to create glitter tattoos as directed by instructions provided with purchase. (NOTE: Actual stamp may have some slight variations from picture shown here.) -
Step 1: Clean the skin area with JEMS Skin Cleaner with a cotton ball.
Step 2: Dry the skin with JEMS Prep Compound by lightly dusting application area and brushing it with a soft bristle brush.
Step 3: Apply adhesive to the beveled edge of sponge brush and dab adhesive onto the desired body stamp. DO NOT brush adhesive onto the stamp, a bubble texture on the stamp is alright.
Step 4: Roll the stamp with adhesive onto prepared skin area. It is very important to use a simple rolling motion from one side to the other, allowing adhesive to dry clear.
Step 5: Once adhesive is clear, apply glitter using puff bottle. Gently move litter around the entire stamped area with the lollipop pad and press the glitter into the stamp pattern. Use soft makeup brush to remove excess glitter. You can save the excess glitter for a future rainbow body art.
Recommendations:
We suggest that body art only be placed on arms and lower legs, not on faces.
Do NOT let adhesive to freeze, it will turn solid.
To remove body art, gently rub with alcohol or baby oil.
To open bottles, press a pin into the top of the bottles. A smaller hole allows you to control the products best during the application process.
View full product details
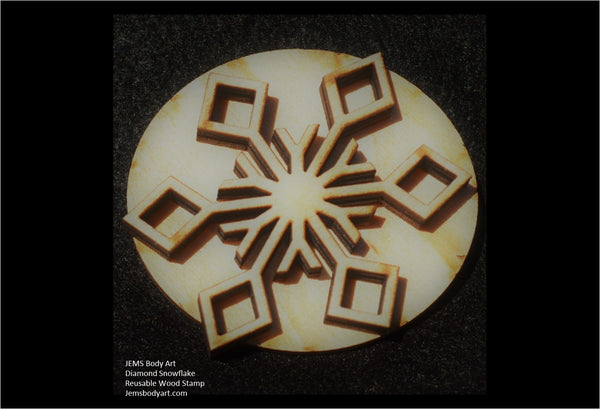

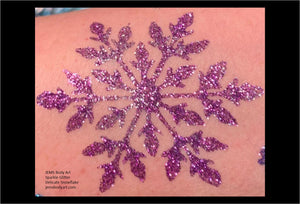
Diamond Snowflake
$4.95
-
Size: 2.25" round
Features: Wooden stamp is designed for the sole purpose of applying adhesive to create glitter tattoos as directed by instructions provided with purchase. (NOTE: Actual stamp may have some slight variations from picture shown here.) -
Step 1: Clean the skin area with JEMS Skin Cleaner with a cotton ball.
Step 2: Dry the skin with JEMS Prep Compound by lightly dusting application area and brushing it with a soft bristle brush.
Step 3: Apply adhesive to the beveled edge of sponge brush and dab adhesive onto the desired body stamp. DO NOT brush adhesive onto the stamp, a bubble texture on the stamp is alright.
Step 4: Roll the stamp with adhesive onto prepared skin area. It is very important to use a simple rolling motion from one side to the other, allowing adhesive to dry clear.
Step 5: Once adhesive is clear, apply glitter using puff bottle. Gently move litter around the entire stamped area with the lollipop pad and press the glitter into the stamp pattern. Use soft makeup brush to remove excess glitter. You can save the excess glitter for a future rainbow body art.
Recommendations:
We suggest that body art only be placed on arms and lower legs, not on faces.
Do NOT let adhesive to freeze, it will turn solid.
To remove body art, gently rub with alcohol or baby oil.
To open bottles, press a pin into the top of the bottles. A smaller hole allows you to control the products best during the application process.
View full product details
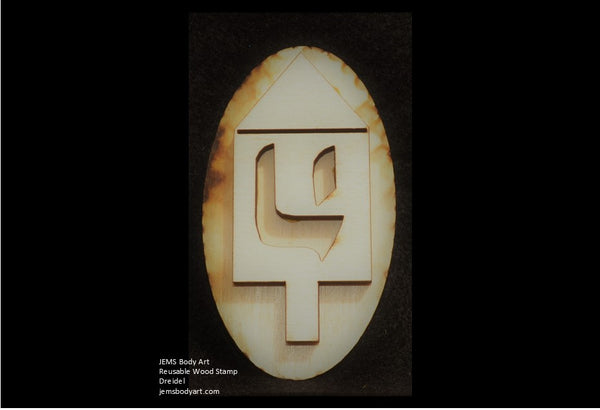
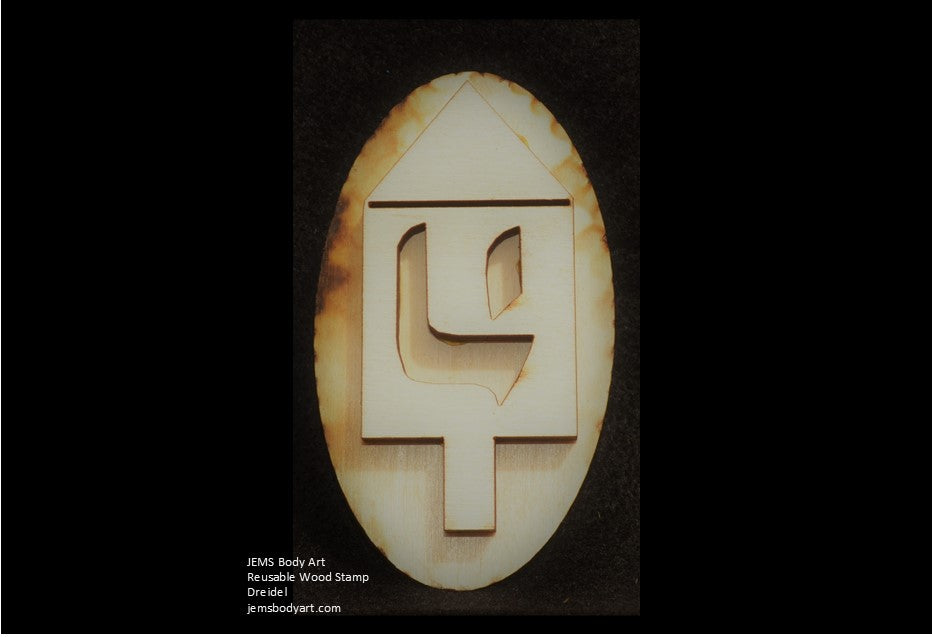
Dreidel
$4.95
- Size: 2.5" tall x 2.0" wide
- Features: Wooden stamp is designed for the sole purpose of applying adhesive to create glitter tattoos as directed by instructions provided with purchase. (NOTE: Actual stamp may have some slight variations from picture shown here.)
-
Step 1: Clean the skin area with JEMS Skin Cleaner with a cotton ball.
Step 2: Dry the skin with JEMS Prep Compound by lightly dusting application area and brushing it with a soft bristle brush.
Step 3: Apply adhesive to the beveled edge of sponge brush and dab adhesive onto the desired body stamp. DO NOT brush adhesive onto the stamp, a bubble texture on the stamp is alright.
Step 4: Roll the stamp with adhesive onto prepared skin area. It is very important to use a simple rolling motion from one side to the other, allowing adhesive to dry clear.
Step 5: Once adhesive is clear, apply glitter using puff bottle. Gently move litter around the entire stamped area with the lollipop pad and press the glitter into the stamp pattern. Use soft makeup brush to remove excess glitter. You can save the excess glitter for a future rainbow body art.
Recommendations:
We suggest that body art only be placed on arms and lower legs, not on faces.
Do NOT let adhesive to freeze, it will turn solid.
To remove body art, gently rub with alcohol or baby oil.
To open bottles, press a pin into the top of the bottles. A smaller hole allows you to control the products best during the application process.
View full product details

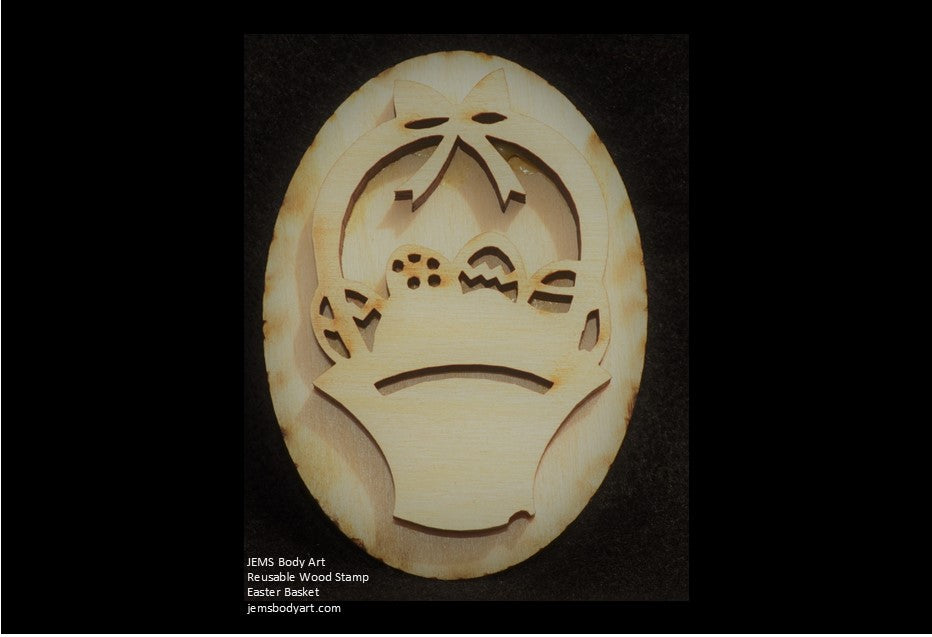
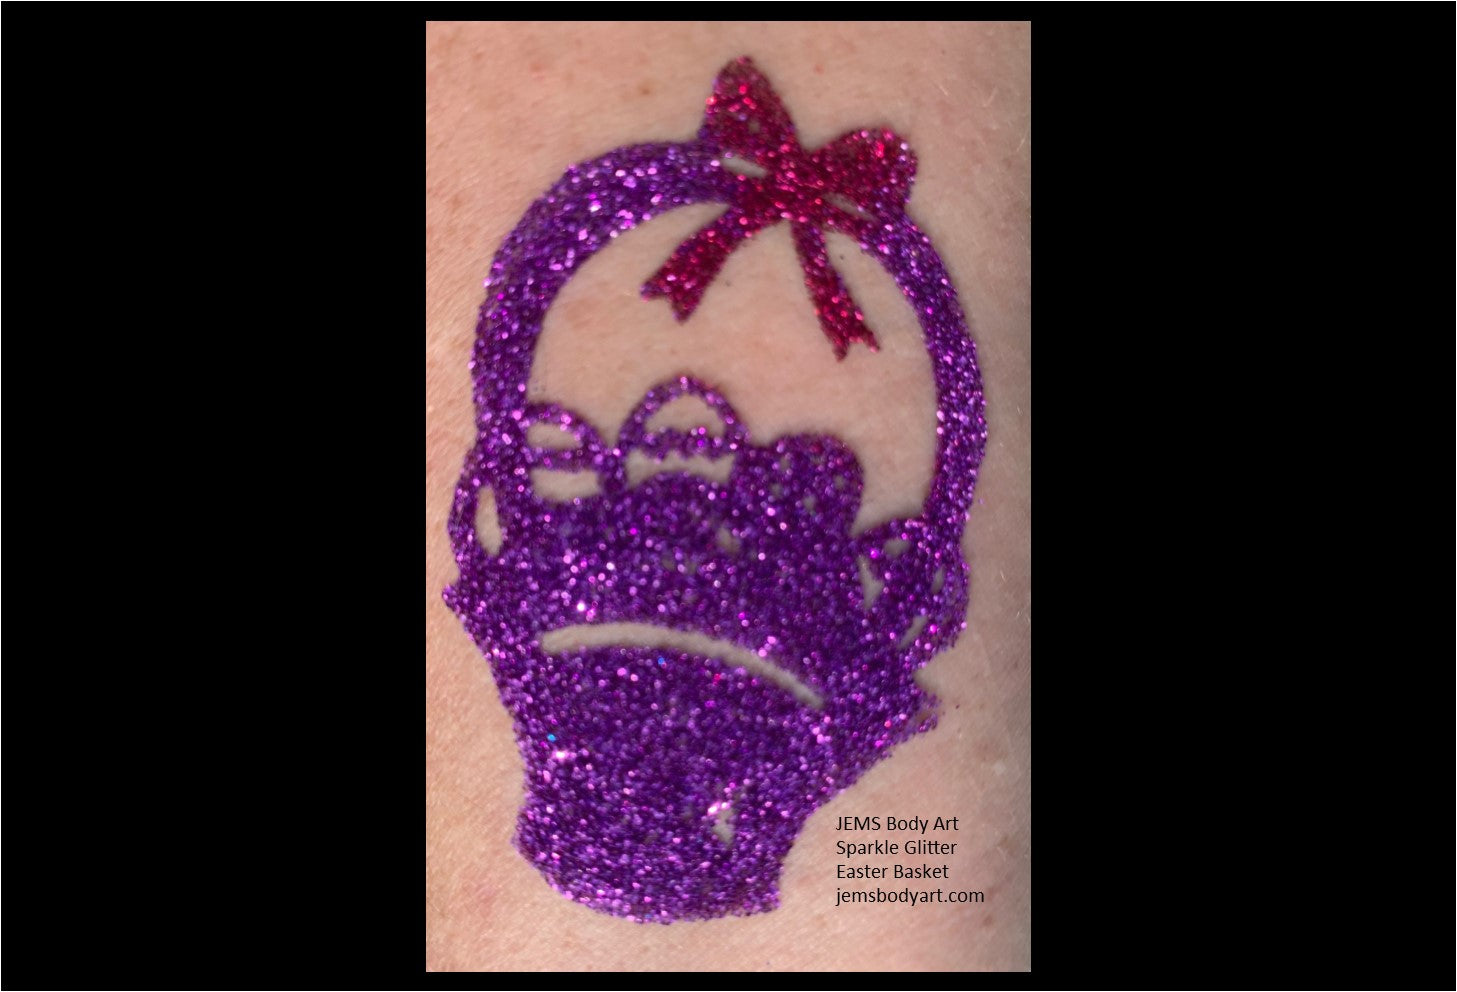
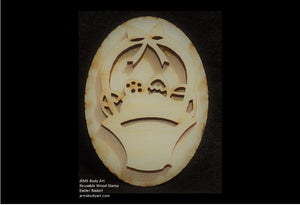

Easter Basket
$4.95
- Size: 2.75" x 1.75"
- Features: Wooden stamp is designed for the sole purpose of applying adhesive to create glitter tattoos as directed by instructions provided with purchase. (NOTE: Actual stamp may have some slight variations from picture shown here.)
-
Step 1: Clean the skin area with JEMS Skin Cleaner with a cotton ball.
Step 2: Dry the skin with JEMS Prep Compound by lightly dusting application area and brushing it with a soft bristle brush.
Step 3: Apply adhesive to the beveled edge of sponge brush and dab adhesive onto the desired body stamp. DO NOT brush adhesive onto the stamp, a bubble texture on the stamp is alright.
Step 4: Roll the stamp with adhesive onto prepared skin area. It is very important to use a simple rolling motion from one side to the other, allowing adhesive to dry clear.
Step 5: Once adhesive is clear, apply glitter using puff bottle. Gently move litter around the entire stamped area with the lollipop pad and press the glitter into the stamp pattern. Use soft makeup brush to remove excess glitter. You can save the excess glitter for a future rainbow body art.
Recommendations:
We suggest that body art only be placed on arms and lower legs, not on faces.
Do NOT let adhesive to freeze, it will turn solid.
To remove body art, gently rub with alcohol or baby oil.
To open bottles, press a pin into the top of the bottles. A smaller hole allows you to control the products best during the application process.
View full product details

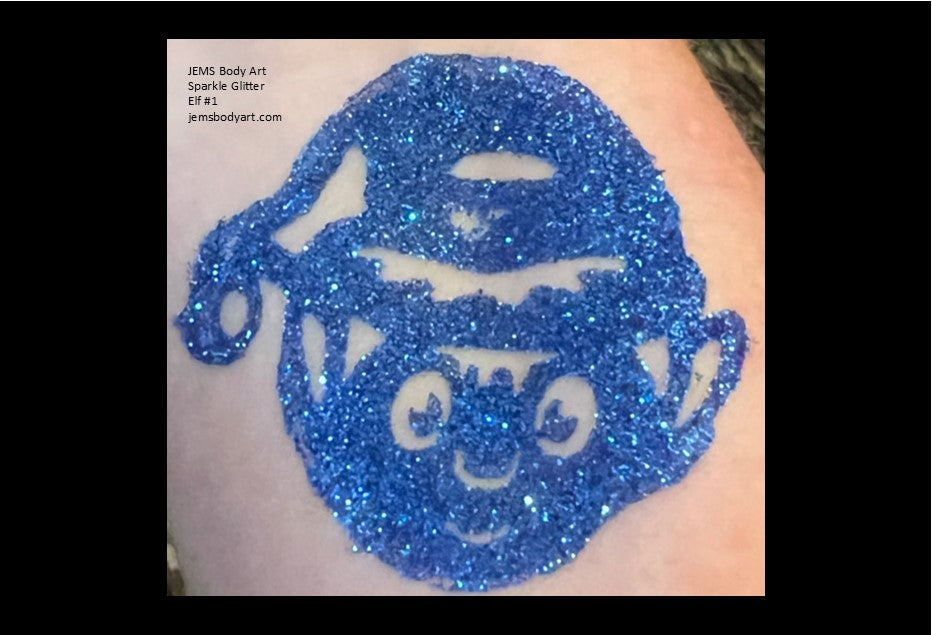


Elf #1
$4.95
- Size: 2.0"Tall x 2.0"Wide
- Features: Wooden stamp is designed for the sole purpose of applying adhesive to create glitter tattoos as directed by instructions provided with G. (NOTE: Actual stamp may have some slight variations from picture shown here.)
-
Step 1: Clean the skin area with JEMS Skin Cleaner with a cotton ball.
Step 2: Dry the skin with JEMS Prep Compound by lightly dusting application area and brushing it with a soft bristle brush.
Step 3: Apply adhesive to the beveled edge of sponge brush and dab adhesive onto the desired body stamp. DO NOT brush adhesive onto the stamp, a bubble texture on the stamp is alright.
Step 4: Roll the stamp with adhesive onto prepared skin area. It is very important to use a simple rolling motion from one side to the other, allowing adhesive to dry clear.
Step 5: Once adhesive is clear, apply glitter using puff bottle. Gently move litter around the entire stamped area with the lollipop pad and press the glitter into the stamp pattern. Use soft makeup brush to remove excess glitter. You can save the excess glitter for a future rainbow body art.
Recommendations:
We suggest that body art only be placed on arms and lower legs, not on faces.
Do NOT let adhesive to freeze, it will turn solid.
To remove body art, gently rub with alcohol or baby oil.
To open bottles, press a pin into the top of the bottles. A smaller hole allows you to control the products best during the application process.
View full product details
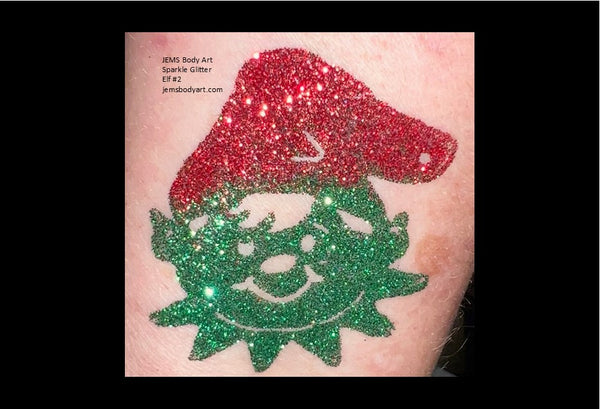

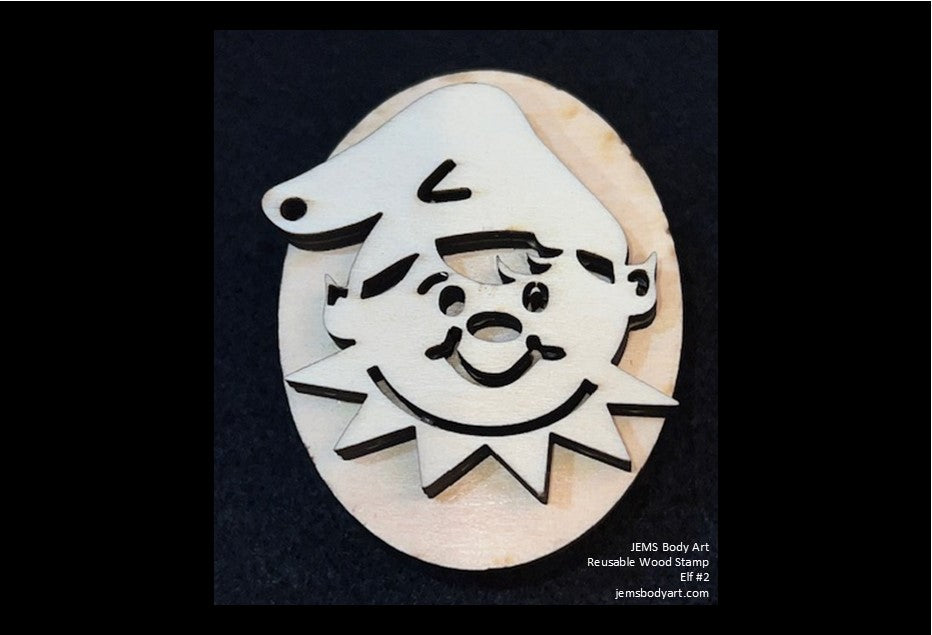
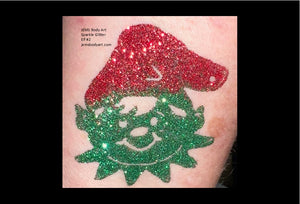

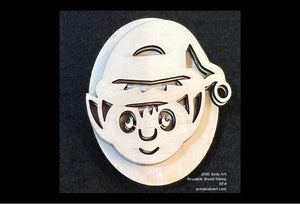
Elf #2
$4.95
- Size: 2.0"Tall x 2.0"Wide
- Features: Wooden stamp is designed for the sole purpose of applying adhesive to create glitter tattoos as directed by instructions provided with G. (NOTE: Actual stamp may have some slight variations from picture shown here.)
-
Step 1: Clean the skin area with JEMS Skin Cleaner with a cotton ball.
Step 2: Dry the skin with JEMS Prep Compound by lightly dusting application area and brushing it with a soft bristle brush.
Step 3: Apply adhesive to the beveled edge of sponge brush and dab adhesive onto the desired body stamp. DO NOT brush adhesive onto the stamp, a bubble texture on the stamp is alright.
Step 4: Roll the stamp with adhesive onto prepared skin area. It is very important to use a simple rolling motion from one side to the other, allowing adhesive to dry clear.
Step 5: Once adhesive is clear, apply glitter using puff bottle. Gently move litter around the entire stamped area with the lollipop pad and press the glitter into the stamp pattern. Use soft makeup brush to remove excess glitter. You can save the excess glitter for a future rainbow body art.
Recommendations:
We suggest that body art only be placed on arms and lower legs, not on faces.
Do NOT let adhesive to freeze, it will turn solid.
To remove body art, gently rub with alcohol or baby oil.
To open bottles, press a pin into the top of the bottles. A smaller hole allows you to control the products best during the application process.
View full product details
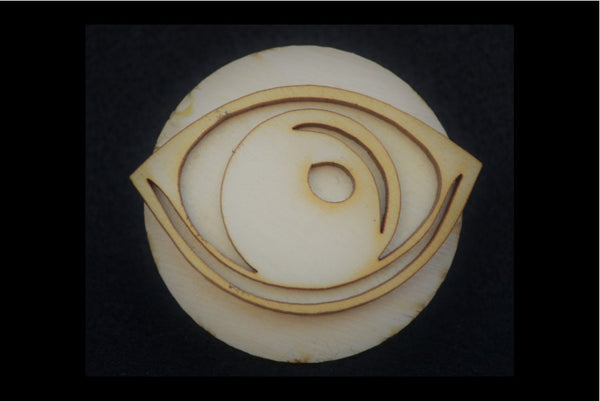

Eye
$4.95
- Size: 2"
- Features: Wooden stamp is designed for the sole purpose of applying adhesive to create glitter tattoos as directed by instructions provided with purchase. (NOTE: Actual stamp may have some slight variations from picture shown here.)
-
Step 1: Clean the skin area with JEMS Skin Cleaner with a cotton ball.
Step 2: Dry the skin with JEMS Prep Compound by lightly dusting application area and brushing it with a soft bristle brush.
Step 3: Apply adhesive to the beveled edge of sponge brush and dab adhesive onto the desired body stamp. DO NOT brush adhesive onto the stamp, a bubble texture on the stamp is alright.
Step 4: Roll the stamp with adhesive onto prepared skin area. It is very important to use a simple rolling motion from one side to the other, allowing adhesive to dry clear.
Step 5: Once adhesive is clear, apply glitter using puff bottle. Gently move litter around the entire stamped area with the lollipop pad and press the glitter into the stamp pattern. Use soft makeup brush to remove excess glitter. You can save the excess glitter for a future rainbow body art.
Recommendations:
We suggest that body art only be placed on arms and lower legs, not on faces.
Do NOT let adhesive to freeze, it will turn solid.
To remove body art, gently rub with alcohol or baby oil.
To open bottles, press a pin into the top of the bottles. A smaller hole allows you to control the products best during the application process.
View full product details


Fall Pumpkin
$4.95
- Size: 2.25" x 2"
- Features: Wooden stamp is designed for the sole purpose of applying adhesive to create glitter tattoos as directed by instructions provided with purchase. (NOTE: Actual stamp may have some slight variations from picture shown here.)
-
Step 1: Clean the skin area with JEMS Skin Cleaner with a cotton ball.
Step 2: Dry the skin with JEMS Prep Compound by lightly dusting application area and brushing it with a soft bristle brush.
Step 3: Apply adhesive to the beveled edge of sponge brush and dab adhesive onto the desired body stamp. DO NOT brush adhesive onto the stamp, a bubble texture on the stamp is alright.
Step 4: Roll the stamp with adhesive onto prepared skin area. It is very important to use a simple rolling motion from one side to the other, allowing adhesive to dry clear.
Step 5: Once adhesive is clear, apply glitter using puff bottle. Gently move litter around the entire stamped area with the lollipop pad and press the glitter into the stamp pattern. Use soft makeup brush to remove excess glitter. You can save the excess glitter for a future rainbow body art.
Recommendations:
We suggest that body art only be placed on arms and lower legs, not on faces.
Do NOT let adhesive to freeze, it will turn solid.
To remove body art, gently rub with alcohol or baby oil.
To open bottles, press a pin into the top of the bottles. A smaller hole allows you to control the products best during the application process.
View full product details


Fancy Star
$4.95
-
Size: 2.0" x 2.0"
Features: Wooden stamp is designed for the sole purpose of applying adhesive to create glitter tattoos as directed by instructions provided with purchase. (NOTE: Actual stamp may have some slight variations from picture shown here.) -
Step 1: Clean the skin area with JEMS Skin Cleaner with a cotton ball.
Step 2: Dry the skin with JEMS Prep Compound by lightly dusting application area and brushing it with a soft bristle brush.
Step 3: Apply adhesive to the beveled edge of sponge brush and dab adhesive onto the desired body stamp. DO NOT brush adhesive onto the stamp, a bubble texture on the stamp is alright.
Step 4: Roll the stamp with adhesive onto prepared skin area. It is very important to use a simple rolling motion from one side to the other, allowing adhesive to dry clear.
Step 5: Once adhesive is clear, apply glitter using puff bottle. Gently move litter around the entire stamped area with the lollipop pad and press the glitter into the stamp pattern. Use soft makeup brush to remove excess glitter. You can save the excess glitter for a future rainbow body art.
Recommendations:
We suggest that body art only be placed on arms and lower legs, not on faces.
Do NOT let adhesive to freeze, it will turn solid.
To remove body art, gently rub with alcohol or baby oil.
To open bottles, press a pin into the top of the bottles. A smaller hole allows you to control the products best during the application process.
View full product details
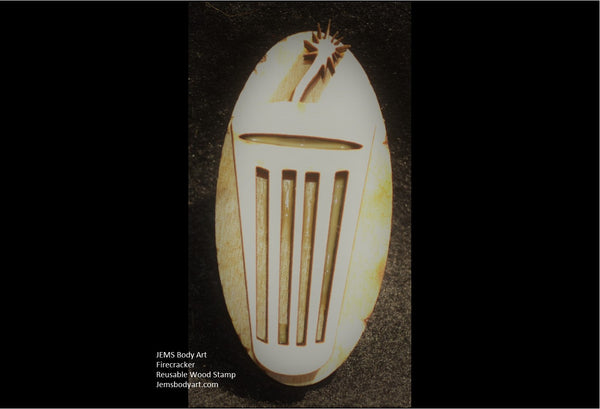
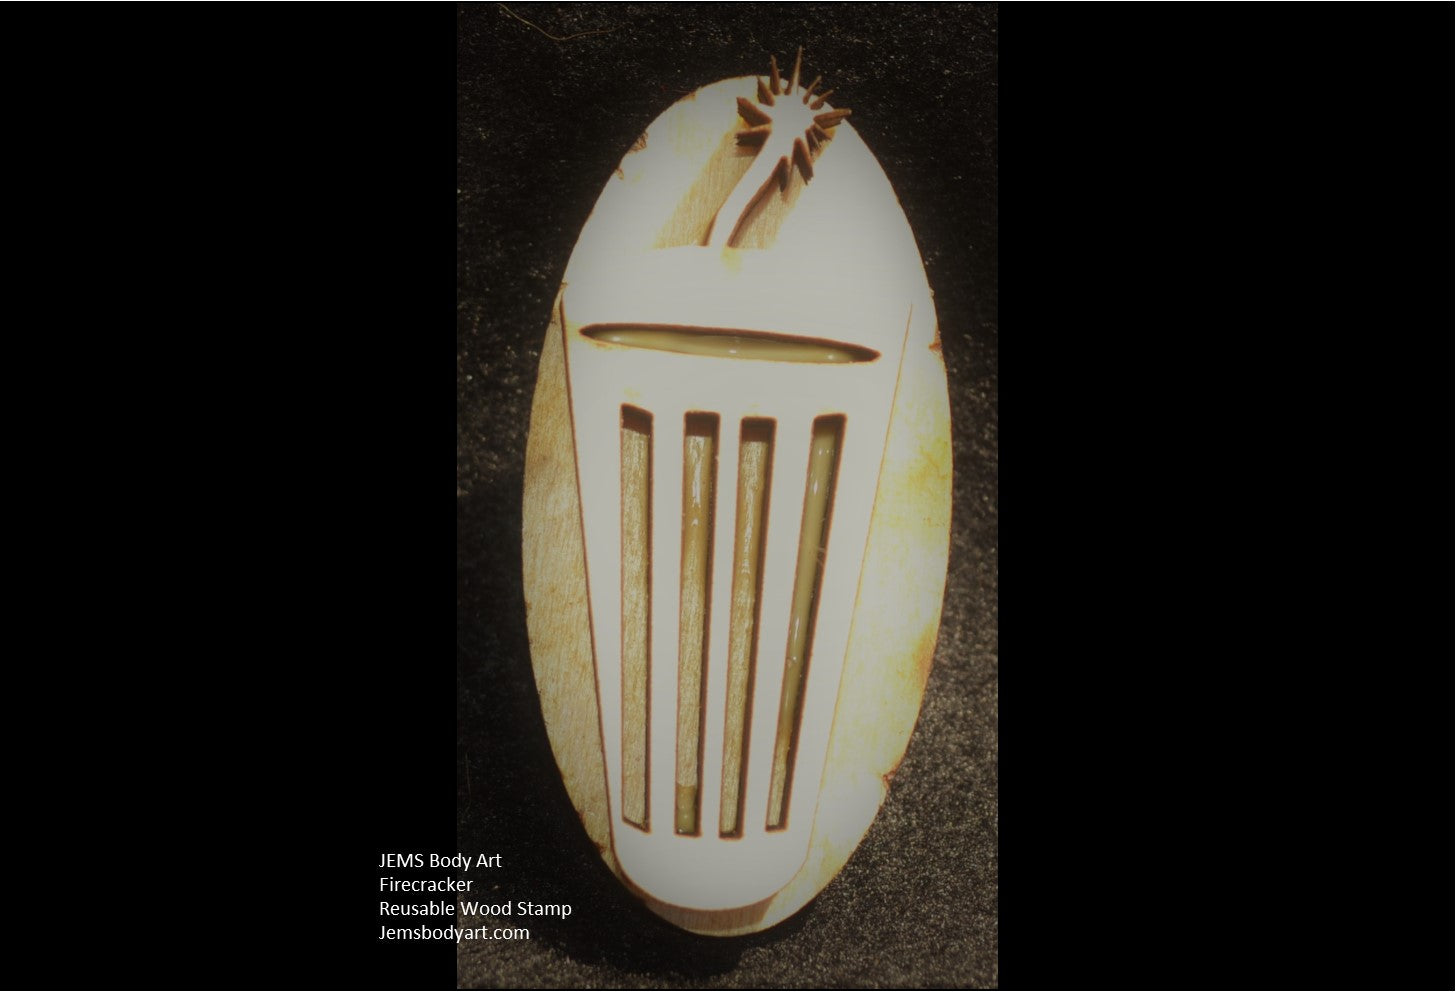
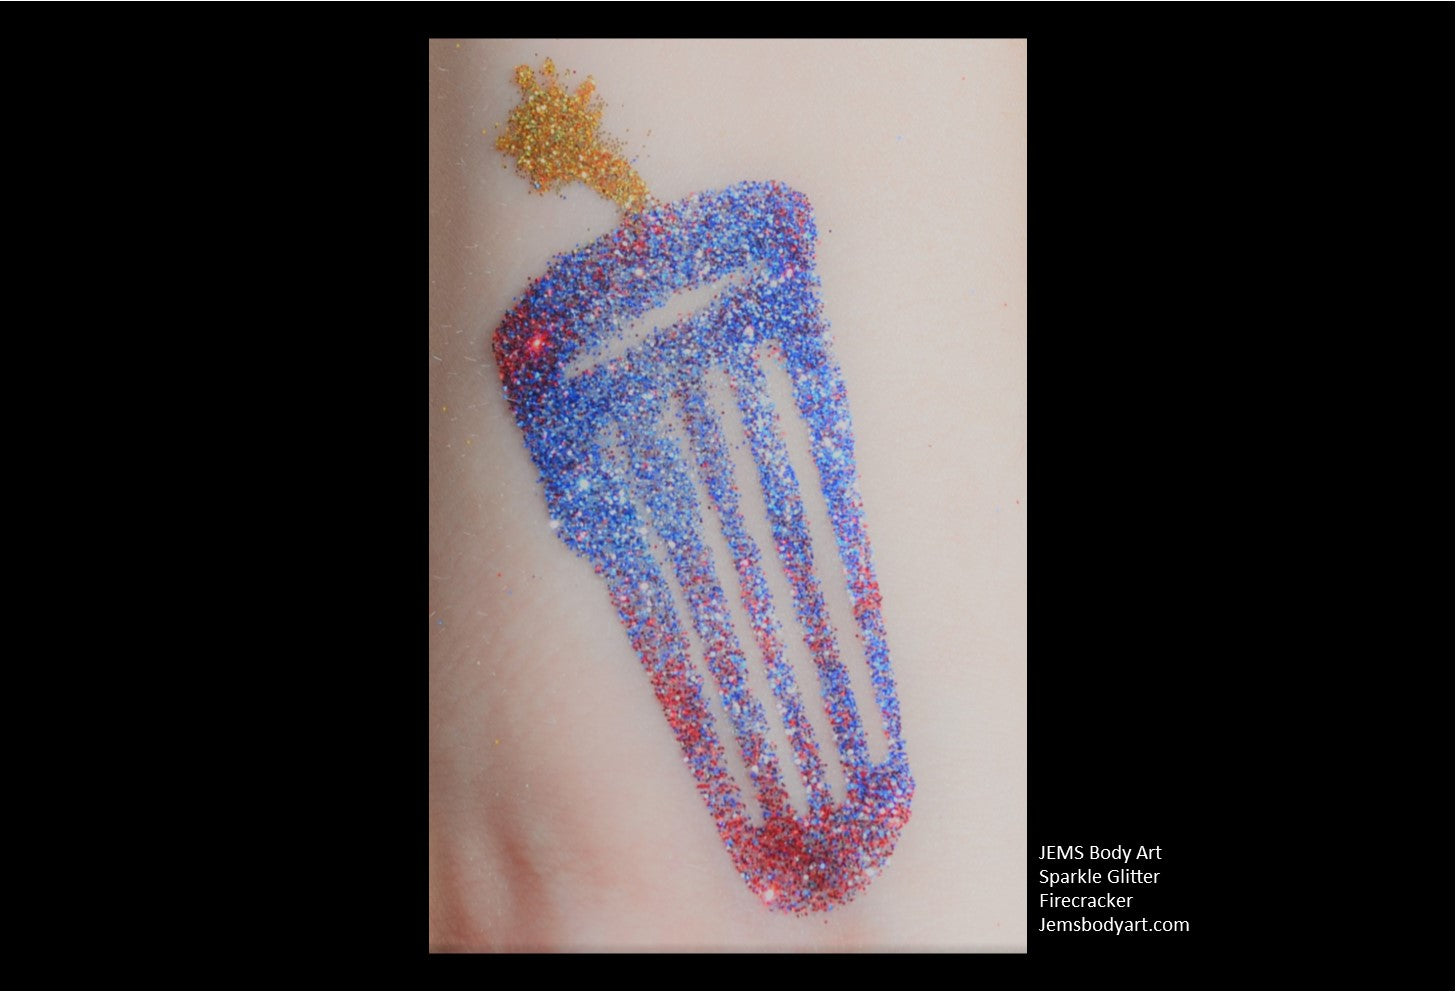

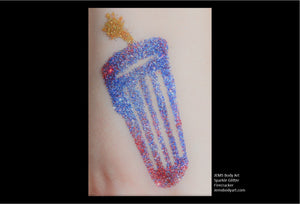
Firecracker
$4.95
- Size: 2.25" x 1"
- Features: Wooden stamp is designed for the sole purpose of applying adhesive to create glitter tattoos as directed by instructions provided with purchase. (NOTE: Actual stamp may have some slight variations from picture shown here.)
-
Step 1: Clean the skin area with JEMS Skin Cleaner with a cotton ball.
Step 2: Dry the skin with JEMS Prep Compound by lightly dusting application area and brushing it with a soft bristle brush.
Step 3: Apply adhesive to the beveled edge of sponge brush and dab adhesive onto the desired body stamp. DO NOT brush adhesive onto the stamp, a bubble texture on the stamp is alright.
Step 4: Roll the stamp with adhesive onto prepared skin area. It is very important to use a simple rolling motion from one side to the other, allowing adhesive to dry clear.
Step 5: Once adhesive is clear, apply glitter using puff bottle. Gently move litter around the entire stamped area with the lollipop pad and press the glitter into the stamp pattern. Use soft makeup brush to remove excess glitter. You can save the excess glitter for a future rainbow body art.
Recommendations:
We suggest that body art only be placed on arms and lower legs, not on faces.
Do NOT let adhesive to freeze, it will turn solid.
To remove body art, gently rub with alcohol or baby oil.
To open bottles, press a pin into the top of the bottles. A smaller hole allows you to control the products best during the application process.
View full product details

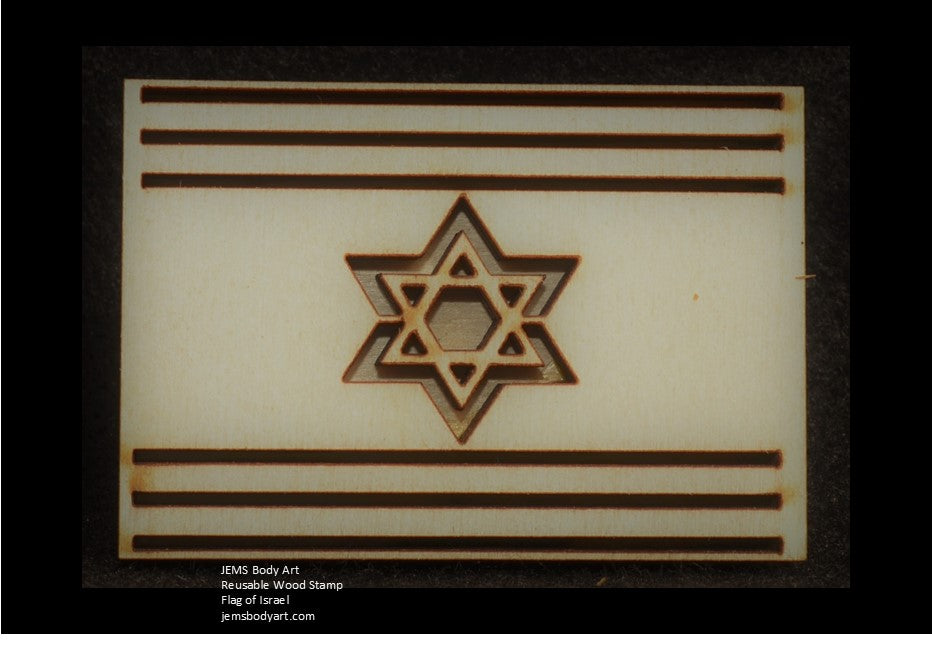
Flag of Israel
$4.95
- Size: 2.5" tall x 2.0" wide
- Features: Wooden stamp is designed for the sole purpose of applying adhesive to create glitter tattoos as directed by instructions provided with purchase. (NOTE: Actual stamp may have some slight variations from picture shown here.)
-
Step 1: Clean the skin area with JEMS Skin Cleaner with a cotton ball.
Step 2: Dry the skin with JEMS Prep Compound by lightly dusting application area and brushing it with a soft bristle brush.
Step 3: Apply adhesive to the beveled edge of sponge brush and dab adhesive onto the desired body stamp. DO NOT brush adhesive onto the stamp, a bubble texture on the stamp is alright.
Step 4: Roll the stamp with adhesive onto prepared skin area. It is very important to use a simple rolling motion from one side to the other, allowing adhesive to dry clear.
Step 5: Once adhesive is clear, apply glitter using puff bottle. Gently move litter around the entire stamped area with the lollipop pad and press the glitter into the stamp pattern. Use soft makeup brush to remove excess glitter. You can save the excess glitter for a future rainbow body art.
Recommendations:
We suggest that body art only be placed on arms and lower legs, not on faces.
Do NOT let adhesive to freeze, it will turn solid.
To remove body art, gently rub with alcohol or baby oil.
To open bottles, press a pin into the top of the bottles. A smaller hole allows you to control the products best during the application process.
View full product details


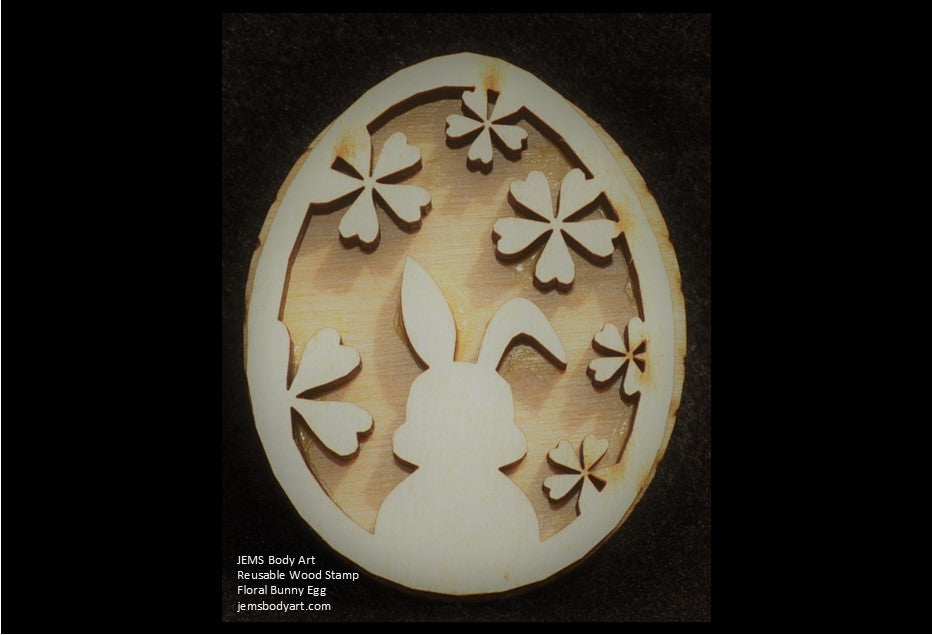
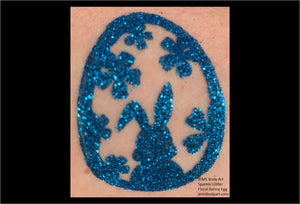

Floral Bunny Egg
$4.95
- Size: 2.25" x 1.75"
- Features: Wooden stamp is designed for the sole purpose of applying adhesive to create glitter tattoos as directed by instructions provided with purchase. (NOTE: Actual stamp may have some slight variations from picture shown here.)
-
Step 1: Clean the skin area with JEMS Skin Cleaner with a cotton ball.
Step 2: Dry the skin with JEMS Prep Compound by lightly dusting application area and brushing it with a soft bristle brush.
Step 3: Apply adhesive to the beveled edge of sponge brush and dab adhesive onto the desired body stamp. DO NOT brush adhesive onto the stamp, a bubble texture on the stamp is alright.
Step 4: Roll the stamp with adhesive onto prepared skin area. It is very important to use a simple rolling motion from one side to the other, allowing adhesive to dry clear.
Step 5: Once adhesive is clear, apply glitter using puff bottle. Gently move litter around the entire stamped area with the lollipop pad and press the glitter into the stamp pattern. Use soft makeup brush to remove excess glitter. You can save the excess glitter for a future rainbow body art.
Recommendations:
We suggest that body art only be placed on arms and lower legs, not on faces.
Do NOT let adhesive to freeze, it will turn solid.
To remove body art, gently rub with alcohol or baby oil.
To open bottles, press a pin into the top of the bottles. A smaller hole allows you to control the products best during the application process.
View full product details


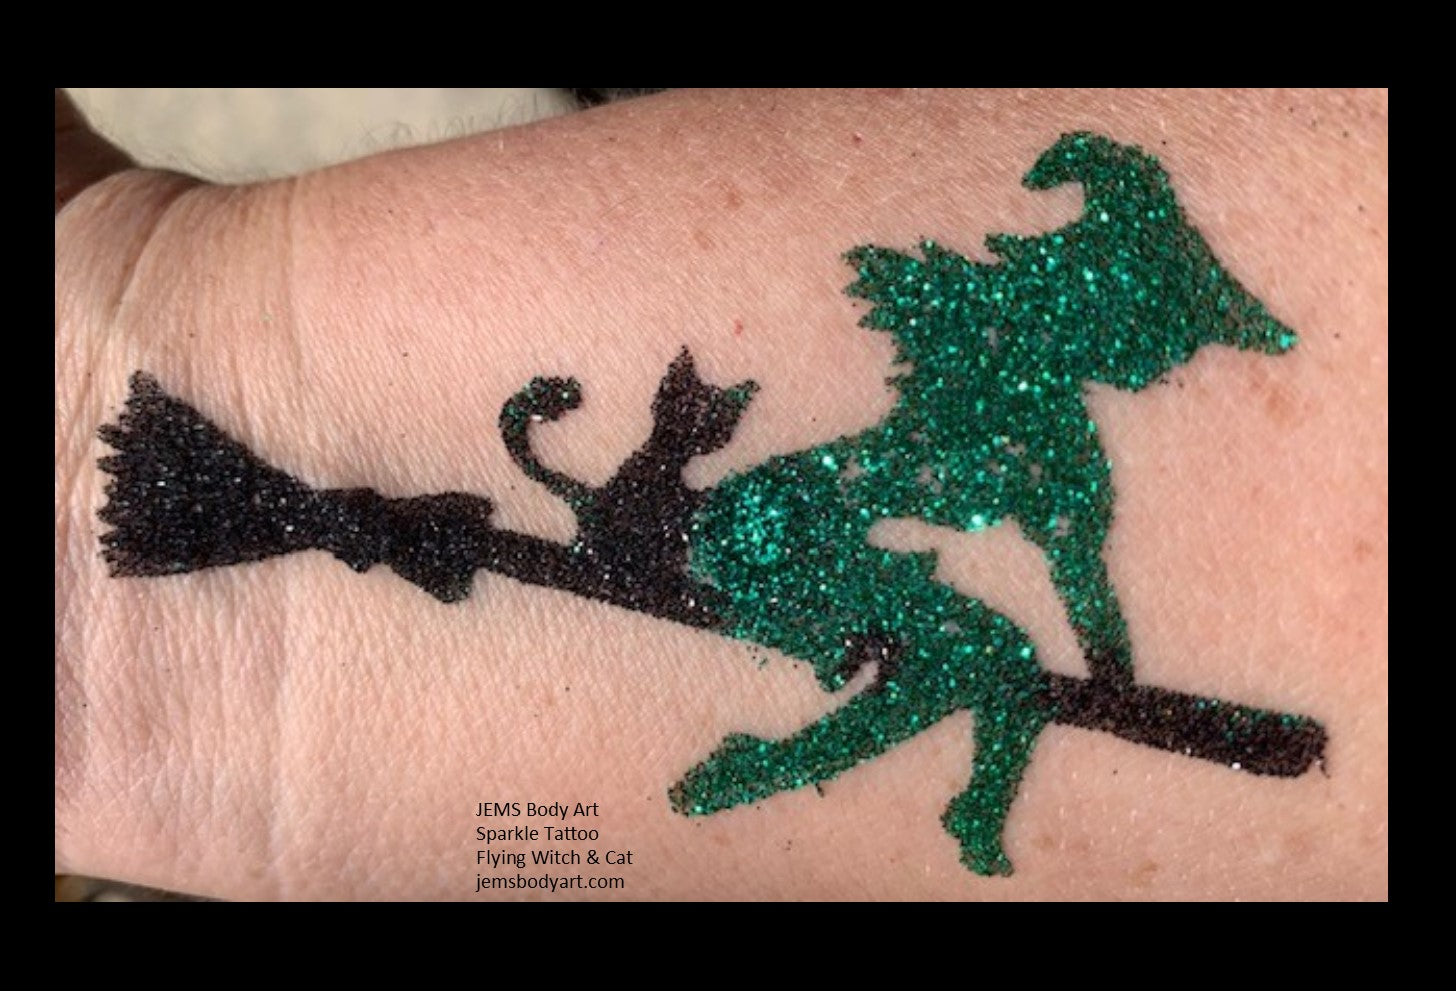
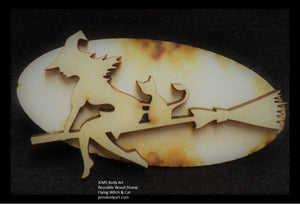
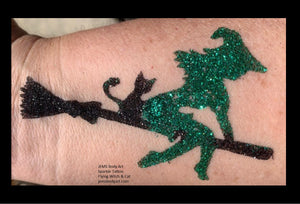
Flying Witch & Cat
$4.95
- Size: 2.75" x 1.75"
- Features: Wooden stamp is designed for the sole purpose of applying adhesive to create glitter tattoos as directed by instructions provided with purchase. (NOTE: Actual stamp may have some slight variations from picture shown here.)
-
Step 1: Clean the skin area with JEMS Skin Cleaner with a cotton ball.
Step 2: Dry the skin with JEMS Prep Compound by lightly dusting application area and brushing it with a soft bristle brush.
Step 3: Apply adhesive to the beveled edge of sponge brush and dab adhesive onto the desired body stamp. DO NOT brush adhesive onto the stamp, a bubble texture on the stamp is alright.
Step 4: Roll the stamp with adhesive onto prepared skin area. It is very important to use a simple rolling motion from one side to the other, allowing adhesive to dry clear.
Step 5: Once adhesive is clear, apply glitter using puff bottle. Gently move litter around the entire stamped area with the lollipop pad and press the glitter into the stamp pattern. Use soft makeup brush to remove excess glitter. You can save the excess glitter for a future rainbow body art.
Recommendations:
We suggest that body art only be placed on arms and lower legs, not on faces.
Do NOT let adhesive to freeze, it will turn solid.
To remove body art, gently rub with alcohol or baby oil.
To open bottles, press a pin into the top of the bottles. A smaller hole allows you to control the products best during the application process.
View full product details


Frankenstein
$4.95
- Size: 2" x 2"
- Features: Wooden stamp is designed for the sole purpose of applying adhesive to create glitter tattoos as directed by instructions provided with purchase. (NOTE: Actual stamp may have some slight variations from picture shown here.)
-
Step 1: Clean the skin area with JEMS Skin Cleaner with a cotton ball.
Step 2: Dry the skin with JEMS Prep Compound by lightly dusting application area and brushing it with a soft bristle brush.
Step 3: Apply adhesive to the beveled edge of sponge brush and dab adhesive onto the desired body stamp. DO NOT brush adhesive onto the stamp, a bubble texture on the stamp is alright.
Step 4: Roll the stamp with adhesive onto prepared skin area. It is very important to use a simple rolling motion from one side to the other, allowing adhesive to dry clear.
Step 5: Once adhesive is clear, apply glitter using puff bottle. Gently move litter around the entire stamped area with the lollipop pad and press the glitter into the stamp pattern. Use soft makeup brush to remove excess glitter. You can save the excess glitter for a future rainbow body art.
Recommendations:
We suggest that body art only be placed on arms and lower legs, not on faces.
Do NOT let adhesive to freeze, it will turn solid.
To remove body art, gently rub with alcohol or baby oil.
To open bottles, press a pin into the top of the bottles. A smaller hole allows you to control the products best during the application process.
View full product details
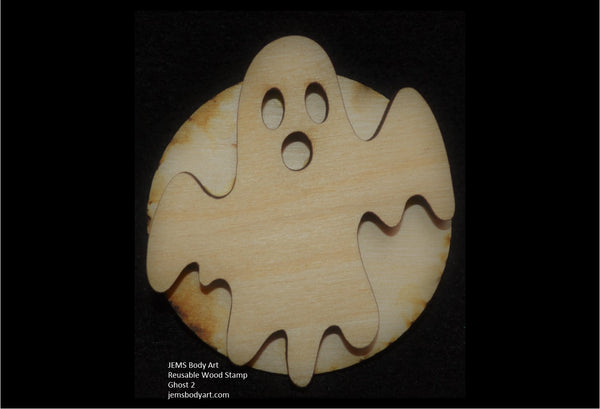

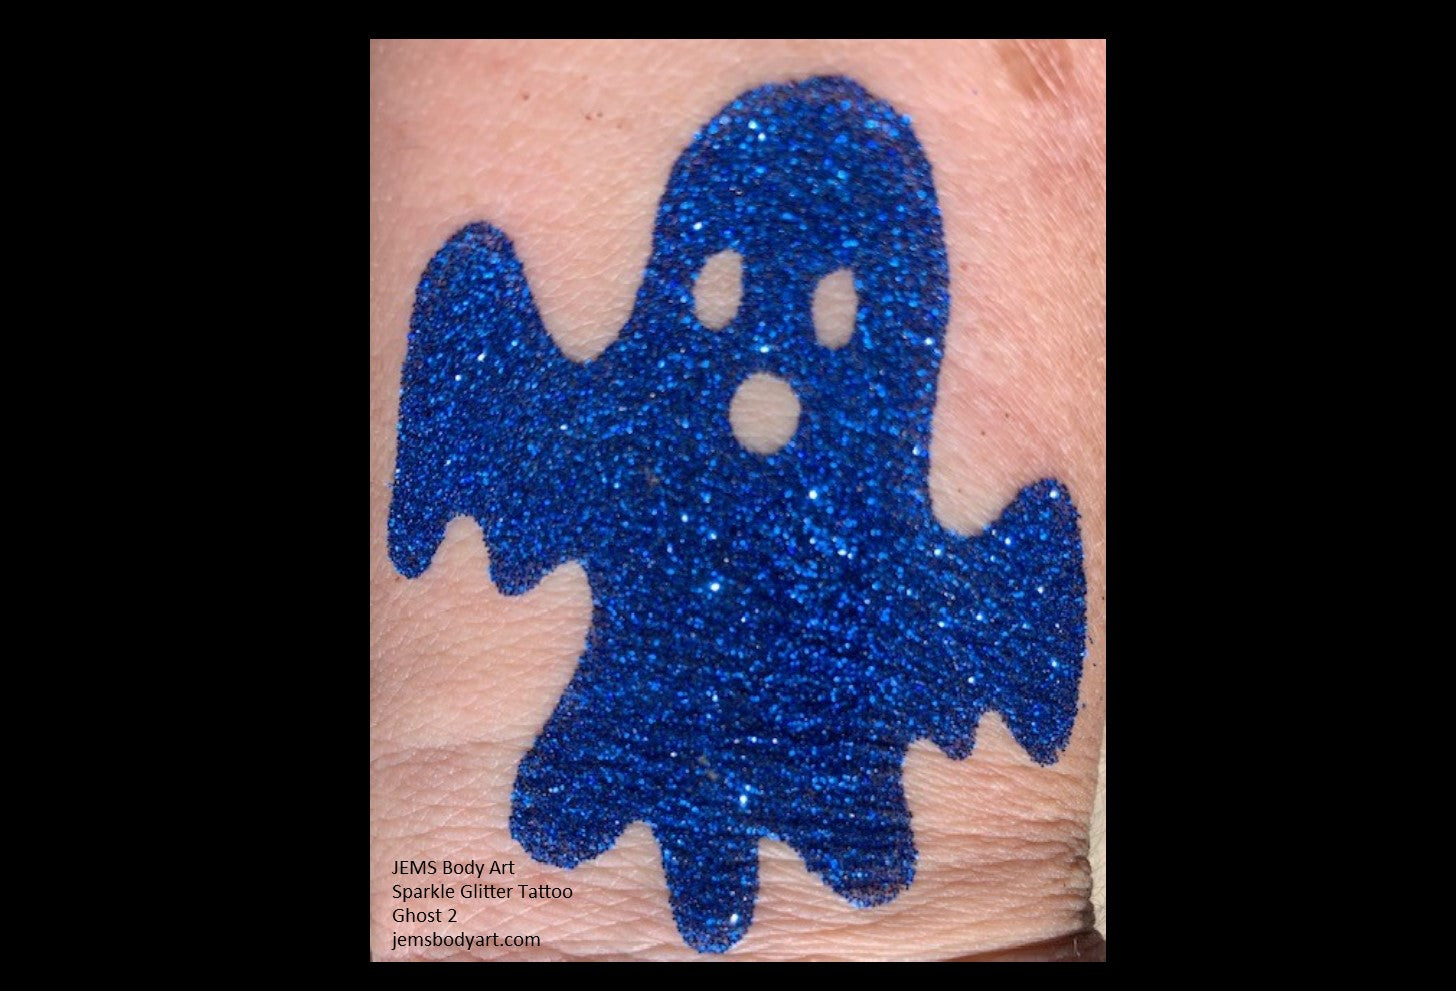


Ghost 2
$4.95
-
Size: 2.5" x 2.25"
Features: Wooden stamp is designed for the sole purpose of applying adhesive to create glitter tattoos as directed by instructions provided with purchase. (NOTE: Actual stamp may have some slight variations from picture shown here.) -
Step 1: Clean the skin area with JEMS Skin Cleaner with a cotton ball.
Step 2: Dry the skin with JEMS Prep Compound by lightly dusting application area and brushing it with a soft bristle brush.
Step 3: Apply adhesive to the beveled edge of sponge brush and dab adhesive onto the desired body stamp. DO NOT brush adhesive onto the stamp, a bubble texture on the stamp is alright.
Step 4: Roll the stamp with adhesive onto prepared skin area. It is very important to use a simple rolling motion from one side to the other, allowing adhesive to dry clear.
Step 5: Once adhesive is clear, apply glitter using puff bottle. Gently move litter around the entire stamped area with the lollipop pad and press the glitter into the stamp pattern. Use soft makeup brush to remove excess glitter. You can save the excess glitter for a future rainbow body art.
Recommendations:
We suggest that body art only be placed on arms and lower legs, not on faces.
Do NOT let adhesive to freeze, it will turn solid.
To remove body art, gently rub with alcohol or baby oil.
To open bottles, press a pin into the top of the bottles. A smaller hole allows you to control the products best during the application process.
View full product details
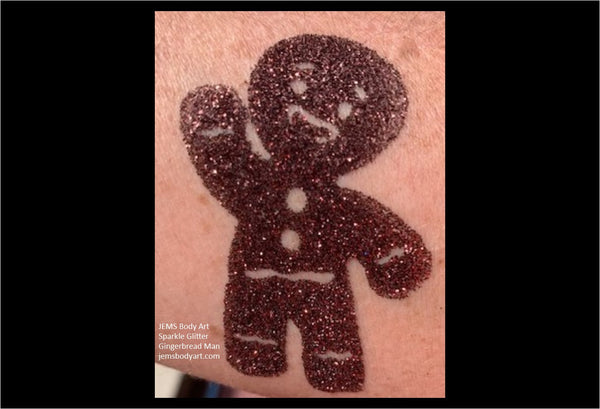

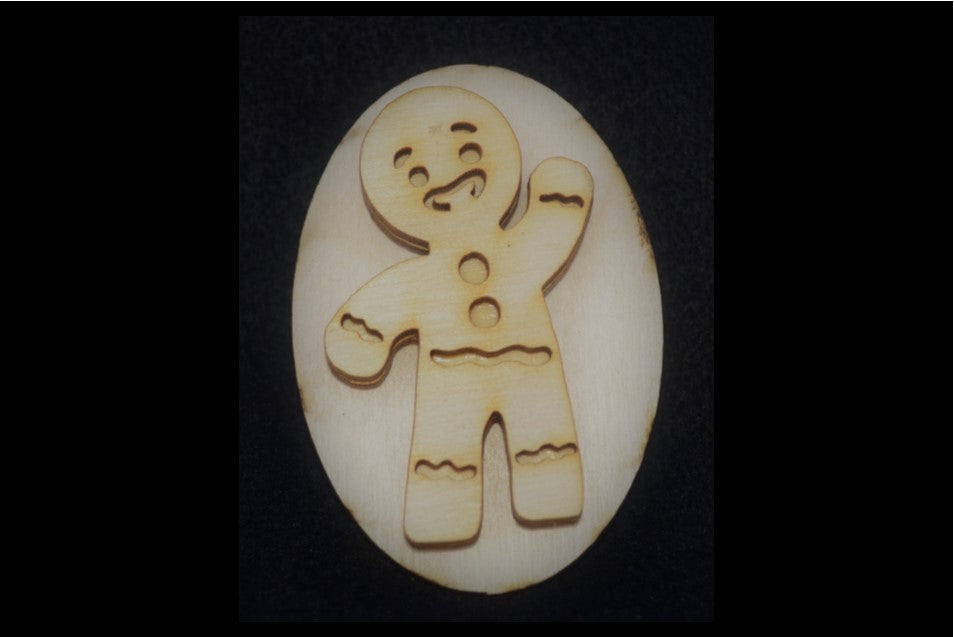


Gingerbread Man
$4.95
- Size: 2.5" x 1.5"
- Features: Wooden stamp is designed for the sole purpose of applying adhesive to create glitter tattoos as directed by instructions provided with purchase. (NOTE: Actual stamp may have some slight variations from picture shown here.)
-
Step 1: Clean the skin area with JEMS Skin Cleaner with a cotton ball.
Step 2: Dry the skin with JEMS Prep Compound by lightly dusting application area and brushing it with a soft bristle brush.
Step 3: Apply adhesive to the beveled edge of sponge brush and dab adhesive onto the desired body stamp. DO NOT brush adhesive onto the stamp, a bubble texture on the stamp is alright.
Step 4: Roll the stamp with adhesive onto prepared skin area. It is very important to use a simple rolling motion from one side to the other, allowing adhesive to dry clear.
Step 5: Once adhesive is clear, apply glitter using puff bottle. Gently move litter around the entire stamped area with the lollipop pad and press the glitter into the stamp pattern. Use soft makeup brush to remove excess glitter. You can save the excess glitter for a future rainbow body art.
Recommendations:
We suggest that body art only be placed on arms and lower legs, not on faces.
Do NOT let adhesive to freeze, it will turn solid.
To remove body art, gently rub with alcohol or baby oil.
To open bottles, press a pin into the top of the bottles. A smaller hole allows you to control the products best during the application process.
View full product details


Gnome 1
$4.95
- Size: 2.25" x .75"
- Features: Wooden stamp is designed for the sole purpose of applying adhesive to create glitter tattoos as directed by instructions provided with purchase. (NOTE: Actual stamp may have some slight variations from picture shown here.)
-
Step 1: Clean the skin area with JEMS Skin Cleaner with a cotton ball.
Step 2: Dry the skin with JEMS Prep Compound by lightly dusting application area and brushing it with a soft bristle brush.
Step 3: Apply adhesive to the beveled edge of sponge brush and dab adhesive onto the desired body stamp. DO NOT brush adhesive onto the stamp, a bubble texture on the stamp is alright.
Step 4: Roll the stamp with adhesive onto prepared skin area. It is very important to use a simple rolling motion from one side to the other, allowing adhesive to dry clear.
Step 5: Once adhesive is clear, apply glitter using puff bottle. Gently move litter around the entire stamped area with the lollipop pad and press the glitter into the stamp pattern. Use soft makeup brush to remove excess glitter. You can save the excess glitter for a future rainbow body art.
Recommendations:
We suggest that body art only be placed on arms and lower legs, not on faces.
Do NOT let adhesive to freeze, it will turn solid.
To remove body art, gently rub with alcohol or baby oil.
To open bottles, press a pin into the top of the bottles. A smaller hole allows you to control the products best during the application process.
View full product details


Gnome 2
$4.95
- Size: 2.25" x 1.25"
- Features: Wooden stamp is designed for the sole purpose of applying adhesive to create glitter tattoos as directed by instructions provided with purchase. (NOTE: Actual stamp may have some slight variations from picture shown here.)
-
Step 1: Clean the skin area with JEMS Skin Cleaner with a cotton ball.
Step 2: Dry the skin with JEMS Prep Compound by lightly dusting application area and brushing it with a soft bristle brush.
Step 3: Apply adhesive to the beveled edge of sponge brush and dab adhesive onto the desired body stamp. DO NOT brush adhesive onto the stamp, a bubble texture on the stamp is alright.
Step 4: Roll the stamp with adhesive onto prepared skin area. It is very important to use a simple rolling motion from one side to the other, allowing adhesive to dry clear.
Step 5: Once adhesive is clear, apply glitter using puff bottle. Gently move litter around the entire stamped area with the lollipop pad and press the glitter into the stamp pattern. Use soft makeup brush to remove excess glitter. You can save the excess glitter for a future rainbow body art.
Recommendations:
We suggest that body art only be placed on arms and lower legs, not on faces.
Do NOT let adhesive to freeze, it will turn solid.
To remove body art, gently rub with alcohol or baby oil.
To open bottles, press a pin into the top of the bottles. A smaller hole allows you to control the products best during the application process.
View full product details


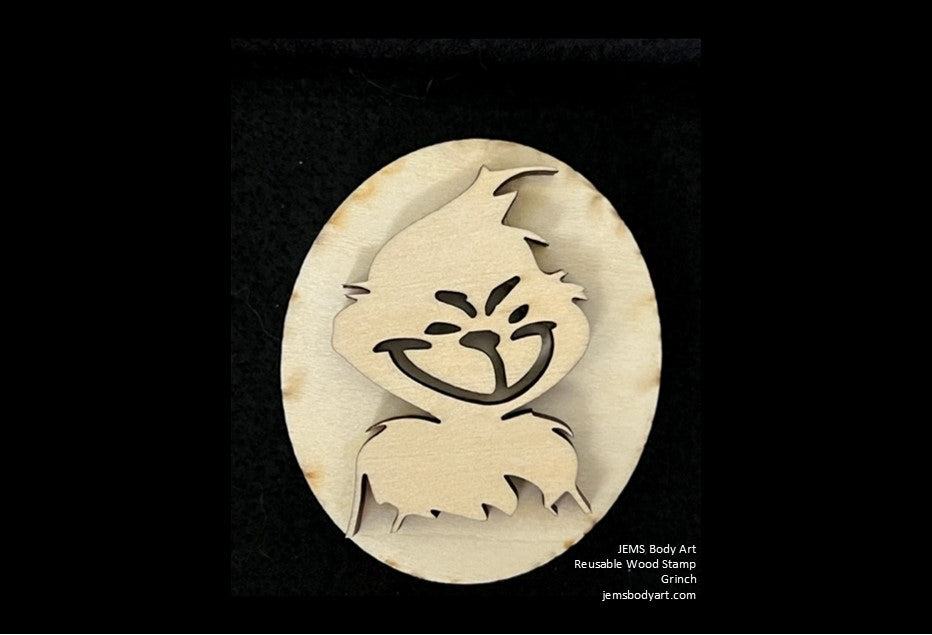
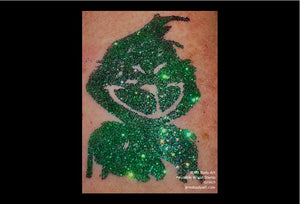

Grinch
$4.95
- BaHumbug!
- Size: 2.0"Tall x 1.5"Wide
- Features: Wooden stamp is designed for the sole purpose of applying adhesive to create glitter tattoos as directed by instructions provided with G. (NOTE: Actual stamp may have some slight variations from picture shown here.)
-
Step 1: Clean the skin area with JEMS Skin Cleaner with a cotton ball.
Step 2: Dry the skin with JEMS Prep Compound by lightly dusting application area and brushing it with a soft bristle brush.
Step 3: Apply adhesive to the beveled edge of sponge brush and dab adhesive onto the desired body stamp. DO NOT brush adhesive onto the stamp, a bubble texture on the stamp is alright.
Step 4: Roll the stamp with adhesive onto prepared skin area. It is very important to use a simple rolling motion from one side to the other, allowing adhesive to dry clear.
Step 5: Once adhesive is clear, apply glitter using puff bottle. Gently move litter around the entire stamped area with the lollipop pad and press the glitter into the stamp pattern. Use soft makeup brush to remove excess glitter. You can save the excess glitter for a future rainbow body art.
Recommendations:
We suggest that body art only be placed on arms and lower legs, not on faces.
Do NOT let adhesive to freeze, it will turn solid.
To remove body art, gently rub with alcohol or baby oil.
To open bottles, press a pin into the top of the bottles. A smaller hole allows you to control the products best during the application process.
View full product details
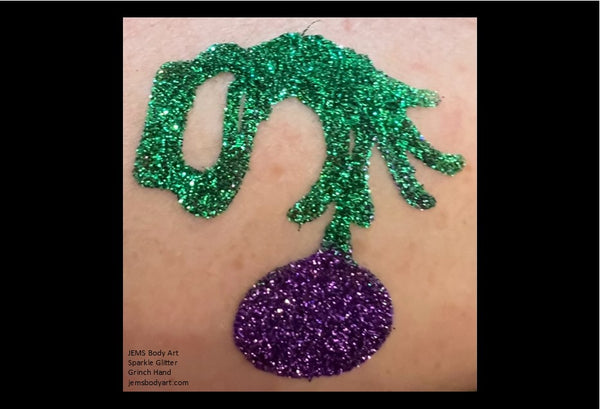

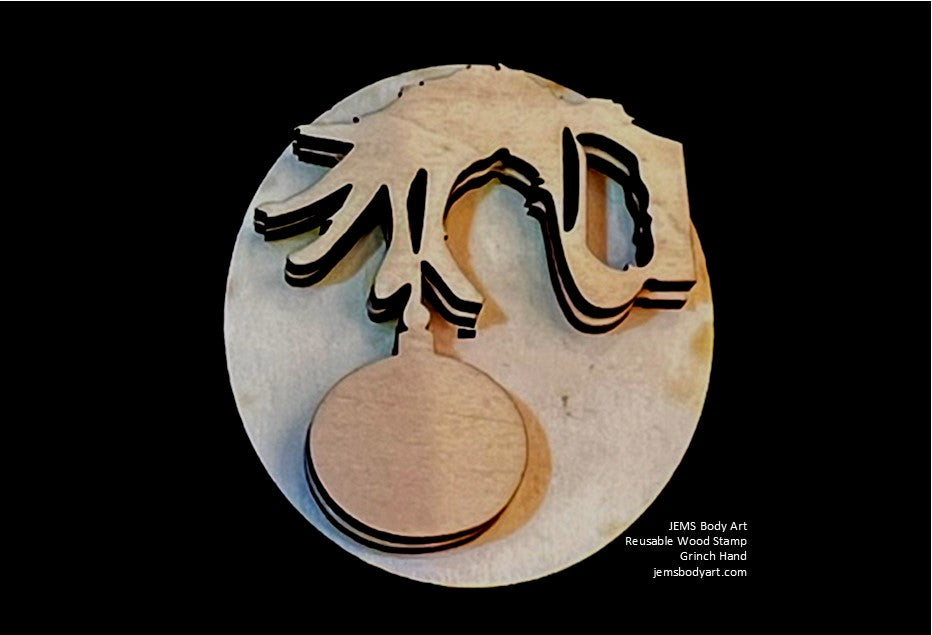


Grinch Hand
$4.95
- BaHumbug!
- Size: 2.0"Tall x 1.75"Wide
- Features: Wooden stamp is designed for the sole purpose of applying adhesive to create glitter tattoos as directed by instructions provided with G. (NOTE: Actual stamp may have some slight variations from picture shown here.)
-
Step 1: Clean the skin area with JEMS Skin Cleaner with a cotton ball.
Step 2: Dry the skin with JEMS Prep Compound by lightly dusting application area and brushing it with a soft bristle brush.
Step 3: Apply adhesive to the beveled edge of sponge brush and dab adhesive onto the desired body stamp. DO NOT brush adhesive onto the stamp, a bubble texture on the stamp is alright.
Step 4: Roll the stamp with adhesive onto prepared skin area. It is very important to use a simple rolling motion from one side to the other, allowing adhesive to dry clear.
Step 5: Once adhesive is clear, apply glitter using puff bottle. Gently move litter around the entire stamped area with the lollipop pad and press the glitter into the stamp pattern. Use soft makeup brush to remove excess glitter. You can save the excess glitter for a future rainbow body art.
Recommendations:
We suggest that body art only be placed on arms and lower legs, not on faces.
Do NOT let adhesive to freeze, it will turn solid.
To remove body art, gently rub with alcohol or baby oil.
To open bottles, press a pin into the top of the bottles. A smaller hole allows you to control the products best during the application process.
View full product details

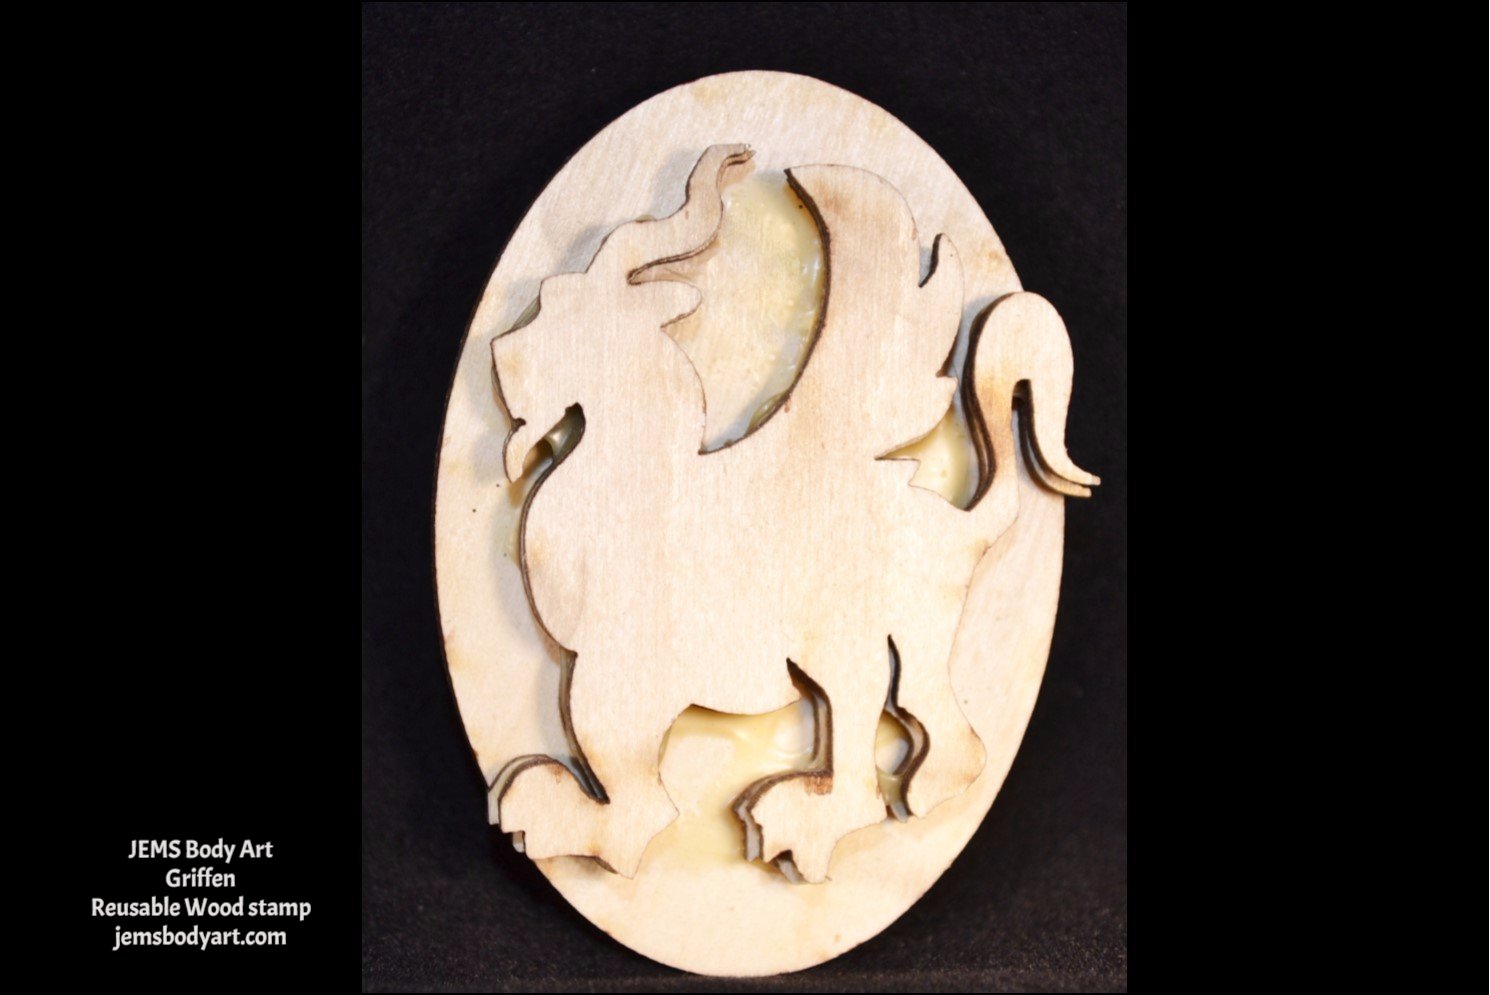
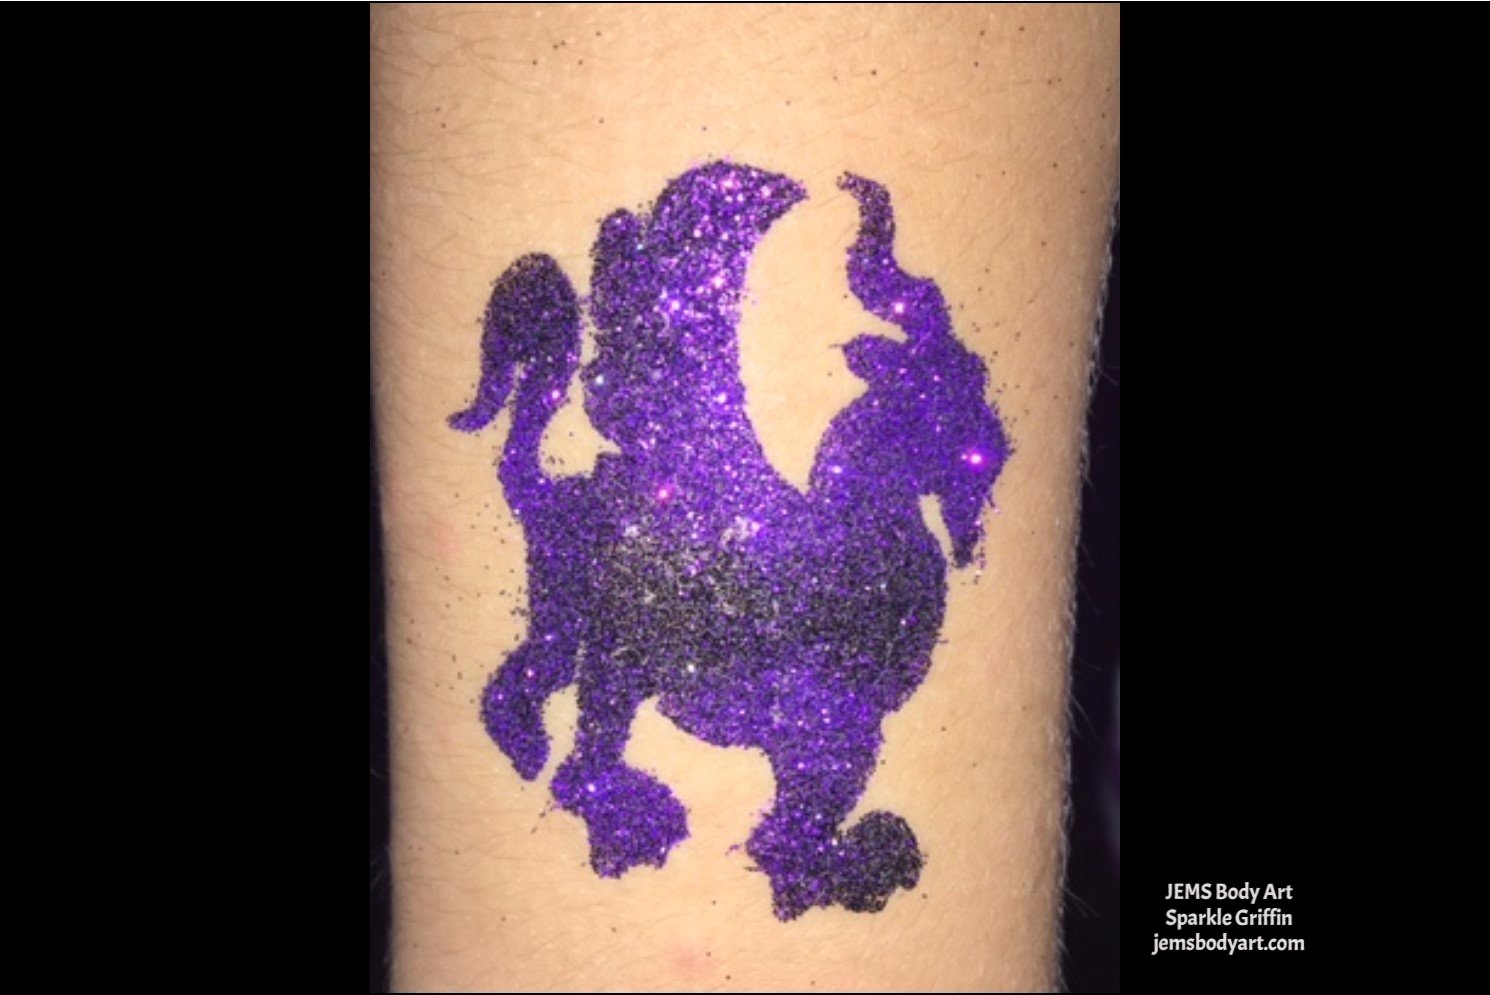

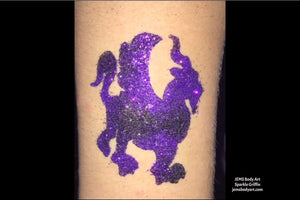
Gryphon
$4.95
-
Size: 2.25" x 1.75"
Features: Wooden stamp is designed for the sole purpose of applying adhesive to create glitter tattoos as directed by instructions provided with purchase. (NOTE: Actual stamp may have some slight variations from picture shown here.) -
Step 1: Clean the skin area with JEMS Skin Cleaner with a cotton ball.
Step 2: Dry the skin with JEMS Prep Compound by lightly dusting application area and brushing it with a soft bristle brush.
Step 3: Apply adhesive to the beveled edge of sponge brush and dab adhesive onto the desired body stamp. DO NOT brush adhesive onto the stamp, a bubble texture on the stamp is alright.
Step 4: Roll the stamp with adhesive onto prepared skin area. It is very important to use a simple rolling motion from one side to the other, allowing adhesive to dry clear.
Step 5: Once adhesive is clear, apply glitter using puff bottle. Gently move litter around the entire stamped area with the lollipop pad and press the glitter into the stamp pattern. Use soft makeup brush to remove excess glitter. You can save the excess glitter for a future rainbow body art.
Recommendations:
We suggest that body art only be placed on arms and lower legs, not on faces.
Do NOT let adhesive to freeze, it will turn solid.
To remove body art, gently rub with alcohol or baby oil.
To open bottles, press a pin into the top of the bottles. A smaller hole allows you to control the products best during the application process.
View full product details

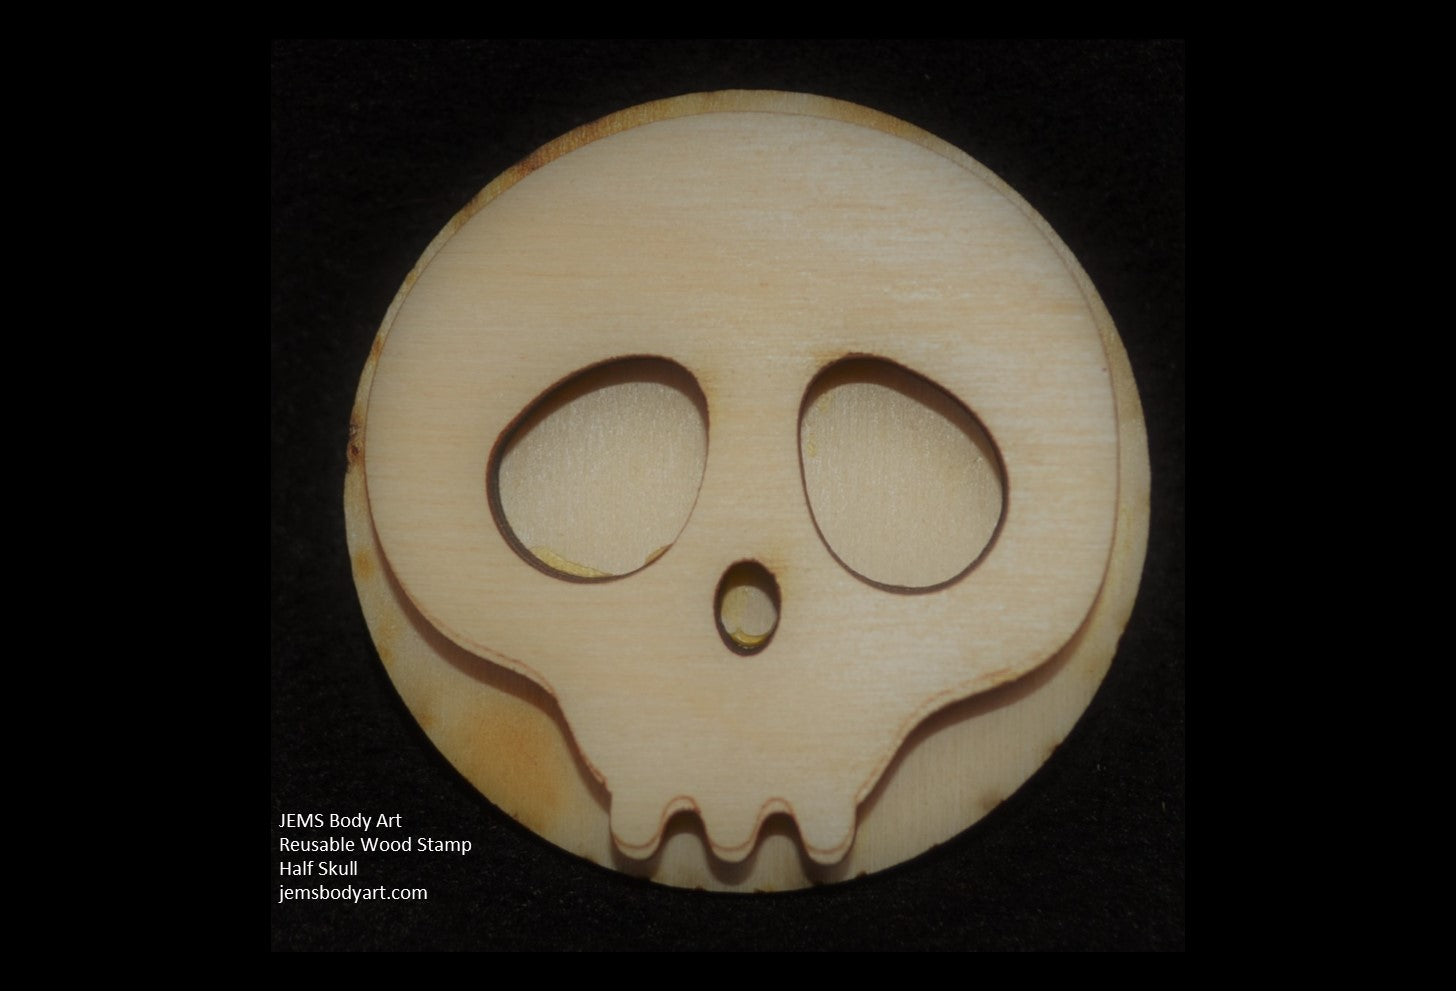

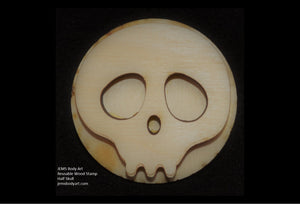
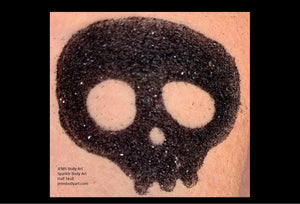
Half Skull
$4.95
- Size: 2" Round
- Features: Wooden stamp is designed for the sole purpose of applying adhesive to create glitter tattoos as directed by instructions provided with purchase. (NOTE: Actual stamp may have some slight variations from picture shown here.)
-
Step 1: Clean the skin area with JEMS Skin Cleaner with a cotton ball.
Step 2: Dry the skin with JEMS Prep Compound by lightly dusting application area and brushing it with a soft bristle brush.
Step 3: Apply adhesive to the beveled edge of sponge brush and dab adhesive onto the desired body stamp. DO NOT brush adhesive onto the stamp, a bubble texture on the stamp is alright.
Step 4: Roll the stamp with adhesive onto prepared skin area. It is very important to use a simple rolling motion from one side to the other, allowing adhesive to dry clear.
Step 5: Once adhesive is clear, apply glitter using puff bottle. Gently move litter around the entire stamped area with the lollipop pad and press the glitter into the stamp pattern. Use soft makeup brush to remove excess glitter. You can save the excess glitter for a future rainbow body art.
Recommendations:
We suggest that body art only be placed on arms and lower legs, not on faces.
Do NOT let adhesive to freeze, it will turn solid.
To remove body art, gently rub with alcohol or baby oil.
To open bottles, press a pin into the top of the bottles. A smaller hole allows you to control the products best during the application process.
View full product details


Halloween Cat
$4.95
-
Size: 2.5" tall
Features: Wooden stamp is designed for the sole purpose of applying adhesive to create glitter tattoos as directed by instructions provided with purchase. (NOTE: Actual stamp may have some slight variations from picture shown here.) -
Step 1: Clean the skin area with JEMS Skin Cleaner with a cotton ball.
Step 2: Dry the skin with JEMS Prep Compound by lightly dusting application area and brushing it with a soft bristle brush.
Step 3: Apply adhesive to the beveled edge of sponge brush and dab adhesive onto the desired body stamp. DO NOT brush adhesive onto the stamp, a bubble texture on the stamp is alright.
Step 4: Roll the stamp with adhesive onto prepared skin area. It is very important to use a simple rolling motion from one side to the other, allowing adhesive to dry clear.
Step 5: Once adhesive is clear, apply glitter using puff bottle. Gently move litter around the entire stamped area with the lollipop pad and press the glitter into the stamp pattern. Use soft makeup brush to remove excess glitter. You can save the excess glitter for a future rainbow body art.
Recommendations:
We suggest that body art only be placed on arms and lower legs, not on faces.
Do NOT let adhesive to freeze, it will turn solid.
To remove body art, gently rub with alcohol or baby oil.
To open bottles, press a pin into the top of the bottles. A smaller hole allows you to control the products best during the application process.
View full product details

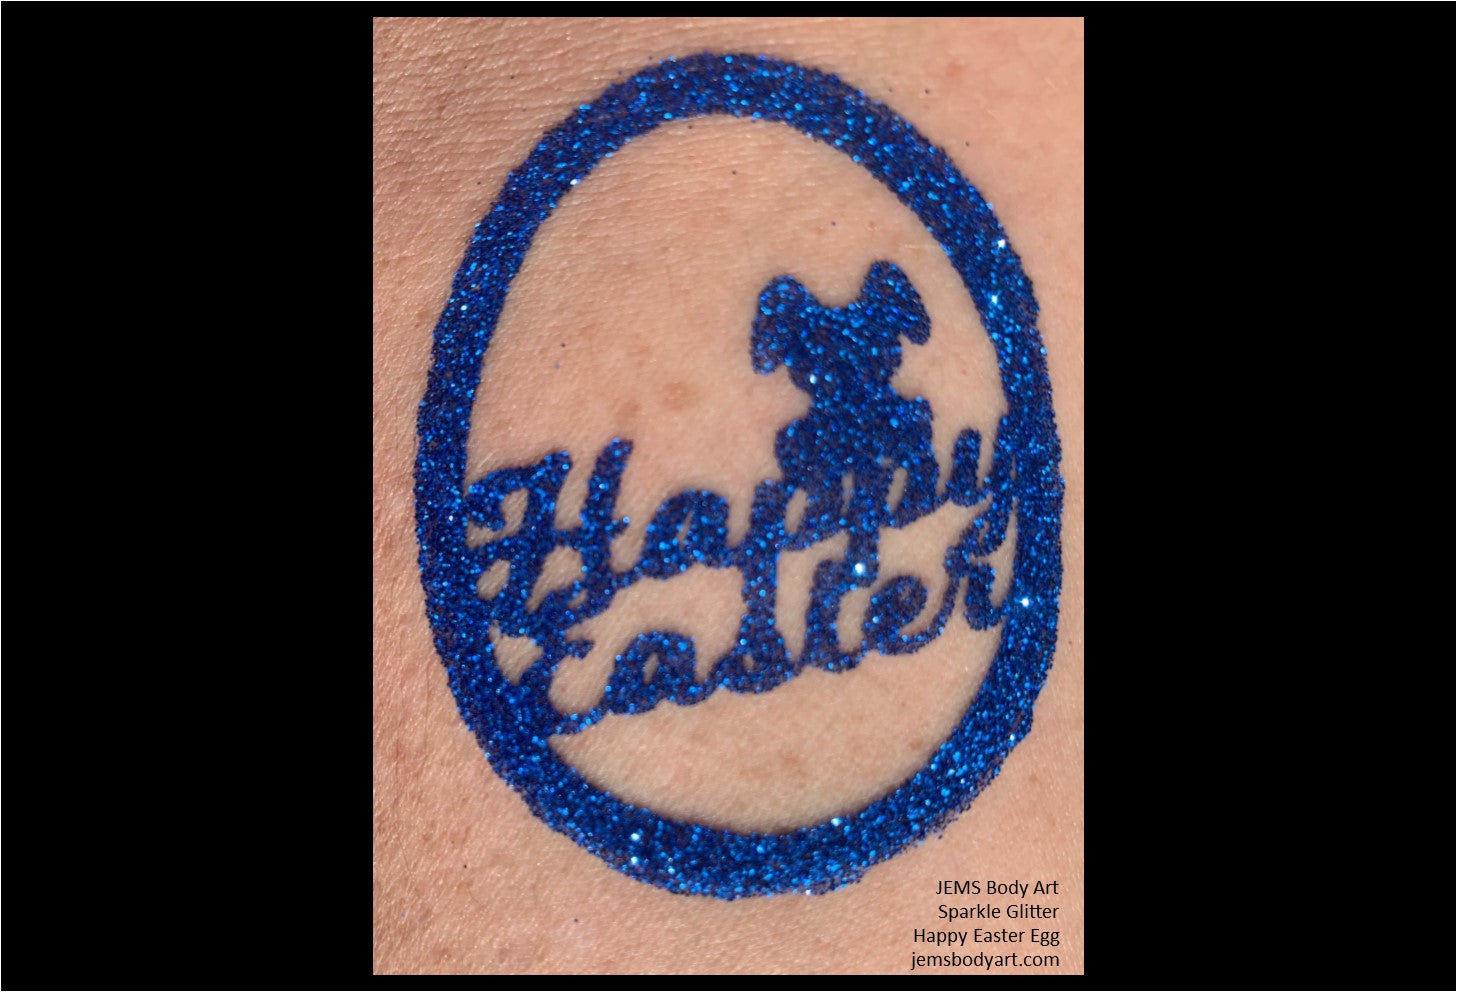
Happy Easter Egg
$4.95
- Size: 2.5" x 2"
- Features: Wooden stamp is designed for the sole purpose of applying adhesive to create glitter tattoos as directed by instructions provided with purchase. (NOTE: Actual stamp may have some slight variations from picture shown here.)
-
Step 1: Clean the skin area with JEMS Skin Cleaner with a cotton ball.
Step 2: Dry the skin with JEMS Prep Compound by lightly dusting application area and brushing it with a soft bristle brush.
Step 3: Apply adhesive to the beveled edge of sponge brush and dab adhesive onto the desired body stamp. DO NOT brush adhesive onto the stamp, a bubble texture on the stamp is alright.
Step 4: Roll the stamp with adhesive onto prepared skin area. It is very important to use a simple rolling motion from one side to the other, allowing adhesive to dry clear.
Step 5: Once adhesive is clear, apply glitter using puff bottle. Gently move litter around the entire stamped area with the lollipop pad and press the glitter into the stamp pattern. Use soft makeup brush to remove excess glitter. You can save the excess glitter for a future rainbow body art.
Recommendations:
We suggest that body art only be placed on arms and lower legs, not on faces.
Do NOT let adhesive to freeze, it will turn solid.
To remove body art, gently rub with alcohol or baby oil.
To open bottles, press a pin into the top of the bottles. A smaller hole allows you to control the products best during the application process.
View full product details


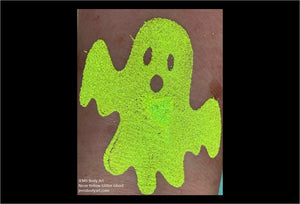
Happy Ghost
$4.95
- Size: 2" x 2"
- Features: Wooden stamp is designed for the sole purpose of applying adhesive to create glitter tattoos as directed by instructions provided with purchase. (NOTE: Actual stamp may have some slight variations from picture shown here.)
-
Step 1: Clean the skin area with JEMS Skin Cleaner with a cotton ball.
Step 2: Dry the skin with JEMS Prep Compound by lightly dusting application area and brushing it with a soft bristle brush.
Step 3: Apply adhesive to the beveled edge of sponge brush and dab adhesive onto the desired body stamp. DO NOT brush adhesive onto the stamp, a bubble texture on the stamp is alright.
Step 4: Roll the stamp with adhesive onto prepared skin area. It is very important to use a simple rolling motion from one side to the other, allowing adhesive to dry clear.
Step 5: Once adhesive is clear, apply glitter using puff bottle. Gently move litter around the entire stamped area with the lollipop pad and press the glitter into the stamp pattern. Use soft makeup brush to remove excess glitter. You can save the excess glitter for a future rainbow body art.
Recommendations:
We suggest that body art only be placed on arms and lower legs, not on faces.
Do NOT let adhesive to freeze, it will turn solid.
To remove body art, gently rub with alcohol or baby oil.
To open bottles, press a pin into the top of the bottles. A smaller hole allows you to control the products best during the application process.
View full product details